Section 02 717 ENGINE
Subsection 02 (MAGNETO SYSTEM)
ASSEMBLY
Generating Coil
Strip end of old wire then crimp and solder on new
coil.
Apply Loctite 243 (blue) (P/N 293 800 060) to
screws no. 13 and install the new coil no. 12 on
armature plate.
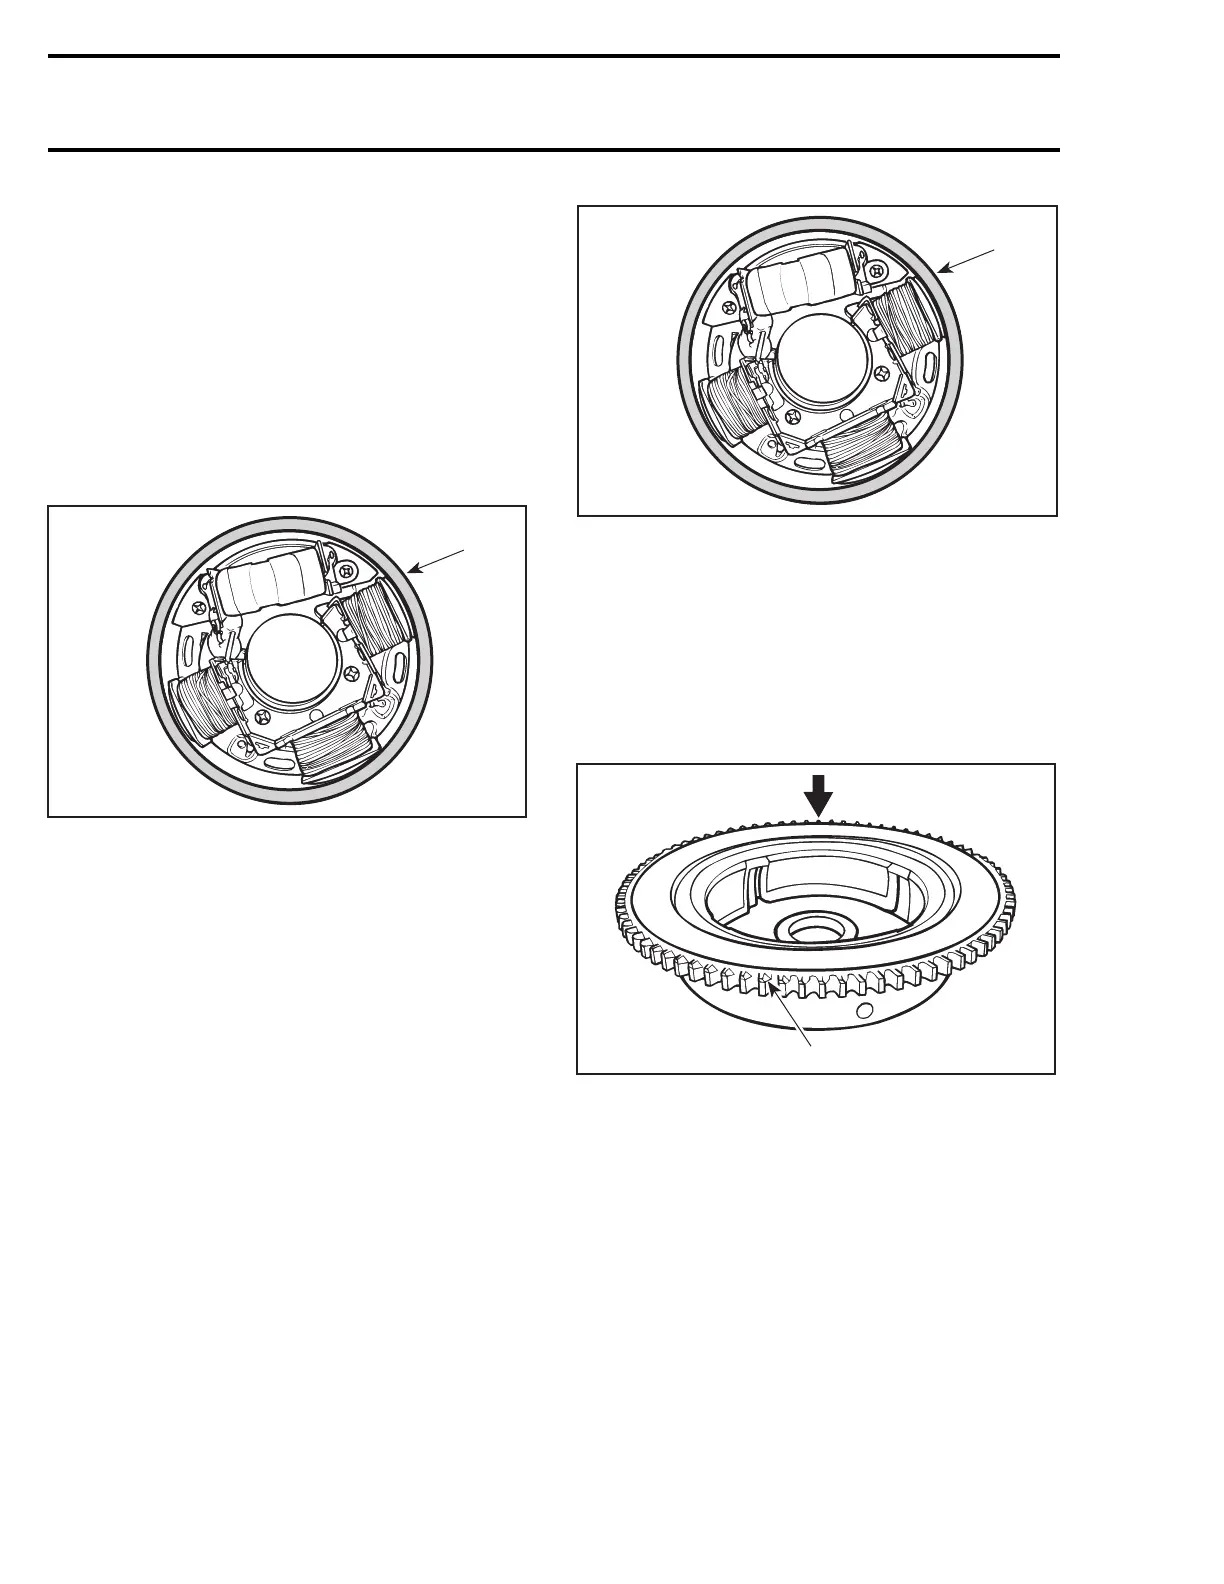
Use the magneto coil centering tool (P/N 420 876
922) and install so that it fits around armature plate
before tightening screws.
F00D0AA
1
1. Magneto coil centering tool
CAUTION: Before reinstalling the magneto, re-
move the loose epoxy from harness.
Battery Charging Coil
Position new coil no. 14, crimp and solder all
wires.
Prior to assembly, apply Loctite 243 (blue)
(P/N 293 800 060).
Use the magneto coil centering tool (P/N 420 876
922) and install it so that it fits around armature
plate before tightening screws no. 15.
F00D0AA
1
1. Magneto coil centering tool
Magneto Flywheel and Ring Gear
Apply Loctite 648 (green) (P/N 413 711 400) to
magneto flywheel mating surface. Lay ring gear
on a steel plate, then heat with a propane torch in
order to install it on magneto flywheel.
Pay particular attention to position ring gear teeth
chamfer side as per following illustration.
F01D3BA
1
1. Teeth chamfer
NOTE: Ensure that ring gear contacts magneto
flywheel flange.
Whenever replacing either ring gear or magneto
flywheel, anticorrosion spray (P/N 219 700 304)
must be applied to prevent possible corrosion.
CAUTION: Always assemble magneto flywheel
and ring gear prior to apply anticorrosion
spray. If not done correctly, ring gear won't
contact magneto flywheel flange.
To apply anticorrosion spray proceed as follows:
22 smr2005-076
 Loading...