EasyManuals Logo
Home>Sega>Game Console>GHOST SQUAD - EVOLUTION

Sega GHOST SQUAD - EVOLUTION User Manual

Sega GHOST SQUAD - EVOLUTION
133 pages
To Next Page IconTo Next Page
To Previous Page IconTo Previous Page
Page #83 background imageLoading...
Page #83 background image
78
CONTROL UNIT
11
FIG. 11-3a
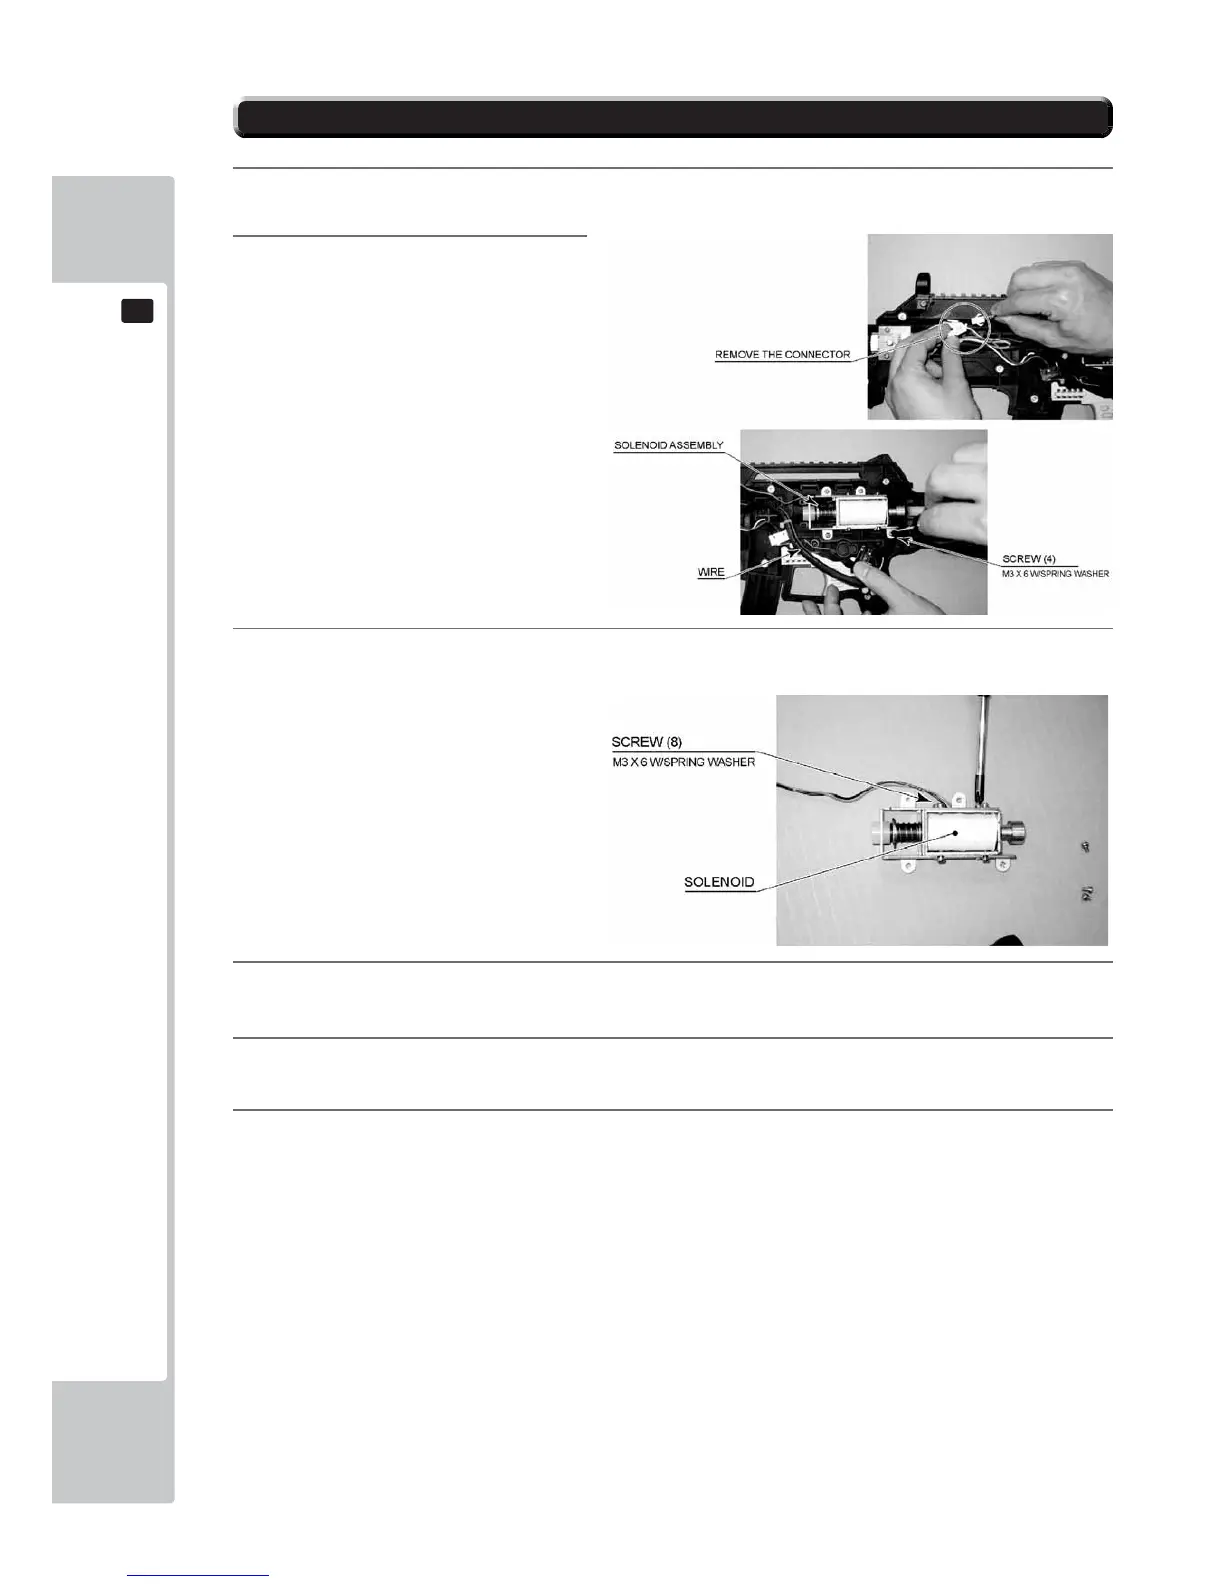
11-3 REPLACING THE SOLENOID
1
Follow the instructions 1 to 3 of “Replacing the Microswitch” to remove the Cover L.
2
Remove the 2 pin connector, wire
and 4 screws to remove the solenoid
assembly..
3
Remove the 8 screws and replace the solenoid.
4
Secure the solenoid assembly with 4 screws and replace the connector. When doing this, make sure not to
damage the wiring.
5
Refer to the previous item, then attach the Cover R, while being careful of each of the parts.
6
After replacement, perform an OUTPUT TEST, refering to the instructions in “GAME TEST MODE”.
FIG. 11-3b

Questions and Answers:

Question and Answer IconNeed help?

Do you have a question about the Sega GHOST SQUAD - EVOLUTION and is the answer not in the manual?

Sega GHOST SQUAD - EVOLUTION Specifications

General IconGeneral
BrandSega
ModelGHOST SQUAD - EVOLUTION
CategoryGame Console
LanguageEnglish

Related product manuals