Creating the virtual router instance
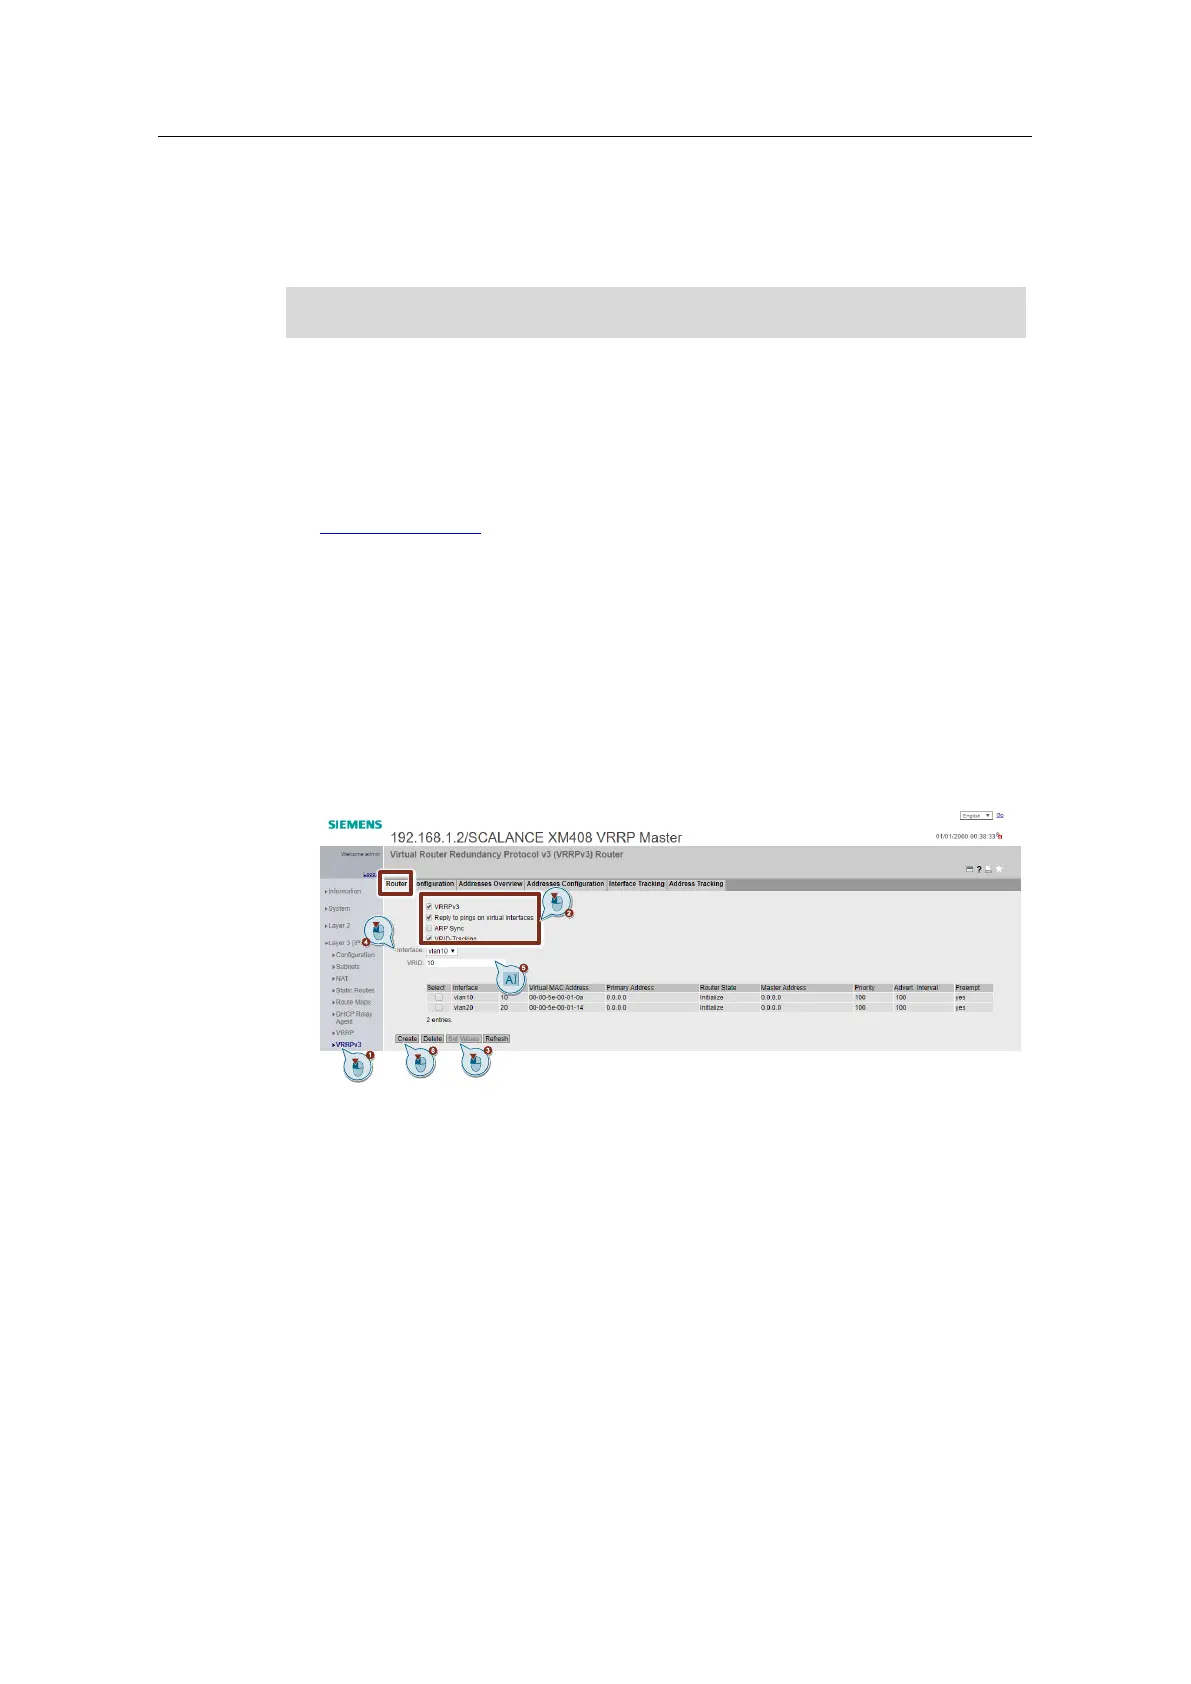
1. Navigate to the "Router" tab in the menu "Layer3 (IPv4) > VRRPv3".
2. Enable routing via "VRRPv3".
Enable "Reply to pings on virtual interfaces".
Enable VRID tracking. For more information on VRID tracking refer to the
Useful information chapter.
3. Click the "Set Values" button.
4. Now, to create a VRRP router for the VLAN 10 subnet, select the
corresponding interface.
5. Enter a VRID 10.
The VRID is any number between 1 and 255. When choosing the number, it is
important to make sure that both VRRP partners have the same VRID for each
VLAN and that no other VRRP devices in the same VLAN have the same
VRID. For the sake of simplicity in this example, we use the VLAN ID as the
VRID in each VLAN.
6. Click the "Create" button to create a virtual router instance.
7. Follow the same procedure again to create a virtual router instance for VLAN
20 (VRID = 20).
Configuring the router instance
1. Now switch to the "Configuration" tab to configure the virtual router.
2. Under "Interface / VRID", select vlan10/ 10 and assign it the IP address
(192.168.10.2) set for the subnet.
3. For the VLANs in which the router needs to function as master, enter "Priority"
254.
 Loading...