09.02 Maintenance
Siemens AG 6SE7087-6AK85-1AA0
8-13
Rectifier/Regenerating Unit Operating instructions
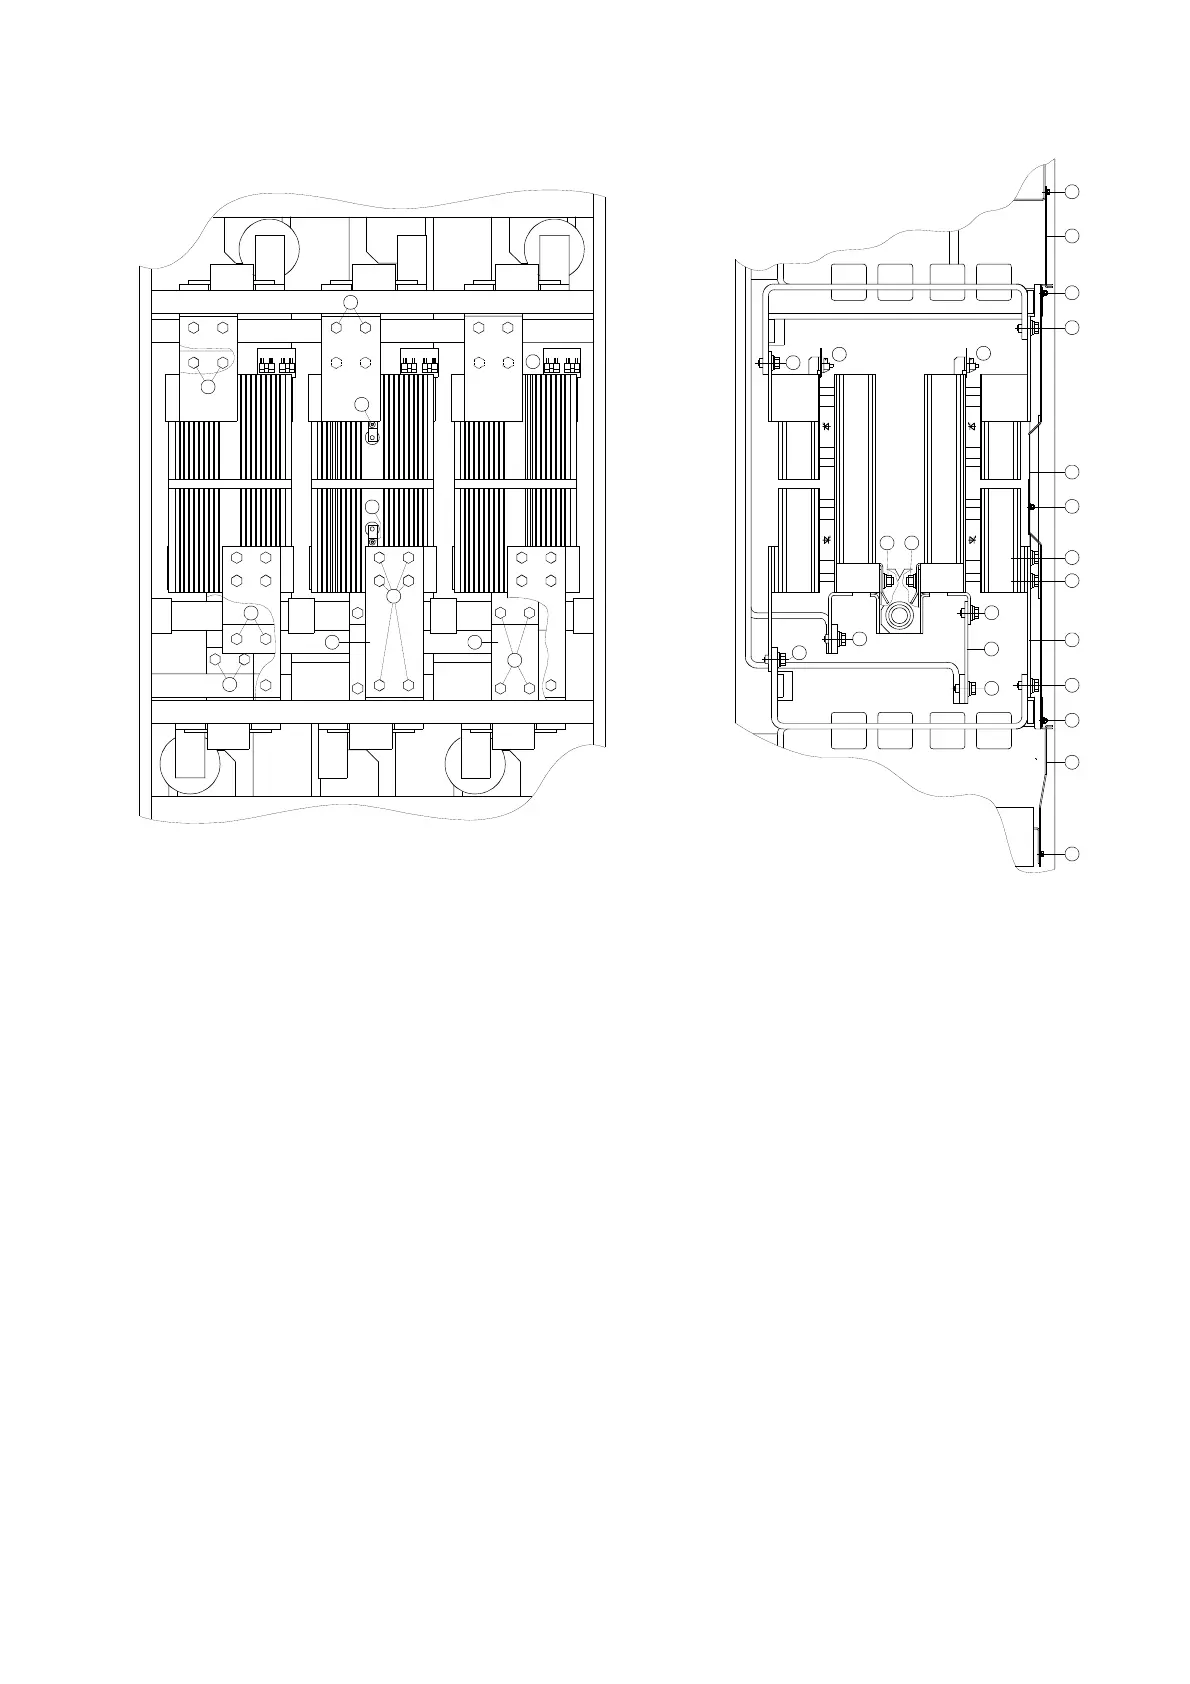
8.2.5.2 Disassembling the thyristor blocks for size K
15
1
2
3
1
3
3
12
8
10
6
1116
13
7
7
5
2
5
5
14
GKGK GK
8
9
GK GK GK
15
1
4
9
14
4
5
6
7
13
10
Front thyristor block, level A (weight of a thyristor block, approx. 25 kg)
• Remove the 3 covers a by removing 7 M4 hexagon-head bolts s and 3 M4 nuts d.
• Remove the copper plate f by removing 6 M10 hexagon-head bolts g.
• Remove the copper plate h by removing 4 M10 hexagon-head bolts j.
• Unplug the gate and cathode cables k (G, K).
• Only on disassembling the central thyristor block, remove the two thermistors that are only located on the
central thyristor block by removing the screws
l (Torx drive T25).
• Loosen the two M10 hexagon-head screws ; and swing the thyristor block out forwards.
• Loosen M10 nut A and pull the thyristor block out upwards at an angle.
Rear thyristor block, level B (weight of a thyristor block, approx. 25 kg)
• Unplug gate and cathode cables (G, K) S.
• Remove 2 M10 hexagon-head screws D.
• Remove 2 M10 hexagon-head screws F.
• Remove 2 M10 hexagon-head screws G.
• Loosen M10 nut H , swing the thyristor block out forwards and pull the thyristor block out upwards at an
angle.
The thyristor blocks are installed in the reverse order.
AoteWell Automation Sales Team
Buy Siemens PLC HMI Drives at AoteWell.com
 Loading...