15 Seat Deck & Fuel Tank Service
Seat Switch Replacement
15 - 10
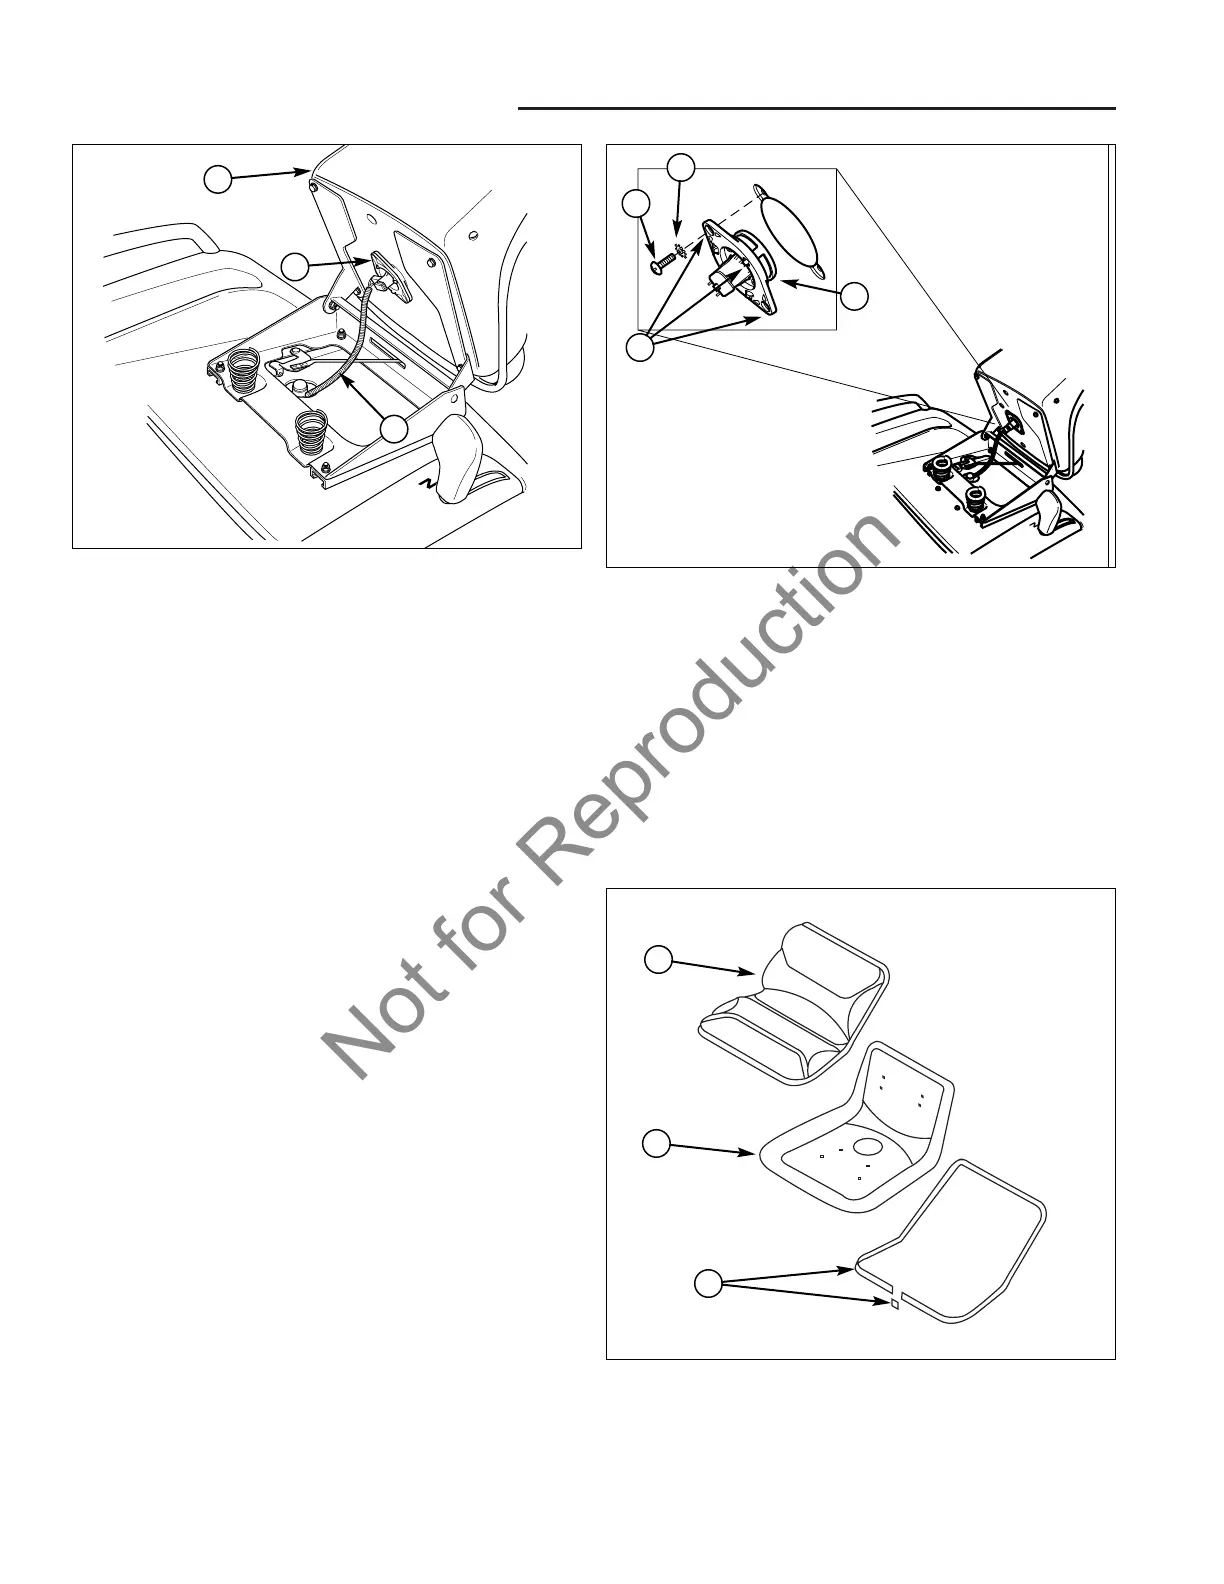
Figure 13. Seat Switch Safety System
A. Seat Switch C. Seat
B. Wire Harness
C
B
Figure 14. Seat Switch Removal and Replacement
A. Capscrew C. Tabs
B. Washer D. Seat Switch
Seat Switch Replacement
See Figure 13, Item A.
1. Disconnect and secure the negative battery cable.
2. Tip the seat deck forward to access the bottom of the
seat assembly.
3. Disconnect the wire harness (B, Figure 13) from the
seat switch (A).
4. Remove the two capscrews (A, Figure 14) and wash-
ers (B) from the seat switch assembly (D).
5. Remove the switch assembly from the seat pan.
6. Install a new switch assembly or just the switch itself
in the seat pan and assemble in reverse order of dis-
assembly.
7. Perform safety system check. (see Section 3, MAIN-
TENANCE).
NOTE: A normally open or normally closed switch may
be used depending on what engine is used. See Section
7 or the appropriate parts book for specifications.
A
D
B
A
C
Seat Cover Replacement
The seat cover and foam assembly are held on the seat
pan by plastic edging and a metal clip. Once removed,
the cover, foam, plastic edging, and clip cannot be rein-
stalled. As a result, this seat is only serviced as a com-
plete assembly.
Figure 15. Seat Cover
A. Seat Cover and Foam Assembly
B. Seat Pan
C. Plastic Edging & Clip
A
B
C

 Loading...