15 Seat Deck & Fuel Tank Service
Fuel Sensor Replacement
15 - 12
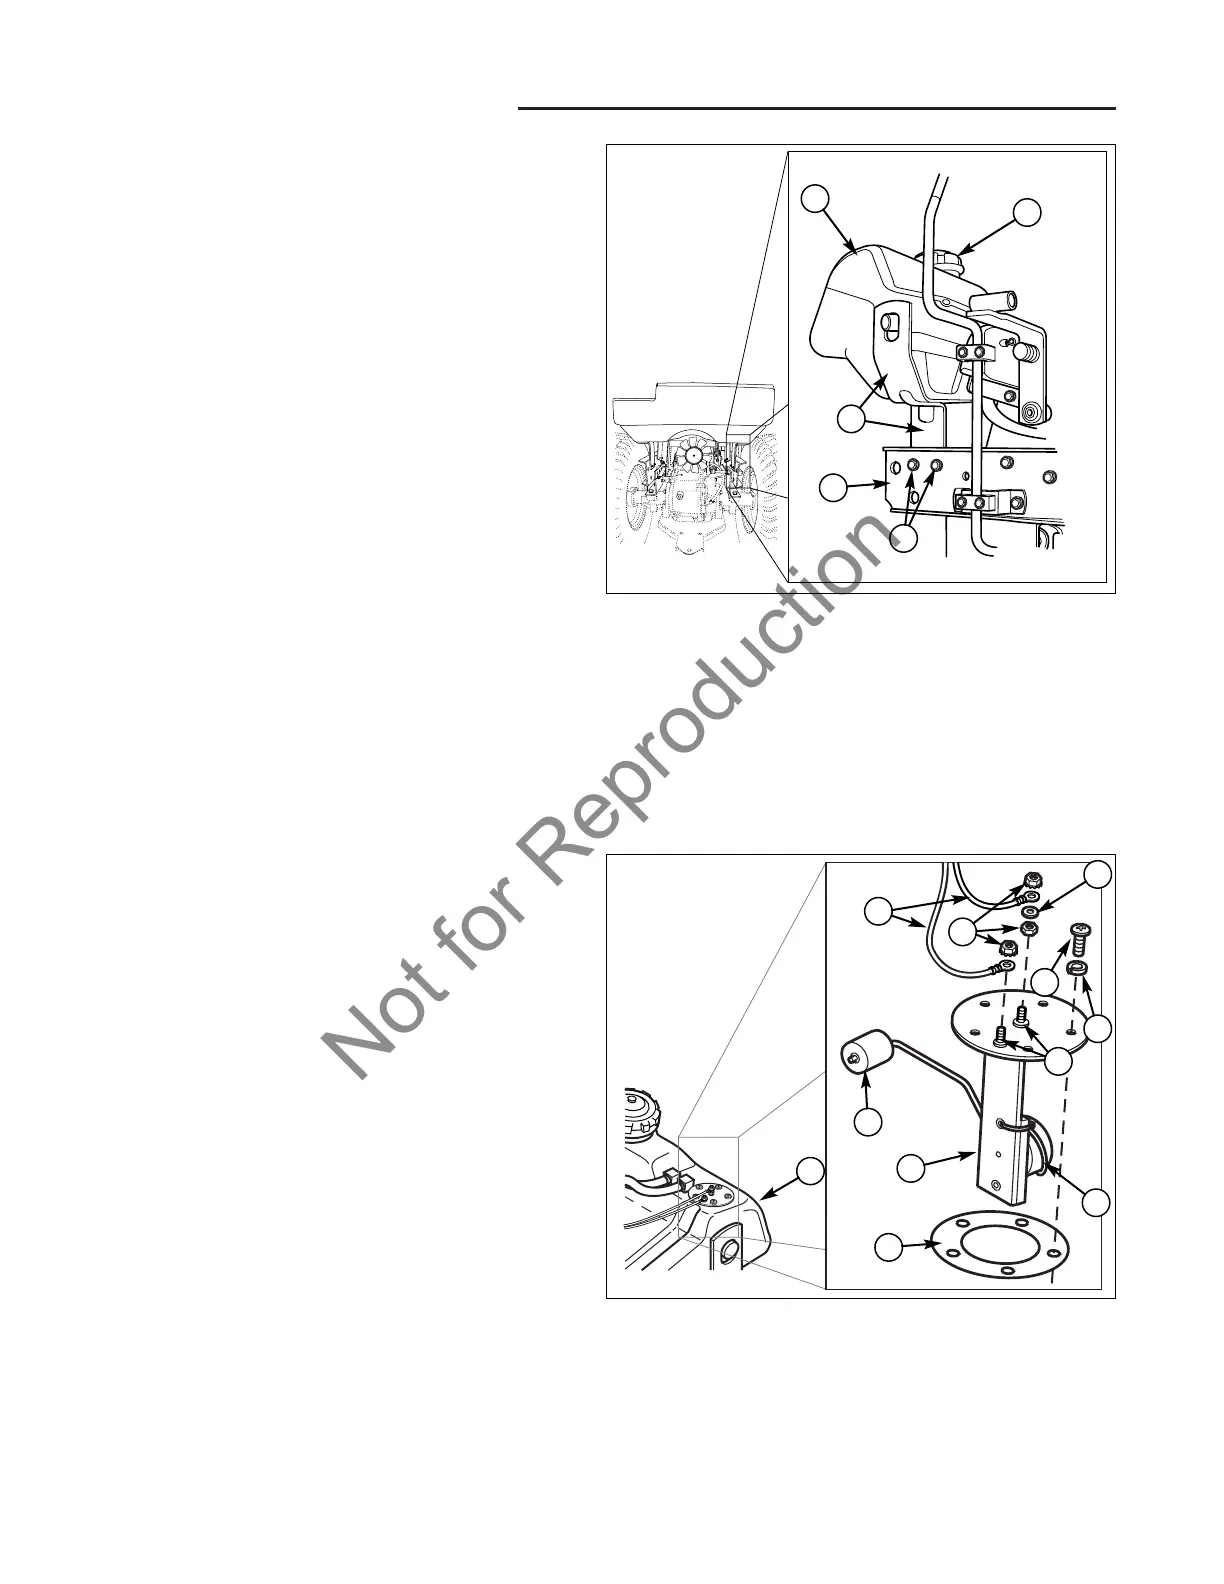
Figure 20. Fuel Level Sensor Assembly
A. Sensor Assembly G. Nuts
B. Float H. Washer
C. Sensor I. Terminals
D. Screw J. Fuel Tank
E. Lockwasher K. Gasket
F. Wires
Fuel Level Sensor replacement
1. Turn the ignition key switch to the OFF position,
remove the key, set the parking brake, and turn the
PTO off.
2. Disconnect the negative (-) battery cable
(see Section 7, ELECTRICAL SYSTEM SERVICE).
3. Remove the seat deck (refer to Seat Deck Removal
earlier in this section).
4. Remove the nuts (G, Figure 20) and washer (H) hold-
ing the wires (F) to the terminals (I).
5. Remove all screws (D) and lockwashers (E) holding
the sensor assembly (A) on the tank (J) and carefully
pull sensor out.
6. Perform fuel tank level sensor test (see Section 7,
ELECTRICAL SYSTEM SERVICE).
7. If the sensor fails test, is damaged, or is suspected to
be faulty, replace the level sensor.
8. Reinstall fuel tank level sensor and seat deck in
reverse order of this instruction.
B
C
A
K
J
H
E
D
G
F
I
Figure 19. Fuel Tank Support Brackets
A. Fuel Tank D. Frame
B. Cap E. Capscrews
C. Support Brackets
A
D
B
C
E
NOTE: It is important to have emptied the fuel tank
before proceeding to the next step. The weight of the
fuel in the fuel tank could make the tank fall and cause a
fuel spill.
11. To remove the fuel tank from the support brackets,
loosen the four capscrews (E, Figure 19) from the
support brackets (C) on both sides of the tractor.
12. Lift the fuel tank (A) up from the brackets (C) and set
the fuel tank in a clean, well ventilated, and
spark/flame free location.
NOTE: To ship or store the fuel tank, make sure it is
empty and the inside of the tank is dry.
13. Replace fuel tank in reverse order of removal.
NOTE: Do not fill tank until it is completely installed.

 Loading...