25
Inserting and Changing Needles
START SEWING
⚠ Turn the machine off before changing the needle.
Change the needle regularly, especially if it is showing signs of wear resulting in sewing problems.
Needles can show signs of wear when you see snags in the fabric or hear a slight popping sound as
you are sewing.
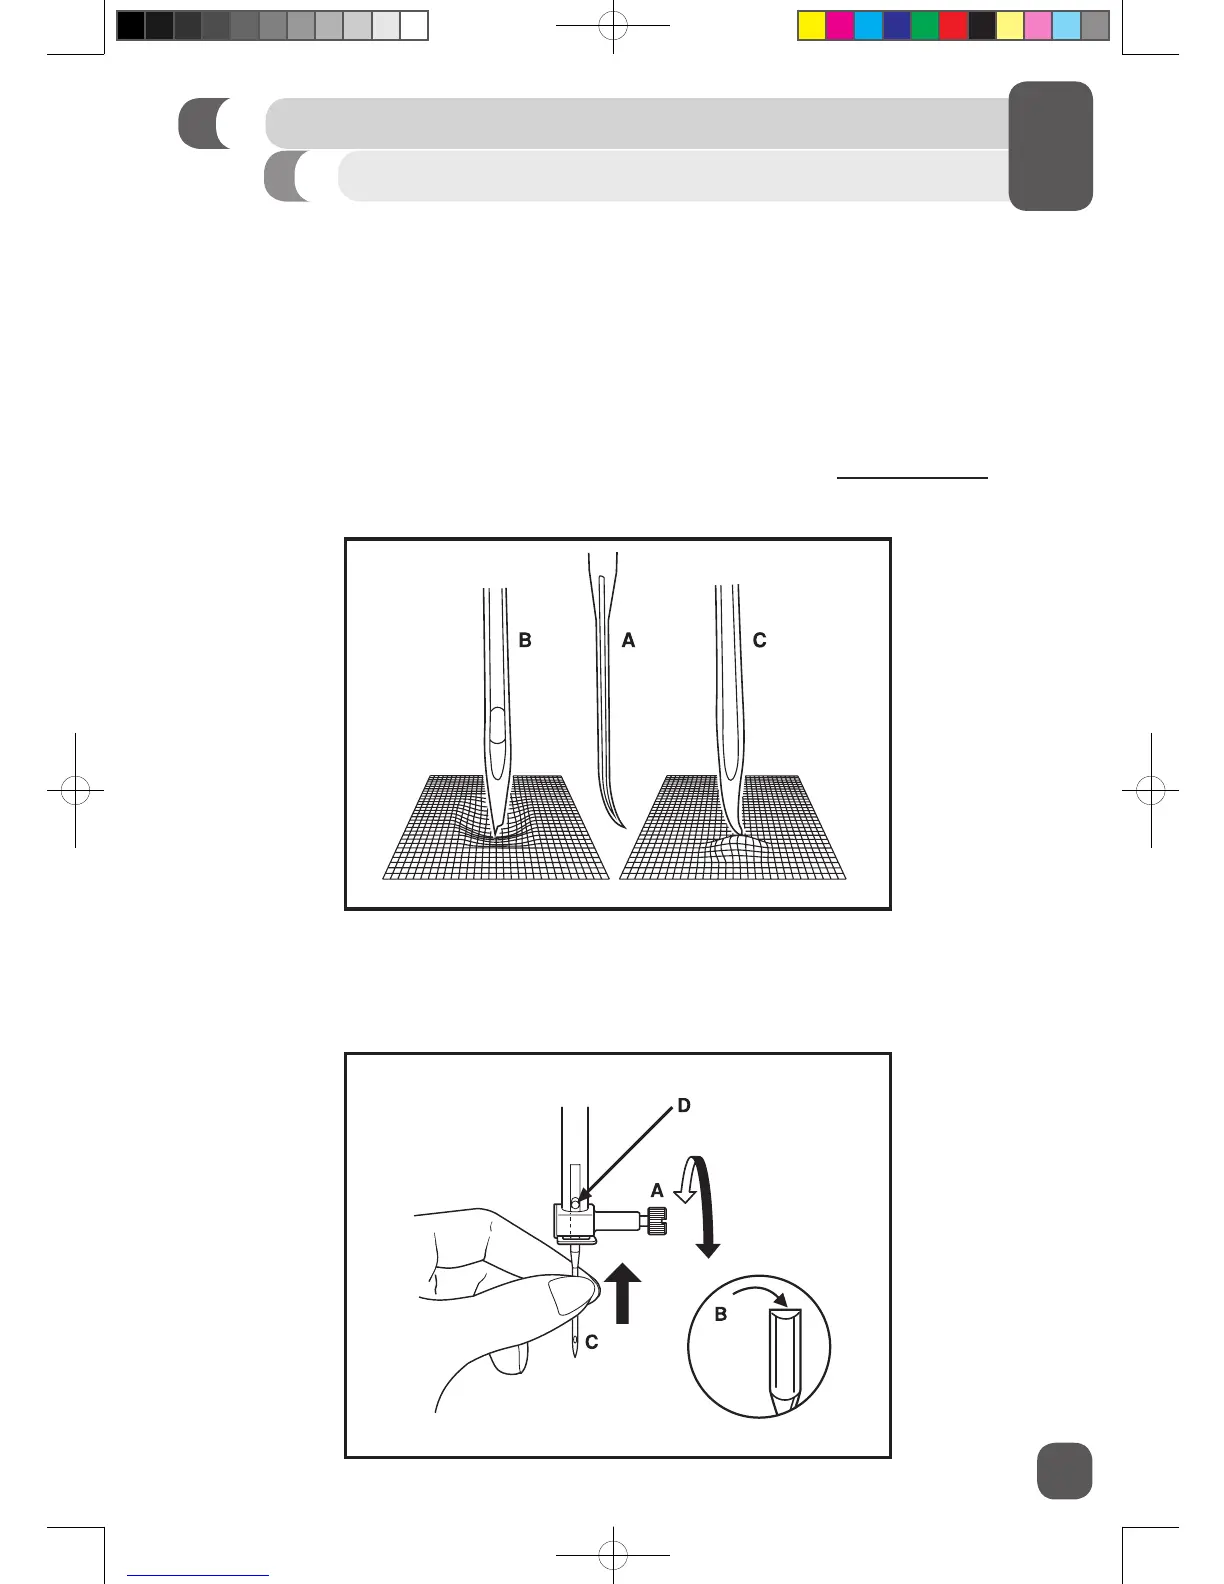
If the needle becomes bent (A), the point becomes damaged (B) or the needle becomes dull (C), you
should replace it with a new needle and discard the old one.
Generally, the needle should be replaced after every 4 projects or approximately every 16 hours of
sewing time.
It is also important to use the right needle for the fabric you are sewing. (Go to www.singerco.com to
view the Stitch Reference Guide)
For best results, use SINGER
®
branded needles in your SINGER
®
sewing machine.
Loosen the needle clamp screw (A) by turning the screw toward you. Remove and discard the old
needle.
Insert the new needle, making sure that the at side of the top part of the needle is facing the back of
the machine (B).
Insert the new needle as far up as it will go (C and D).
Tighten the needle clamp screw (A) securely by turning it toward the back.
 Loading...