- 19 -
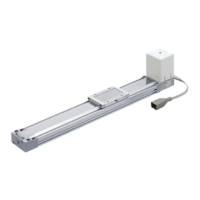
(2) Double-click the JXCP1 icon on the PROFINET network.
When the Properties screen appears, set an arbitrary name in the [device Name] field. To set the IP
address, click [Ethernet] button and enter an arbitrary address.
Note: when the Properties screen below appears for the first time, it may automatically
display a device name and an IP address. If the default description is acceptable, it is
not necessary to change it.
Click [OK].
Fig.4.5 Device name and IP address input screen
(3) When other settings such as master and device are added and their settings are complete, please
select [PLC/Download] and download (1) to (3) setting to the PLC.
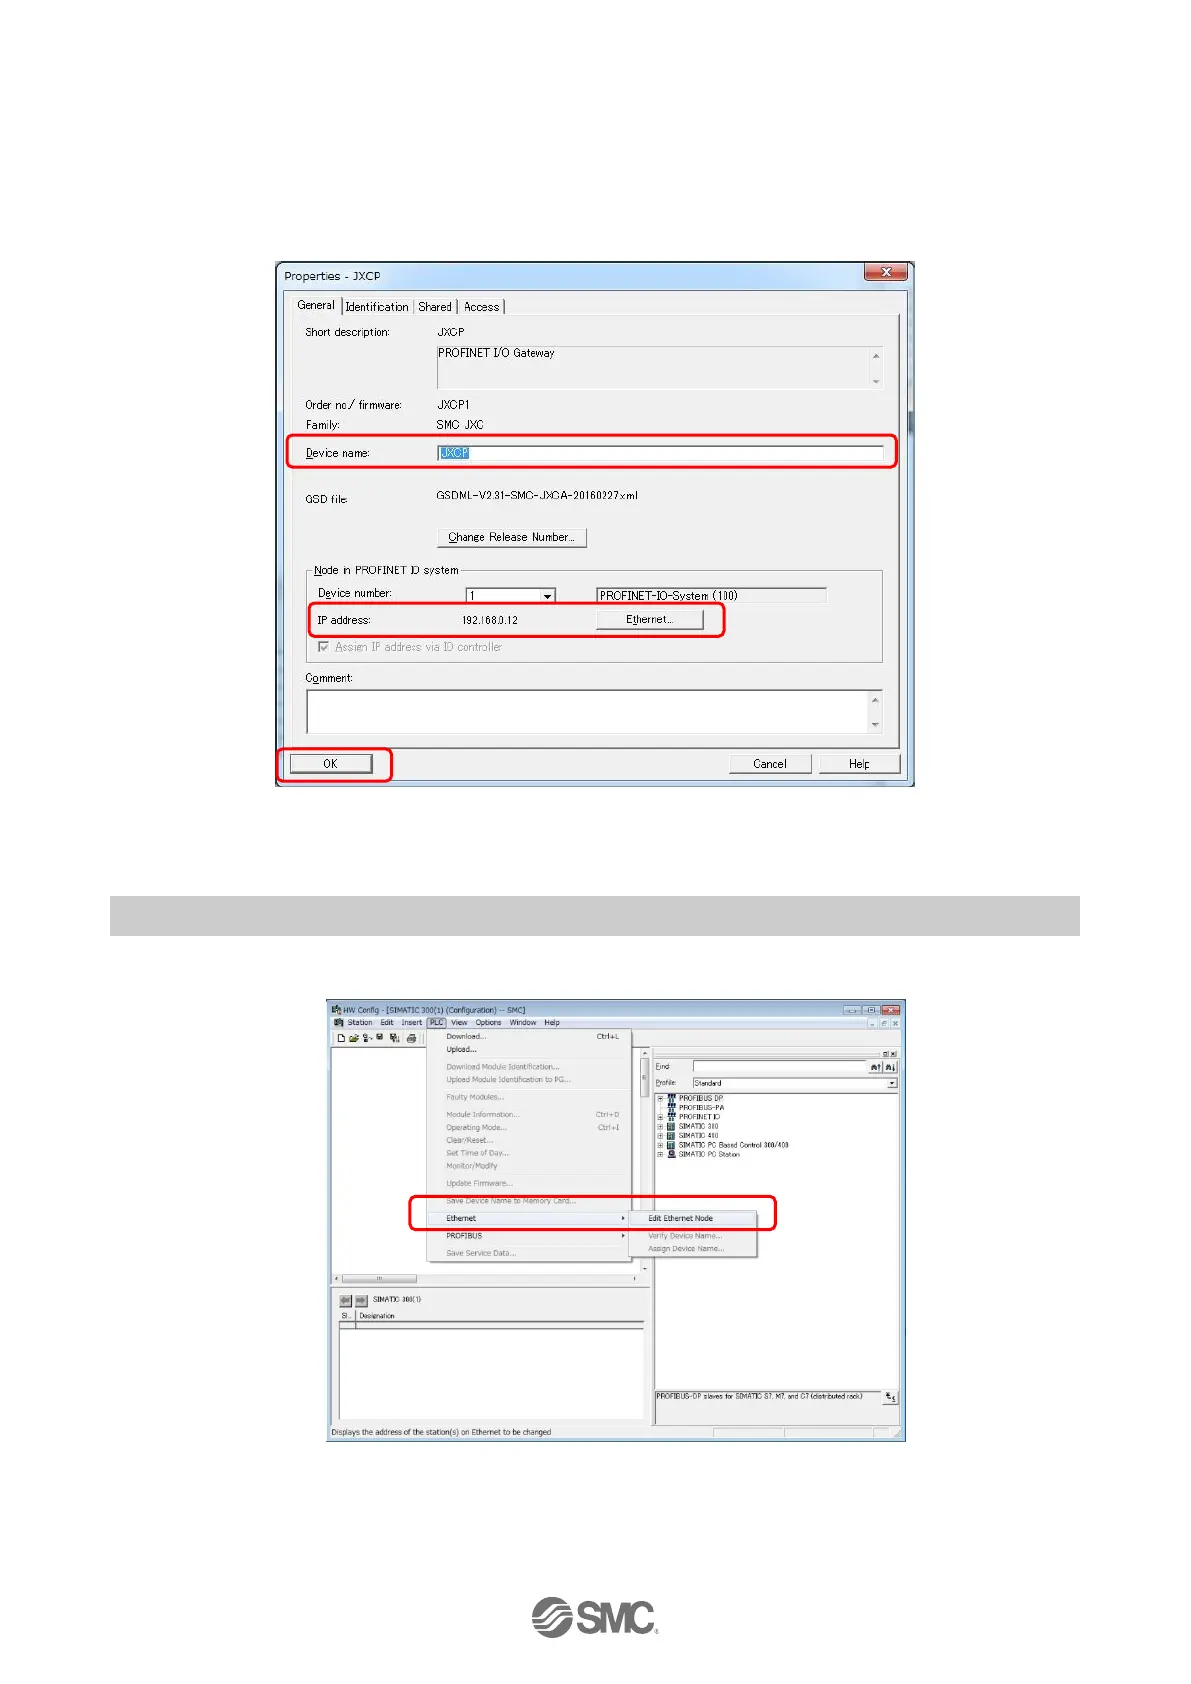
4.4 Registration of the device name of the JXCP1 controller to be connected
(1) Start [HW Config] from STEP7(SIMATIC Manager). (Refer to 4.2(1).)
Select [PLC]→[Ethernet]→[Edit Ethernet Node] from the menu bar of [HW Config].
Fig.4.6 [Edit Ethernet Node] screen is selected.

 Loading...