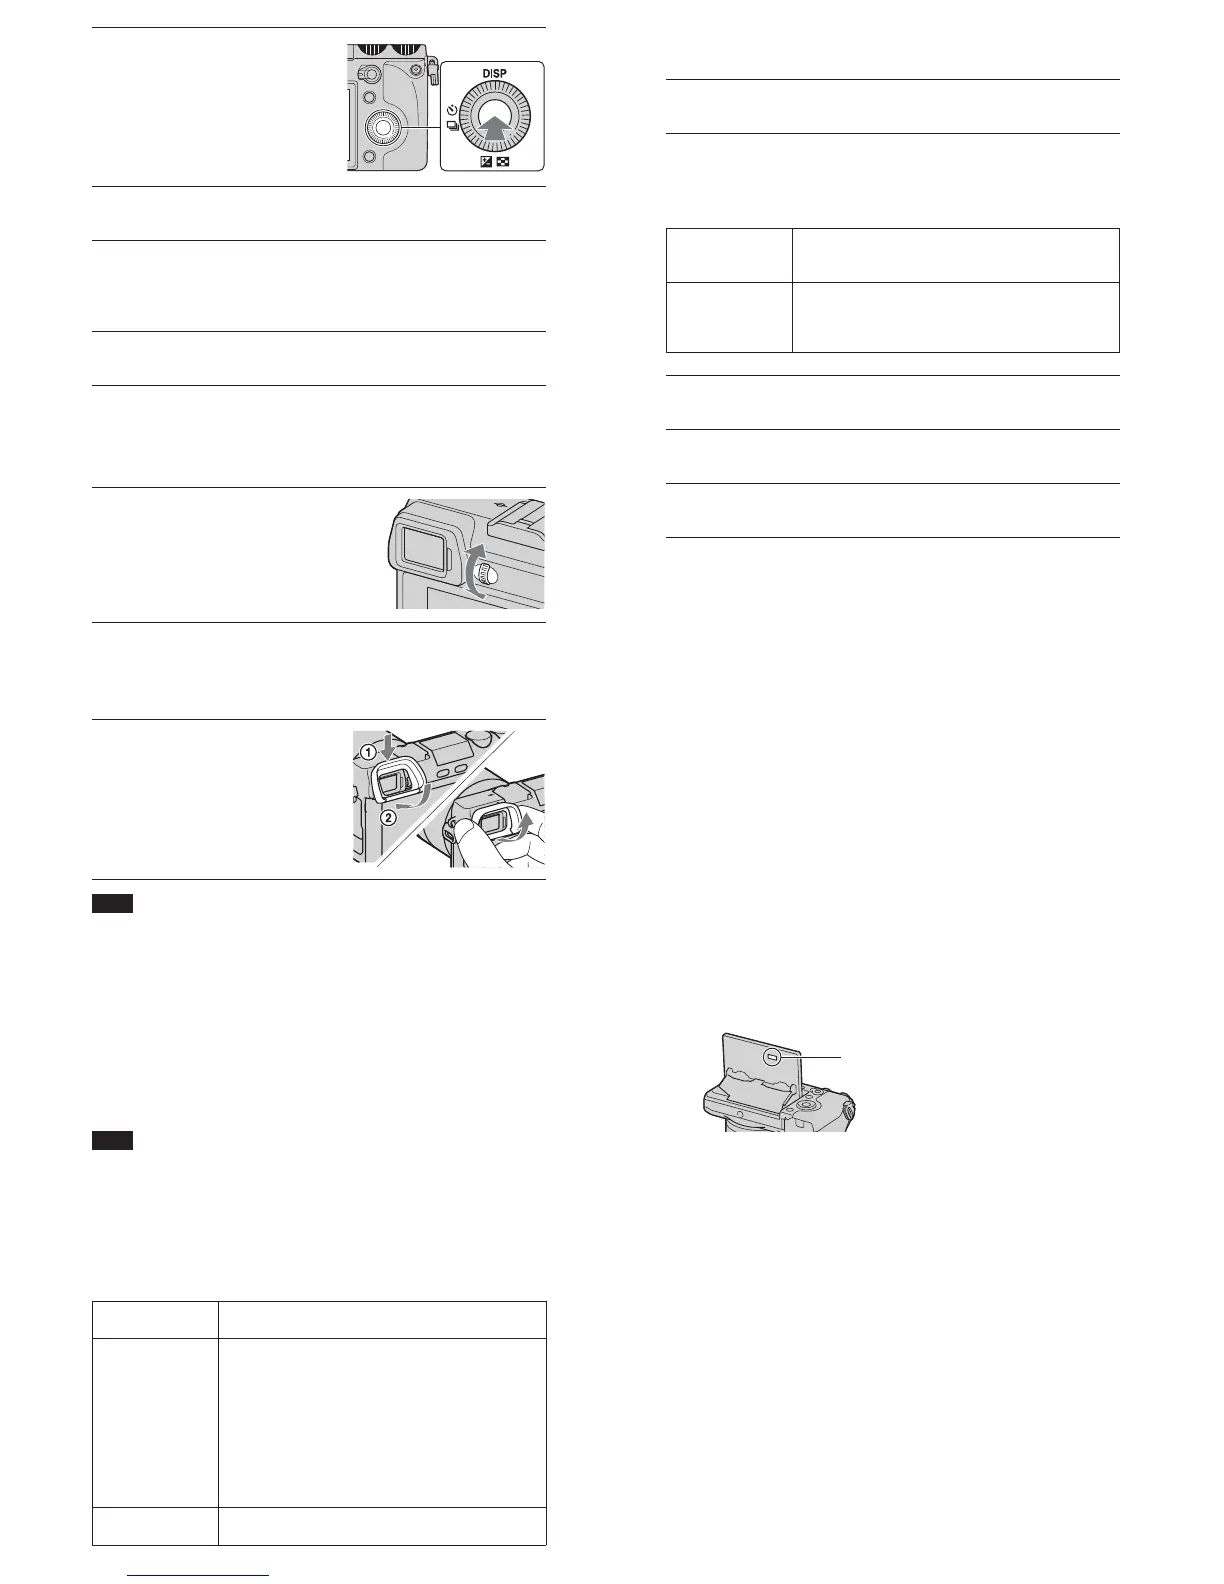
Adjusting the viewfinder (diopter
adjustment)
Adjust the viewfinder so that you can see the screen displays clearly.
Attaching/removing the eyepiece cup
It is recommended that you attach the eyepiece cup when you intend to use the
viewfinder.
• Remove the eyepiece cup when you attach an accessory (sold separately) to the
accessory shoe.
Installing the software
To utilize images recorded with the camera, the following software is
provided:
• “Image Data Converter”
You can edit RAW images, etc.
• “PMB” (Picture Motion Browser) (Windows only)
You can import images to the computer, edit them, such as displaying them
on a calender.
• If “PMB” has already been installed on the computer, and the version number of
the previously installed “PMB” is lower than that of the “PMB” on the CD-ROM
(supplied), install “PMB” also from the CD-ROM (supplied).
x
Windows
The following computer environment is recommended when using the
supplied software and importing images via a USB connection.
* 64-bit editions and Starter (Edition) are not supported. Windows Image Mastering
API (IMAPI) Ver. 2.0 or later is required to use the function for creating discs.
** Starter (Edition) is not supported.
x
Macintosh
The following computer environment is recommended when using the
supplied software and importing images via a USB connection.
Precautions
The Cleaning Cloth
Remove large specks of dirt from the Cleaning Cloth before using it.
On the functions available with the camera
You may feel uncomfortable symptoms such as eyestrain, nausea, or a tired
feeling while watching 3D images recorded with the camera on 3D compatible
monitors. When you watch 3D images, we recommend that you take a break at
regular time intervals. Since the need for or frequency of break times varies
between individuals, please set your own standards. If you feel sick, stop
watching 3D images, and consult a doctor as needed. Also, refer to the
operating instructions of the connected device or the software used with the
camera. A child's vision is always vulnerable (especially for children under six
years of age). Before allowing them to watch 3D images, please consult with
an expert, such as a pediatric or ophthalmic doctor. Make sure your children
follow the precautions above.
On the LCD monitor and lens
• The LCD monitor is manufactured using extremely high-precision
technology so over 99.99 % of the pixels are operational for effective use.
However, there may be some tiny black points and/or bright points (white,
red, blue or green in color) that constantly appear on the LCD monitor. These
points are normal in the manufacturing process and do not affect the images
in any way.
• A magnet is attached to the back of the LCD monitor. Do not put objects that
are affected by magnetic fields, such as a floppy disk or a credit card,
between the LCD monitor and the camera body.
• Images may trail across on the LCD monitor in a cold location. This is not a
malfunction. When turning on the camera in a cold location, the LCD
monitor may become temporarily dark.
• Do not expose the camera to direct sunlight. If sunlight is focused on a
nearby object, it may cause a fire. When you must place the camera under
direct sunlight, attach the front lens cap.
On using the lenses and accessories
It is recommended that you use Sony lenses/accessories designed to suit the
characteristics of this camera. Using the products of other manufacturers may
cause the camera not to operate to its capability, or result in accidents and
malfunctions of the camera.
Do not use/store the camera in the following places
• In an extremely hot, dry or humid place
In places such as in a car parked in the sun, the camera body may become
deformed and this may cause a malfunction.
• Storing under direct sunlight or near a heater
The camera body may become discolored or deformed, and this may cause a
malfunction.
• In a location subject to rocking vibration
• Near strong magnetic place
2
Press the center of the control
wheel to confirm [OK].
3
Select your area by pressing the right or left of the control
wheel and press the center.
4
Press the left or right of the control wheel to select each
item, and press the top or bottom, or turn it to select the
numeric value.
• Midnight is indicated as 12:00 AM, and noon as 12:00 PM.
5
When you have set all items, press the center of the control
wheel.
1
Turn the diopter-adjustment
dial.
1
Align the top of the eyepiece
cup with the viewfinder, and
snap it onto the bottom of the
viewfinder.
• To remove the eyepiece cup, push
on the sides and pull the eyepiece
cup off the viewfinder.
Note
Note
OS (pre-installed) Microsoft Windows XP* SP3/Windows Vista** SP2/
Windows 7 SP1
“PMB” CPU: Intel Pentium III 800 MHz or faster
(For playing/editing the HD movies: Intel Core Duo
1.66 GHz or faster, Intel Core 2 Duo 1.66 GHz or faster,
Intel Core 2 Duo 2.26 GHz or faster (HD FX/HD FH), Intel
Core 2 Duo 2.40 GHz or faster (HD PS))
Memory: 512 MB or more (For playing/editing the HD
movies: 1 GB or more)
Hard Disk: Disk space required for installation—
approximately 500 MB
Display: Screen resolution—1024 × 768 dots or more
“Image Data
Converter Ver.4”
CPU/Memory: Pentium 4 or faster/1 GB or more
Display: 1024 × 768 dots or more
1
Insert the CD-ROM (supplied) into the CD-ROM drive, and
install the software following the instructions on the screen.
OS (pre-installed) USB Connection: Mac OS X (v10.3 to v10.6)
“Image Data Converter Ver.4”: Mac OS X v10.5/
Mac OS X v10.6 (Snow Leopard)
“Image Data
Converter Ver.4”
CPU: Intel processors, such as Intel Core Solo/Core Duo/
Core 2 Duo
Memory: 1 GB or more is recommended.
Display: 1024 × 768 dots or more
1
Insert the CD-ROM (supplied) into the CD-ROM drive, and
double-click the CD-ROM icon.
2
Copy the [IDC_INST.pkg] file in the [MAC] folder to the
hard disk icon.
3
Double-click the [IDC_INST.pkg] file in the copy-to folder.
• Follow the instructions on the screen to complete the installation.
Magnet
 Loading...