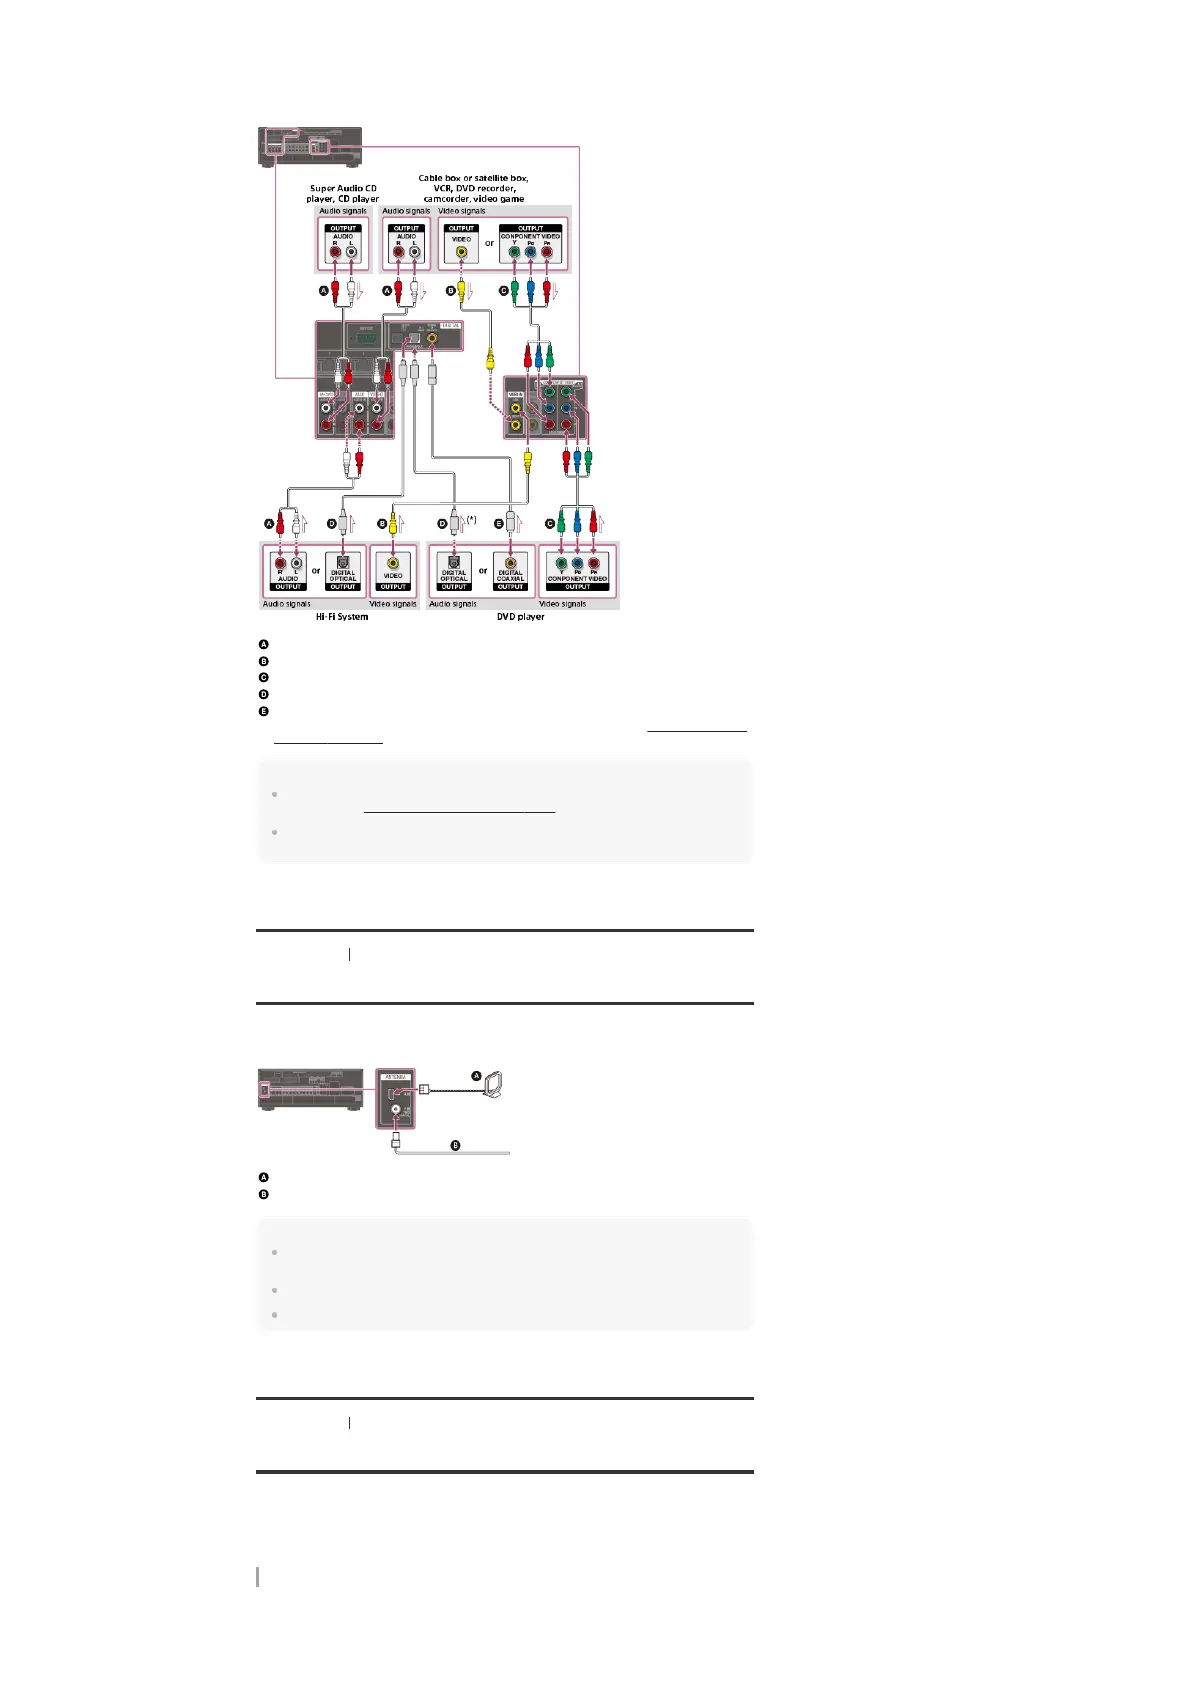
Connect devices to the receiver as illustrated below.
Solid lines show recommended connections and the dashed lines show alternative connections.
Before connecting cables, be sure to disconnect the AC power cord (mains lead).
Audio cable (not supplied)
Video cable (not supplied)
Component video cable (not supplied)
Optical digital cable (not supplied)
Coaxial digital cable (not supplied)
Hint
You can rename each input so that the name can be displayed on the display panel of the receiver.
For details, see “Changing the name for each input (
Name).”
The image quality depends on the connecting jack. We recommend that you connect your devices
via an HDMI connection if they have HDMI jacks.
[28] Preparation 4. Connecting audio-visual devices and the antennas (aerials)
Connecting the antennas (aerials)
Connect the supplied antennas (aerials) to the receiver as illustrated below.
Before connecting antenna (aerial), be sure to disconnect the AC power cord (mains lead).
AM loop antenna (aerial) (supplied)
FM wire antenna (aerial) (supplied)
Note
To prevent noise pickup, keep the AM loop antenna (aerial) away from the receiver and other
devices.
Be sure to fully extend the FM wire antenna (aerial).
After connecting the FM wire antenna (aerial), keep it as horizontal as possible.
[29] Preparation 4. Connecting audio-visual devices and the antennas (aerials)
Connecting another amplifier in Zone 2/3
You can enjoy image (*) and sound from a device connected to the receiver in a zone other
than the main zone. For example, you can watch a DVD in the main zone and listen to a CD in
Zone 2.
Connecting another amplifier using the ZONE 2 VIDEO/AUDIO OUT jack
If you connect devices with an OPTICAL jack, reassign the input jacks. For details, see “Using other video/audio
input jacks (Input Assign).”
*
For a connection using the HDMI OUT B (ZONE 2) jack only
*

 Loading...