198
To assign side flag operation buttons to cross-
point buttons
Press [Side Flags Button Assign] to open the Engineering
Setup >Panel >Xpt Assign >Side Flags Button Assign
menu (7322.10) and configure the settings (see page 417).
Enabling and disabling side flags (cross-
point control block)
You can assign the [SIDE FLAG] button to the right hand
edge of the cross-point button row for enabling and
disabling side flags.
You assign the [SIDE FLAG] button in the Setup menu.
For details, see “Assigning the [SIDE FLAG] Button”
(page 417)
.
When the [SIDE FLAG] button assigned to the right hand
edge of the cross-point button row for background A bus
or B bus on the cross-point control block is pressed,
turning it on amber, the side flags are enabled.
• The side flag enable/disable setting in the menu is linked
to the setting using the [SIDE FLAG] button.
• When auto side flags are enabled, selecting a 4:3 video
material automatically turns the [SIDE FLAG] button
on, but if you press this button, turning it off, the side
flags are temporarily disabled.
However, when you select a different 4:3 video material,
the [SIDE FLAG] button automatically turns on once
again, enabling the side flags.
Creating an image with side flags
This section describes creating images with side flags on
background B on the M/E-1 bank as an example.
1
In the M/E-1 bank cross-point control block, press the
delegation button [UTL1] in the cross-point pad and
select the signal (utility 1 bus signal) to insert in the
side flag areas using the cross-point buttons.
• On the cross-point control block in key/AUX bus
delegation mode, press the [UTIL1] button in the 1st
row and select a signal using the cross-point buttons
in the 2nd row.
• You can assign the utility 1 bus using the [UTIL]
button on the cross-point pad of the cross-point
control block (see page 79).
2
In the background B bus cross-point button row, press
the button corresponding to the 4:3 video material.
If auto side flags are enabled, this automatically adds
side flags to the 4:3 video material.
3
Enable side flags in the menu (see page 197) or using
the [SIDE FLAG] button (see page 198).
Side flags are added to the 4:3 video material.
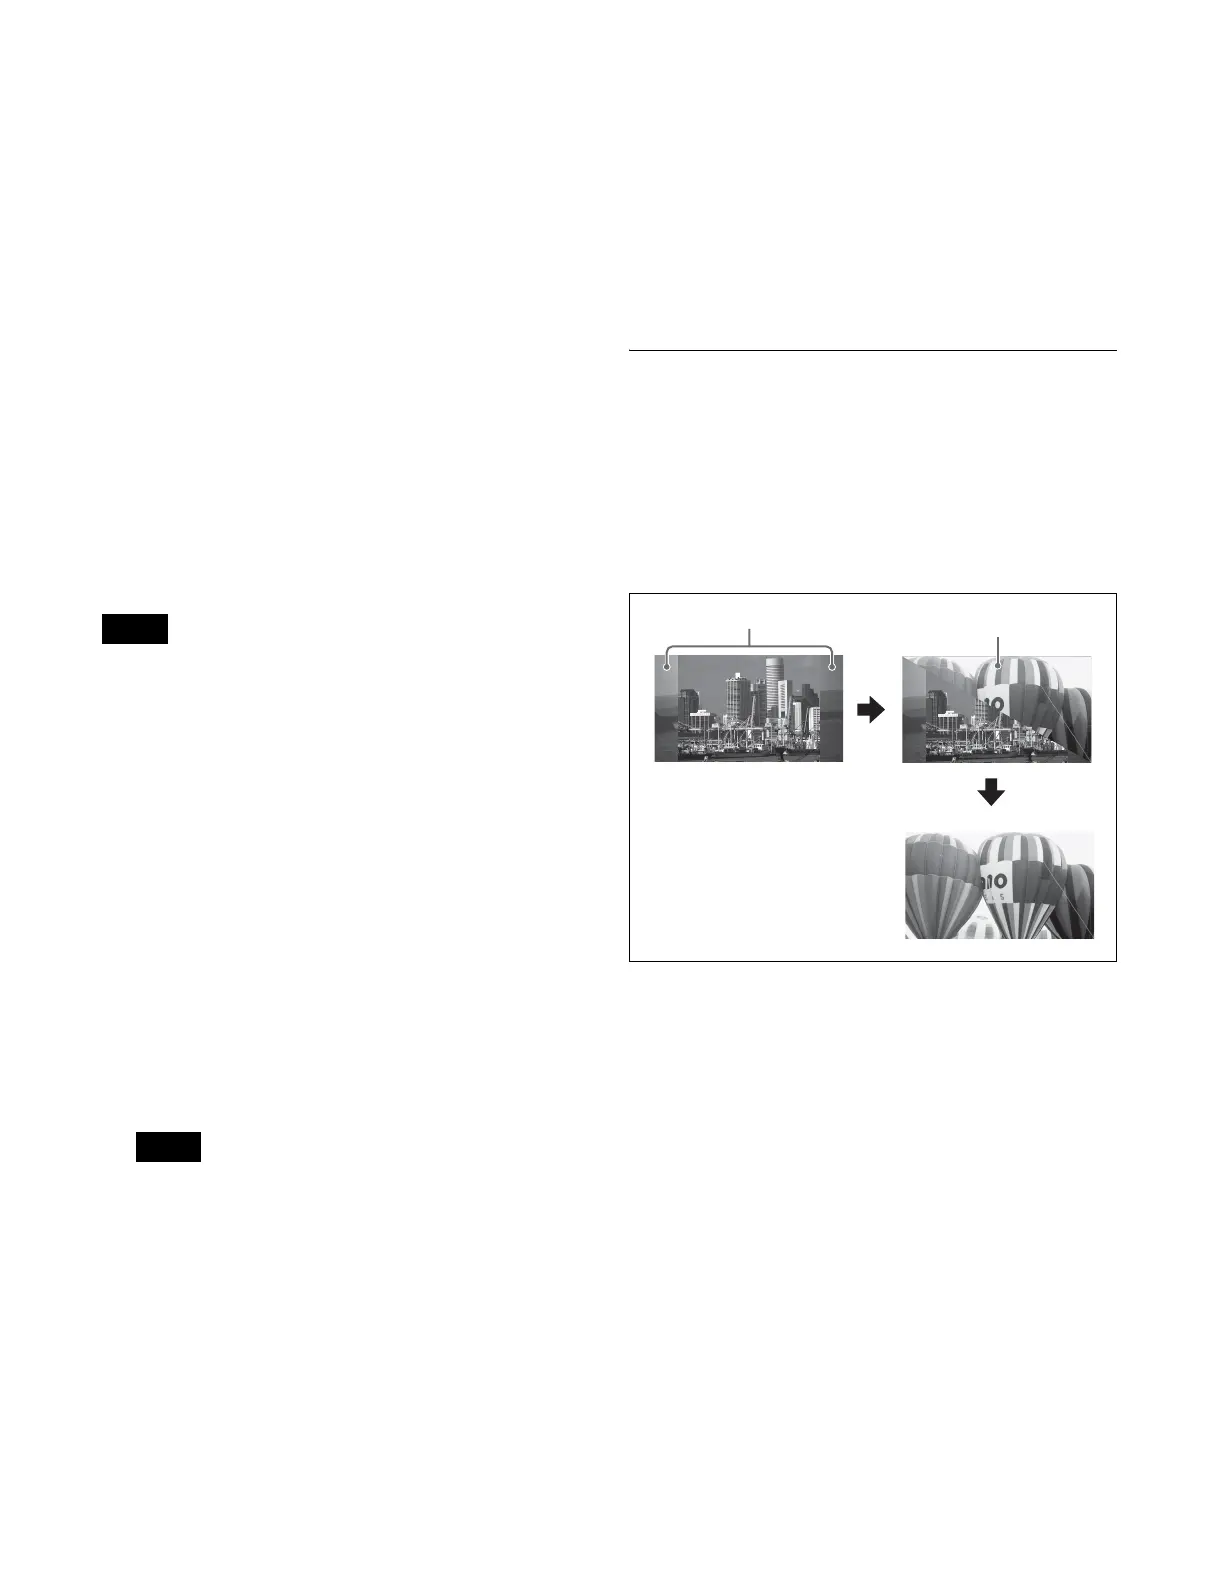
Wipe Action on Images with Side
Flags
When a wipe is executed on an image with side flags, all
wipe patterns can be used.
The following illustration shows the action in a wipe.
Wipe from 4:3 image to 16:9 image
Notes
Notes
4:3 image
(Side flags: enabled)
Side flag areas
16:9 image
 Loading...