Component Access / Removal
600 Series
(Prior to #1810000)
7-24
#3756270 - Revision B - January, 2006
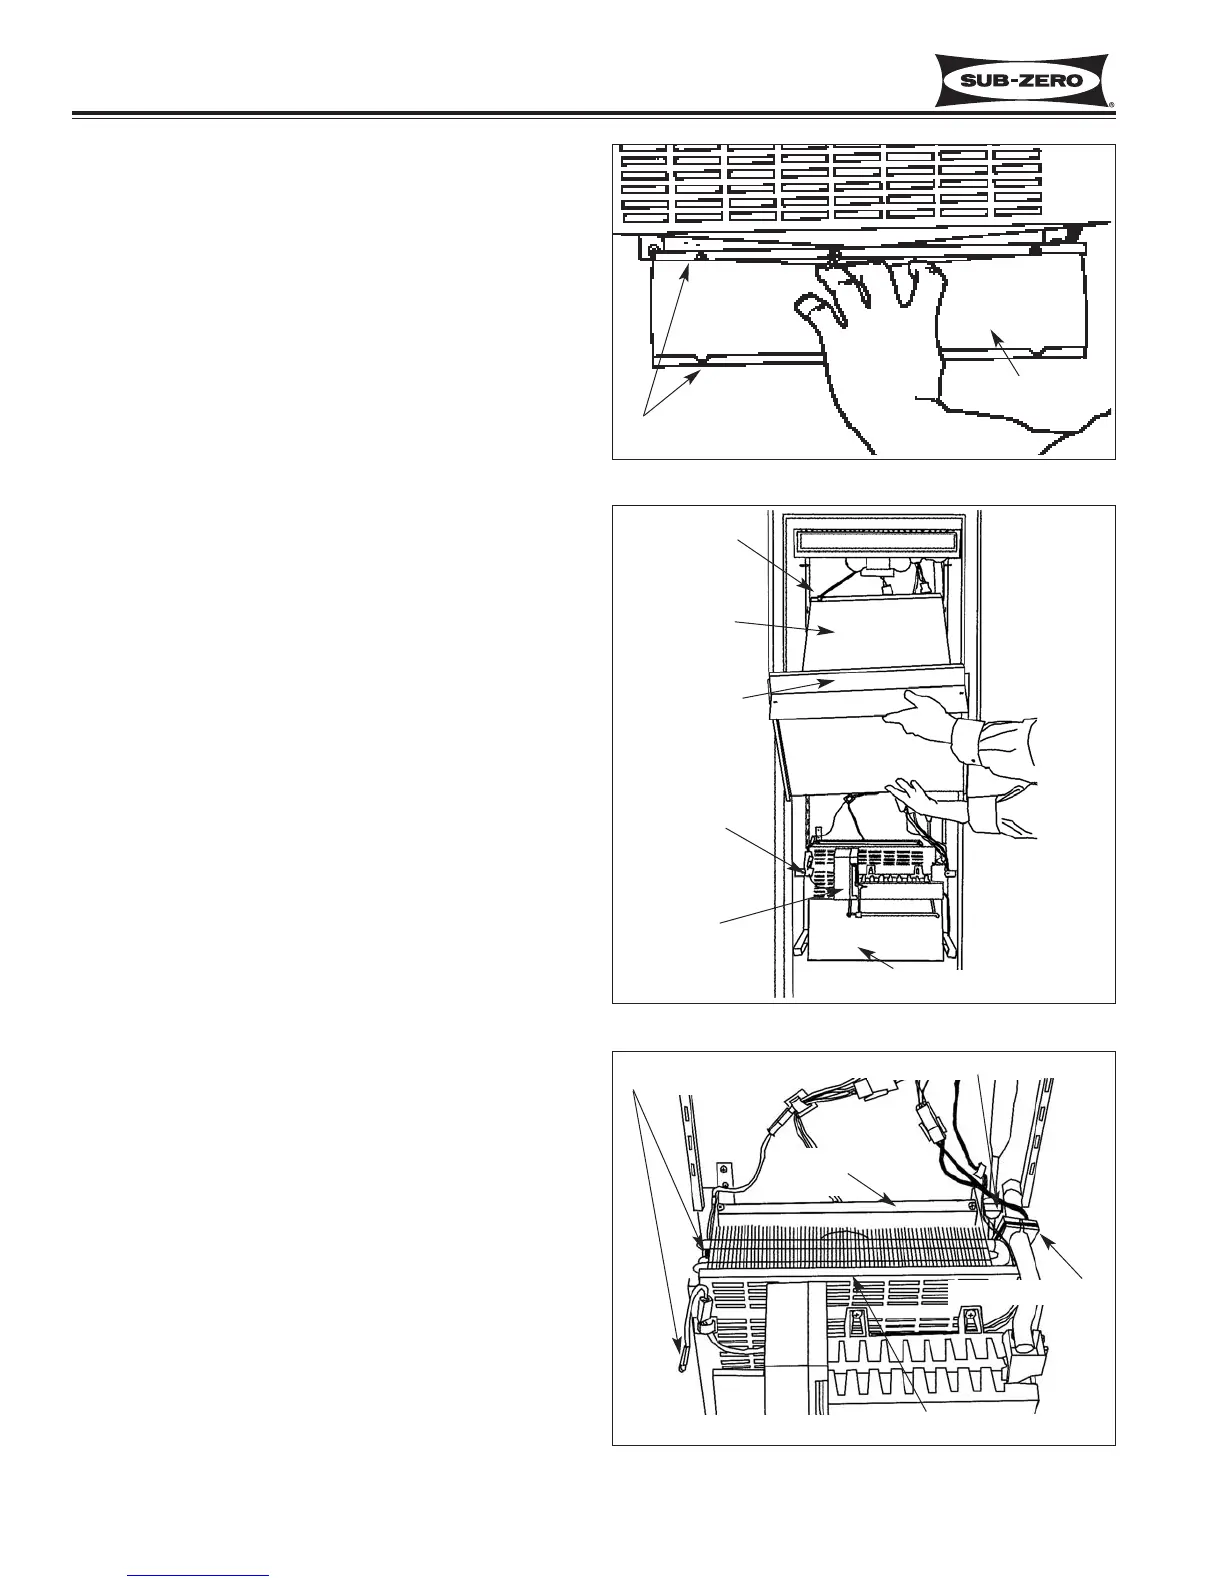
Freezer Lower Light Diffuser (Models 632, 642)
To access and remove the lower light diffuser, the top
freezer basket needs to be removed first. Push top of
diffuser down, causing it to flex from top to bottom.
This will release the top of the diffuser from the top
channel of the diffuser retainer. Then, pull diffuser for-
ward. (See Figure 7-48)
NOTE: To reinstall, place bottom of diffuser in bottom
channel of diffuser retainer; flex diffuser from top to bot-
tom while lining up top of diffuser in top channel of
retainer.
Freezer Compartment Thermistor (Models 632, 642)
The freezer compartment thermistor is attached to the
left side wall in the icemaker area. (See Figure 7-49 &
7-50)
NOTE: To access and remove the freezer compartment
thermistor it is recommended, but not necessary, to
remove the icemaker, as long as an offset screwdriver
is used.
To access and remove the freezer compartment ther-
mistor, the ice bucket must be removed first, and the
ice bucket carriage assembly slid back out of the way.
Then, disconnect the thermistor wire leads from the
wire harness, and extract the screw which secures the
thermistor to left side wall. (See Figures 7-49 & 7-50)
Freezer Duct/Shelf Assembly (Models 632, 642)
NOTE: It is recommended, but not necessary, to
remove the light diffuser in order to remove the air
duct/shelf.
The freezer duct/shelf assembly is secured at the top
by slots in the side flanges fitting over pegs at the top of
each shelf ladder. Screws at the shelf front hold the
duct/shelf to supports in the side walls. To remove the
duct/shelf, the ice bucket must first be removed. Now,
extract the screws at left and right of shelf front, and
pull the duct/shelf forward and down slightly. Then, pull
the grounding clip terminal from the top flange of the
duct/shelf and pull duct/shelf out. (See Figure 7-49)
NOTE: When reinstalling freezer duct/shelf, be sure to
reattach grounding clip terminal to top flange. (See
Figure 7-49)
Figure 7-49. Model 632, 642 Freezer Compartment
Figure 7-48. Model 632, 642 Lower Light Diffuser
Diffuser Retainers
Shelf Front
Compartment
Thermistor
Icemaker
Duct/Shelf
Ground Clip
Carriage Assembly
Light Diffuser
Figure 7-50. Model 632, 642 Evaporator Area
Thermistor
Defrost Terminator
Fill Tube Heater
Evaporator Cover Assy.
Evaporator Fan
Shroud
 Loading...