8 – Saving and recalling setting data
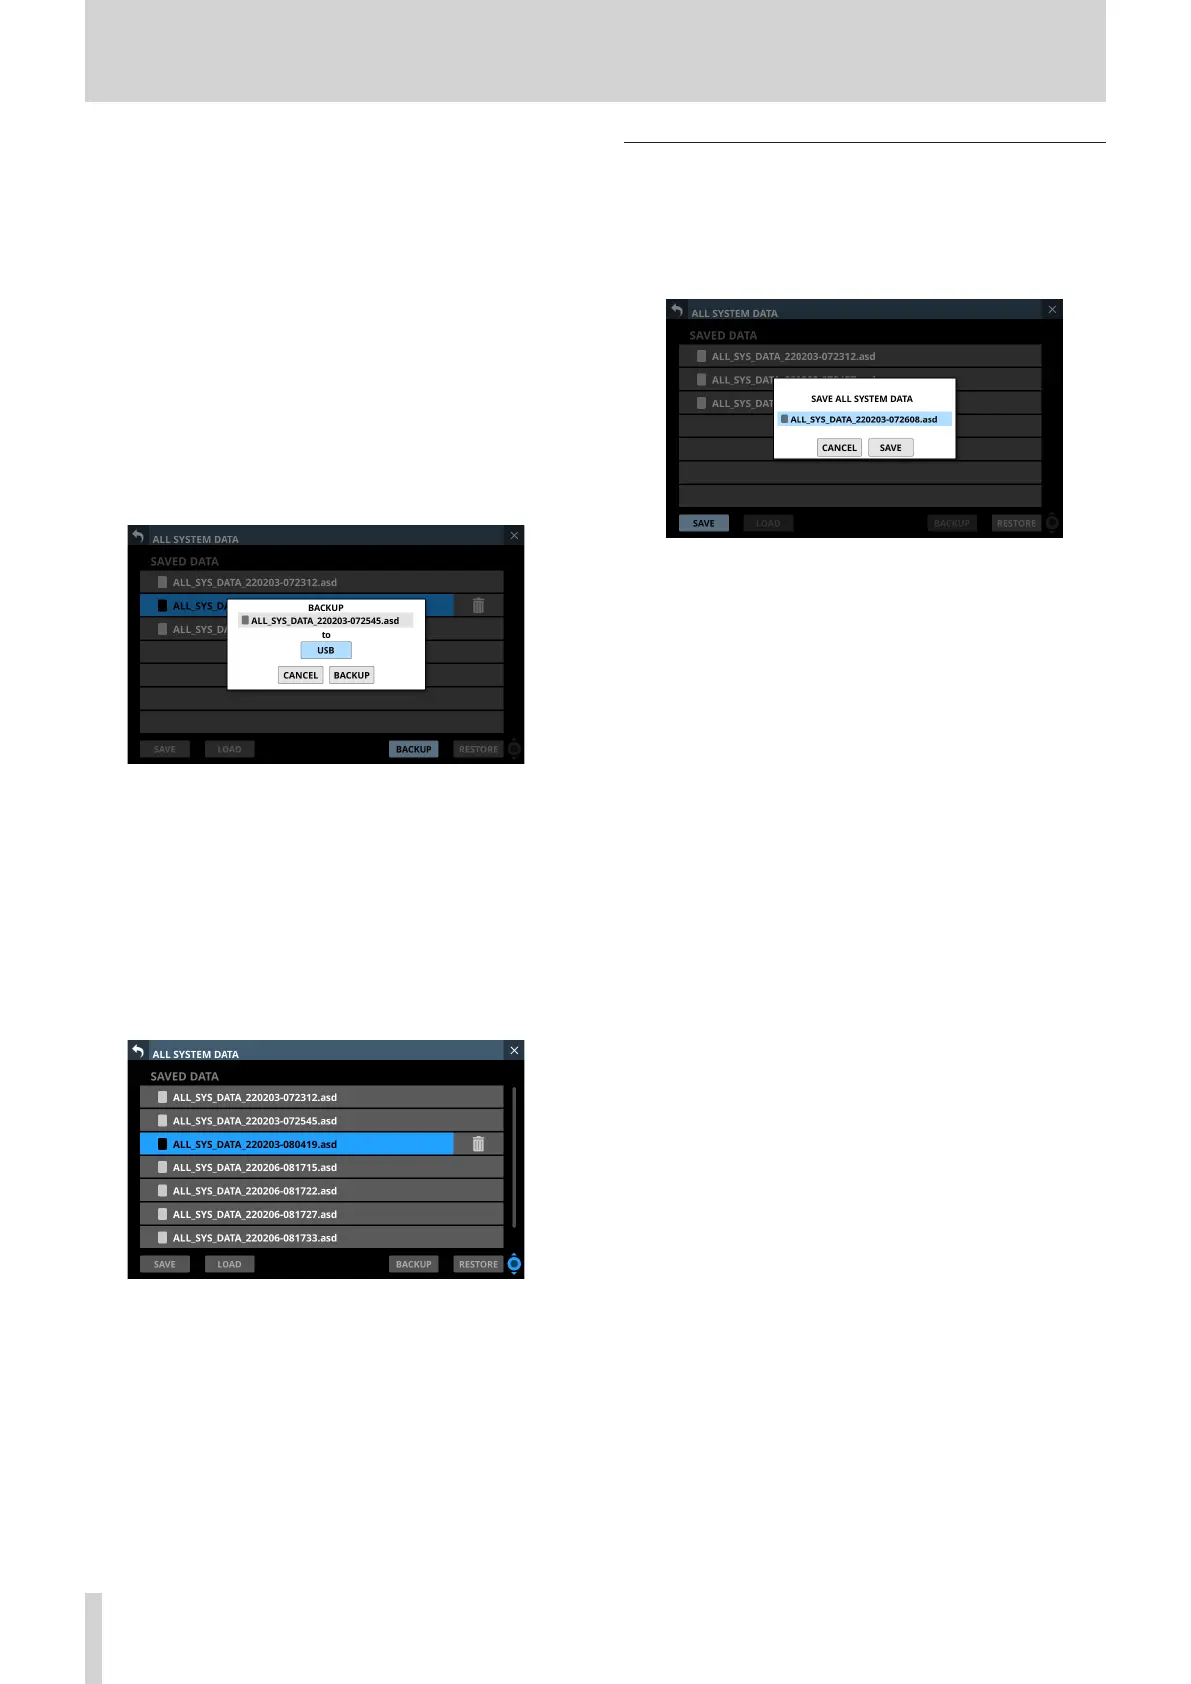
3 SAVE button
Tap this button to save All System Data to the internal
storage. (See “Saving All System Data” on page 180.)
4 LOAD button
o Tap this button to load All System Data from the internal
storage. (See “Loading All System Data” on page 181.)
o If no All System Data file is selected, this button will
appear gray.
5 BACKUP button
o If no All System Data file is selected, this button will
appear gray.
o Tap this button when an All System Data file is selected
to open a confirmation message for backing up that data
to external memory. (See “Backing up All System Data” on
page 181.)
6 RESTORE button
Tap this button to open the ALL SYSTEM DATA RESTORE
Screen. (See “Restoring All System Data” on page 182.)
7 Scroll knob and scrollbar
o If all the saved files cannot all be shown on the screen at
once, the scrollbar will appear and the scroll knob will be
highlighted.
o Drag the scrollbar to scroll the screen. The list of saved
files (1) can also be scrolled by swiping up and down as
well as by turning LCD knob 8.
Saving All System Data
Follow the procedures below to save All System Data to the
internal storage.
1. Tap the SAVE (3) button to open a confirmation message
for saving All System Data.
2. Tapping the CANCEL button on the confirmation message
will close the message.
Tapping the SAVE button on the confirmation message will
save All System Data to the internal storage and close the
confirmation message.
The name shown on the confirmation message will be
added to the list of saved files (1).
180 TASCAM Sonicview 16/Sonicview 24 V1.1.0
 Loading...