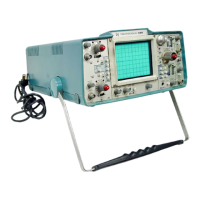
Performance CheckICalibration-314 Service
POWER SUPPLY AND CALIBRATOR
Equipment Required
1. Variable Autotransformer
1
2 Digital Voltmeter
3. Voltohmmeter
4. Variable DC Supply
See
in the pullout Diagrams section
Control Settings
Preset the 314 controls as follows:
INTENSITY
ccw
POWER off (in)
FOCUS midrange
CH 1 and CH 2
VOLTS/DIV 10 m
VARIABLE CAL
POSITION midrange
Input Coupling GND
DISPLAY CH
1
CH 2 INVERT out
TRIGGERING
LEVEL
cw
SLOPE
T
Coupling AC
Source I NT
Mode AUTO
TIME/DIV 1 ms
Variable CA L
Horizontal POSITION midrange
SWEEP MAG X 1
STORAGE
STORE out
ENHANCE out
AUTO ERASE out
ENHANCE LEVEL
ccw
VIEWING TIME
ccw
EXT ATTEN (side panel) 1X
Power Source AC
Line Voltage Selector 115 V
Regulating Range M
d. Connect DVM between +12 V supply (terminal V)
and ground (terminal K) on Storage board. See Fig. 7-3for
location of terminals V and K.
e. Check for a DVM reading of
+12.0 V, +360 mV
(1 1.640 to 12.360 V).
f. ADJUST-R628 (see Fig. 7-3), +12 V, for 12.00 V.
2.
Adjust High-Voltage Supply
a. Connect dc voltmeter between TP701 and ground
(see Fig. 7-3 for location).
/
WARNING
)
Hazardous voltages in this area!
b. Check for
a
voltmeter reading of -1900 V, +2O/o
(-1862 to -1938 V).
c. ADJUST-R719,
H
V, for a meter reading of
-1900 V.
d. Push POWER-INTENSITY switch in (off).
3.
Adjust Regulator Turn-off Level
a. Set AC-DC Selector to DC, 11 V-14 V
1. Adjust +12-Volt Supply
a. Connect variable autotransformer to the ac power
line. Set transformer output to 115 V.
b. Plug 314 ac line cord into variable autotransformer
output.
b. Connect variable dc supply to External DC Input on
314 (black and red banana jacks on right-side panel).
c. Set variable dc supply output votlage to 12.000 V
(measure supply output with DVM).
c. Pull POWER-INTENSITY switch on (pull out).
d. Pull POWER-INTENSITY switch on.

 Loading...


