Performance Verification
Image Suppression
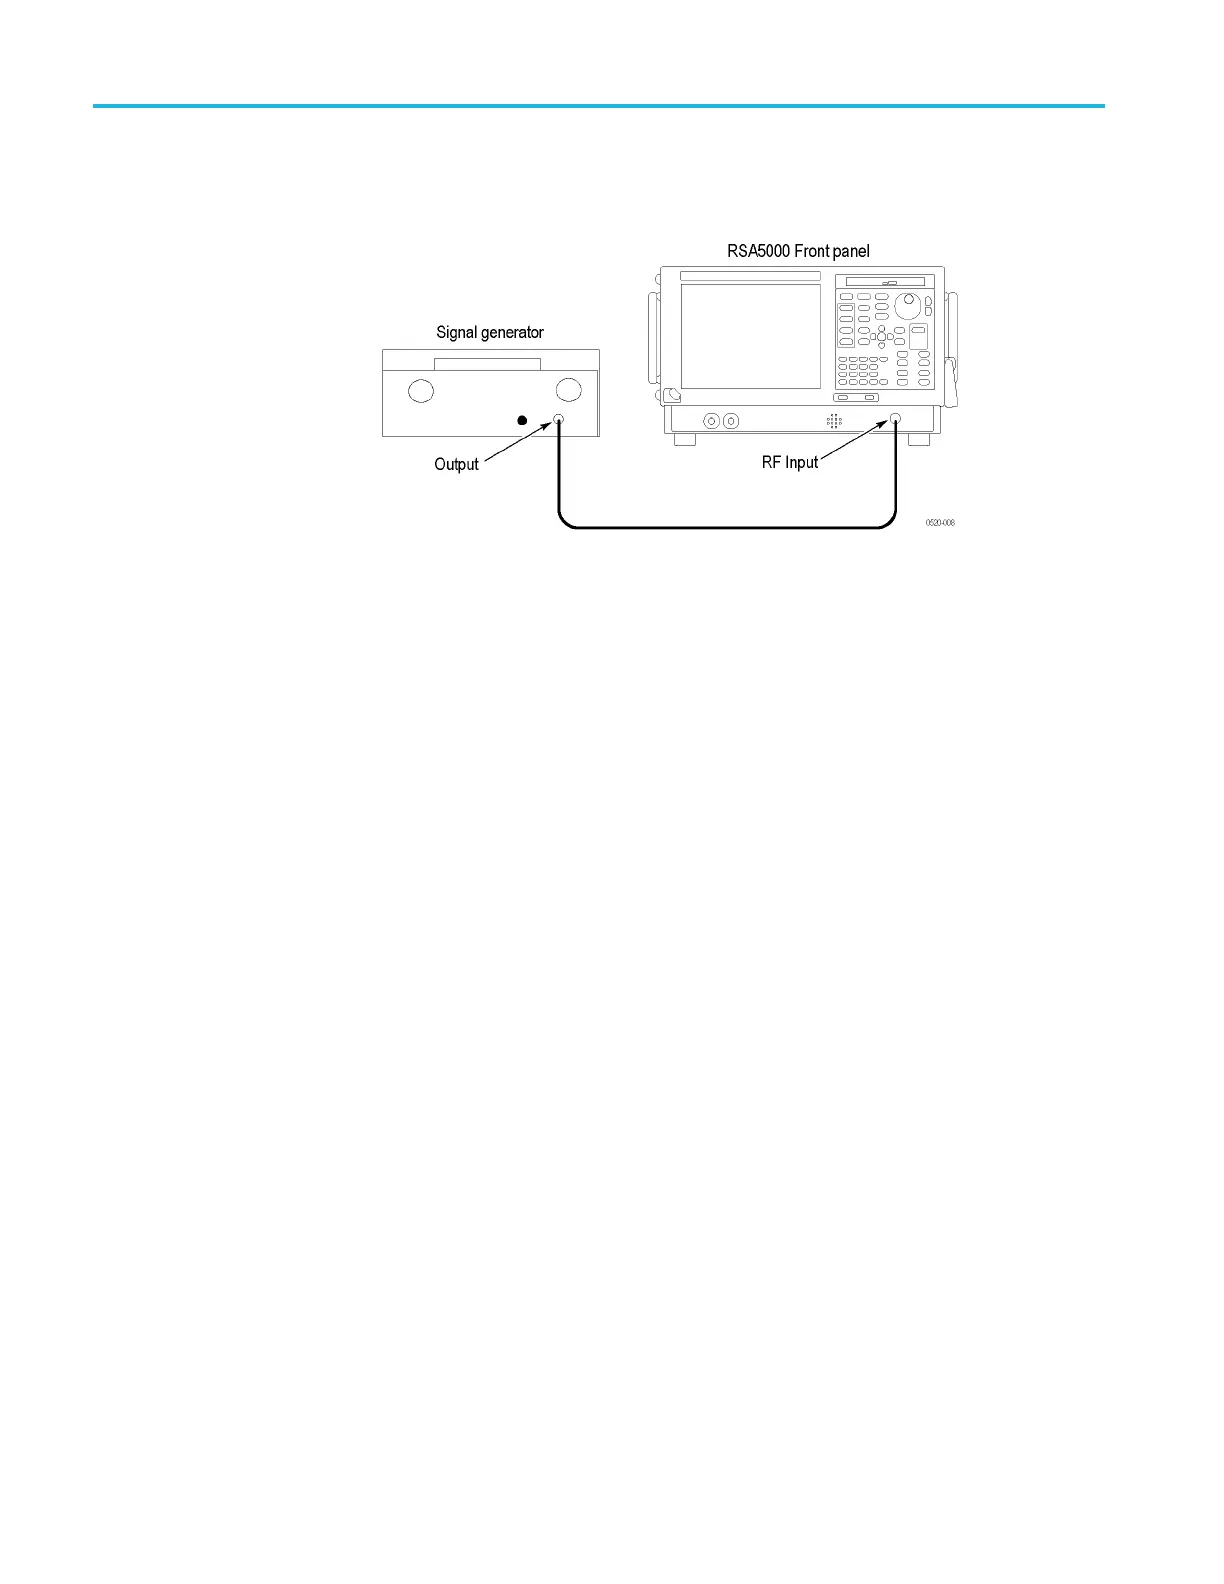
1. Connect the RF g
enerator capable of at least 26.5 GHz to the RSA5100B RF
Input, as shown in the following figure.
Figure 15: Equipment connections for Image Suppression check
2. Reset the RSA5100B to factory defaults: select Setup > Preset (Main).
3. Select Tools > Alignments and select Align Now.
4. Set the RSA5100B:
Ref Level
Setup > Amplitude > Internal Settings > Ref Level
–30 dBm
Internal Attenuator
Setup > Amplitude > Internal Settings > Internal
Attenuator
10 dB (Auto unchecked)
Span
Setup > Settings > Freq & Span > Span
10 kHz
RBW
Setup > Settings > BW > RBW
10 Hz (A uto unchecked)
Function
Setup > Settings > Traces > Function
Avg (VRMS)
Averages
Setup > Settings > Traces > Function
10 (Count checked)
5. Set the RF generator: Output Level to -30 dBm at the end of the cable and
turn RF On. Verify the output level with the power meter, if necessary.
6. For each row of the table below (as appropriate to your instrument model):
a. Set the RSA5100B to the Center Frequency shown in the first column.
b. Set the RF signal generator frequency to that shown in the first column.
c. Set Function to Normal (Setup > Settings > Traces > Function > Normal).
d. Press the Peak key on the Markers control bar.
126 RSA5100B Series Technical Reference
 Loading...