9. Changing the battery
26
1 Please read out the saved data before changing the battery.
See testo ComSoft software Instruction manual
If it is not possible to read out the saved data due to low
battery capacity, please carry out the following:
First change the battery and then read out the saved data
(no data will be lost).
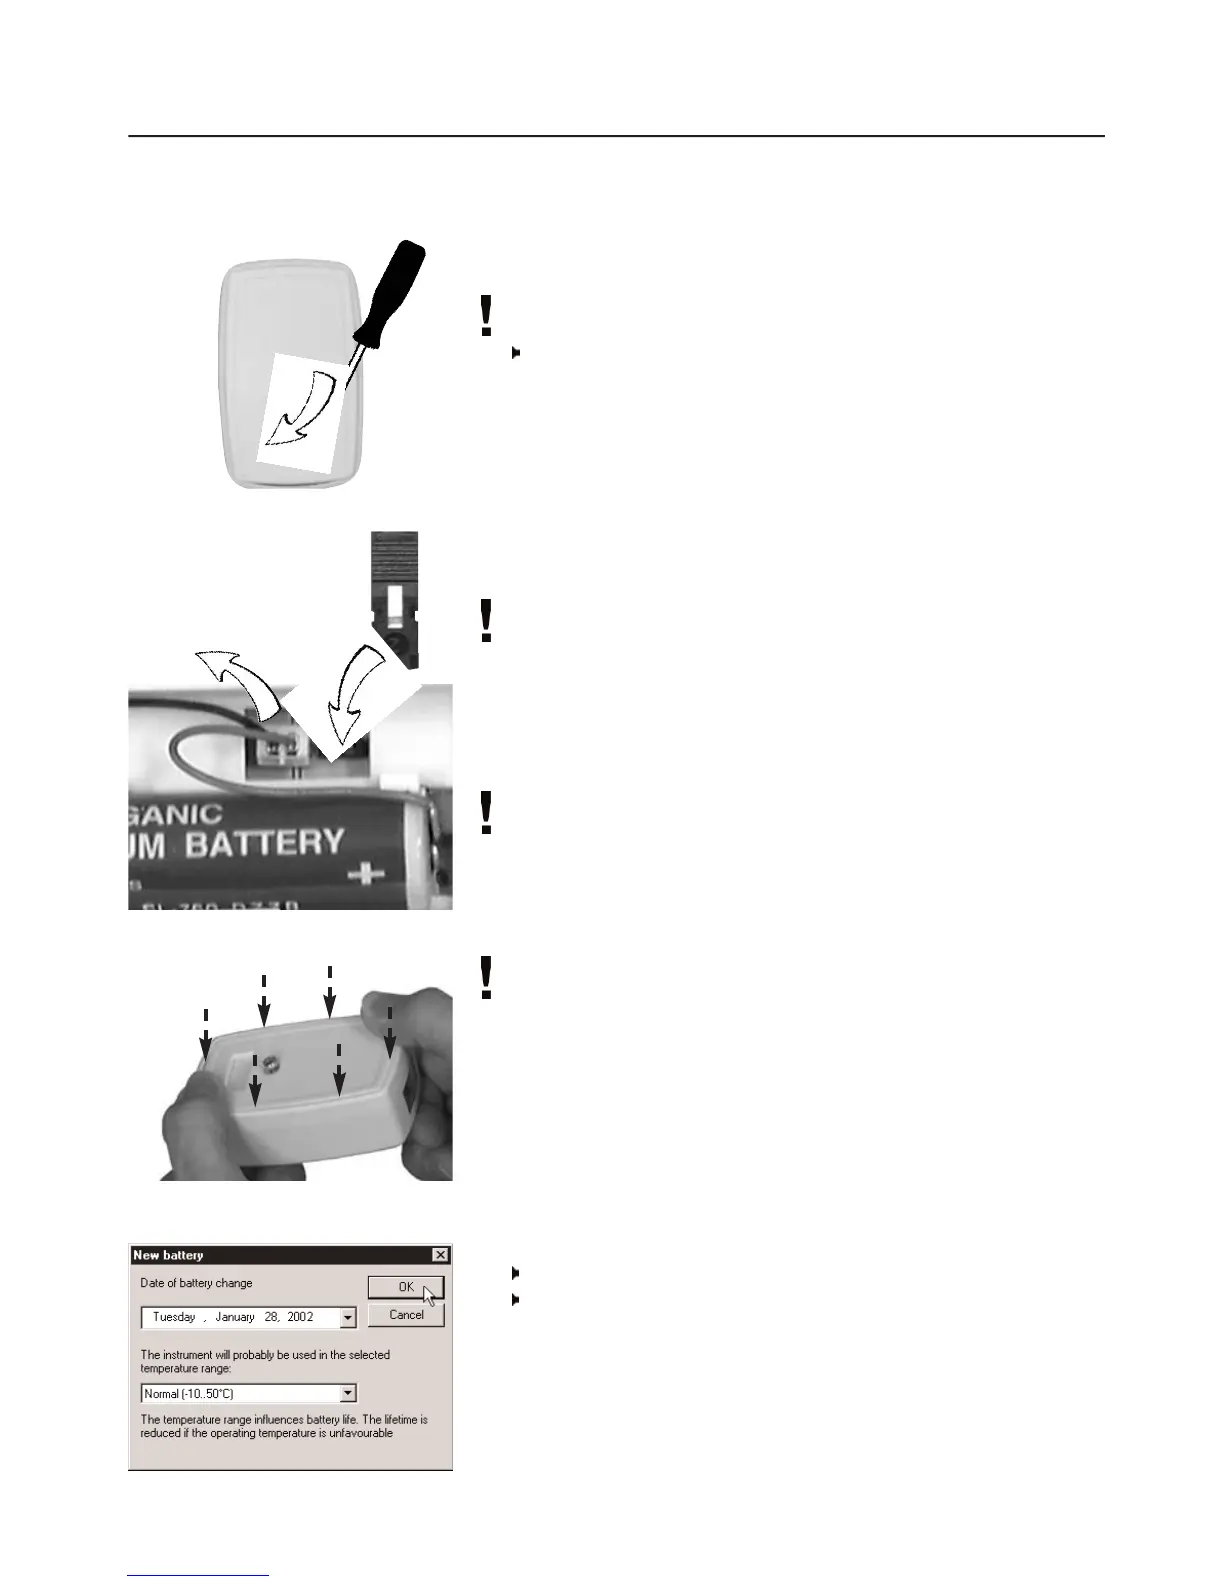
2 Remove the screw at the back of the data logger using a small
crosstip screwdriver.
3 Using a screwdriver, lift the back wall at the bottom of the data
logger and then remove from data logger 1.
4 Attach the jumper (included with spare battery) to the plug
connector beside the connection for the battery 2.
The inserted jumper prevents the memory from being deleted
or written over.
5 Take the battery out of the battery compartment and pull out
the plug-in connection to the data logger 3.
6 Connect the new battery to the data logger`s plug-in
connection and place in battery compartment.
Only original Testo spare batteries should be used
(see 12. Accessories/Spare parts, P. 34 for Part nos).
7 Remove the jumper from the plug connector.
8 Hold the back wall at a 45° angle to the top of the instrument
and then flip down.
Ensure that both O rings are positioned on the screw so as to
guarantee that it is sealed completely.
9 Press the back wall onto the logger with your thumbs. Make
sure that it is closed properly 4 and then secure using screw.
10 Place the data logger in the desk-top holder and attach to
interface.
11 Start the testo ComSoft software and set up a connection to
the data logger by clicking twice on the required connection
with the left mouse button.
- The
New battery
window is opened 5.
Enter the date of battery change.
Enter the temperature range in which you will be using the
data logger and confirm with OK.
- The data logger is now ready for use.
1
2
3
4
 Loading...