36 Using the IP Fax Function from the Touch Panel
0.Using the IP Fax Function from the Touch Panel
P.36 “Sending/Receiving”
P.47 “User Functions”
Sending/Receiving
This chapter describes the basic sending/receiving operations of IP Fax.
P.36 “Sending an IP Fax”
P.38 “Specifying the recipient”
P.44 “Reception mode”
P.46 “Checking communication status / Checking reserved transmissions”
P.47 “Canceling the transmission”
For details on functions other than for IP Faxing, refer to the Fax Guide.
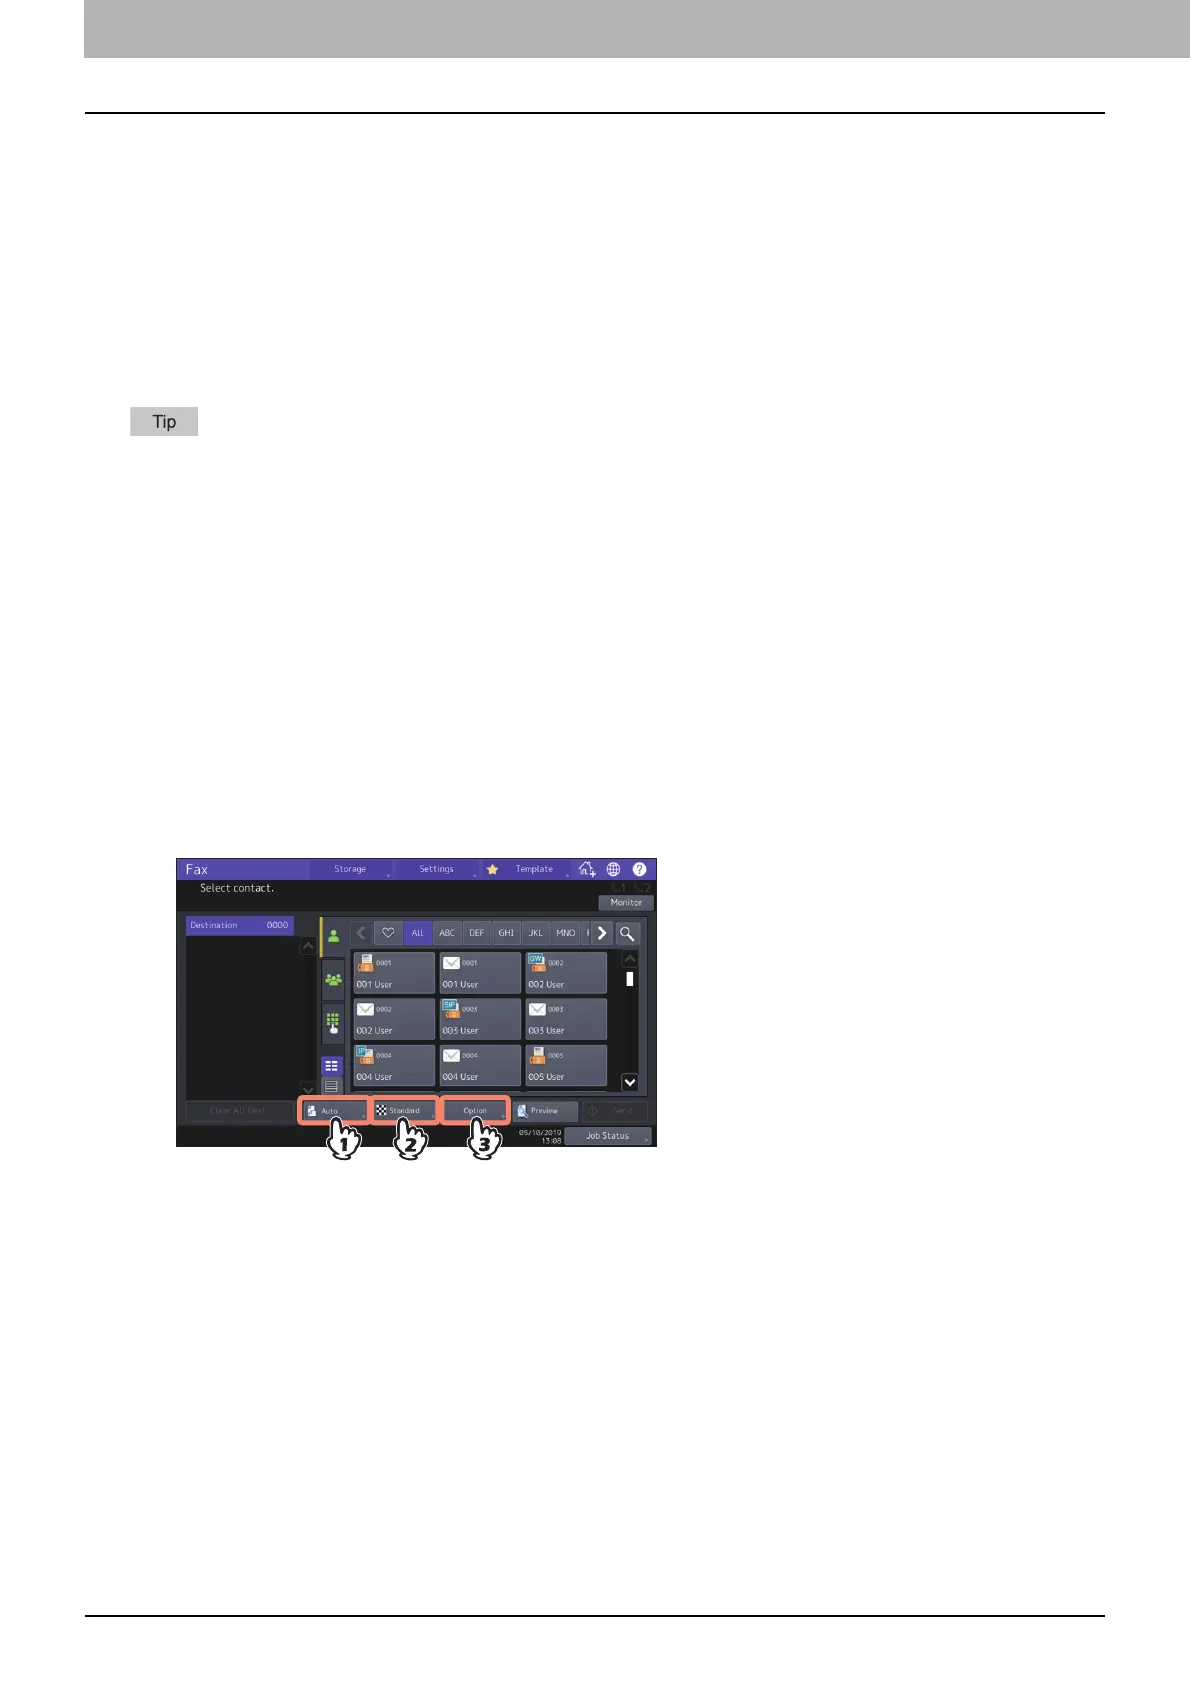
Sending an IP Fax
This section describes the basic procedures to send an IP Fax. For details of in-depth operations, see the page under
each procedure as required.
1
Place the original(s).
Check the original size and scanning range, etc. Place the original(s) in the correct direction on the original glass
or ADF.
For details about the operation, refer to the Fax Guide.
2
Press [Fax] on the Home screen.
The fax screen is displayed. If you leave the screen unattended for the period of the auto clear setting time (45
sec. by default), the screen returns to the default one automatically.
3
Set the original size, resolution and other necessary conditions.
For details about the transmission condition setting screen, refer to the Fax Guide.
 Loading...