4.Using the IP Fax Function
Using the IP Fax Function from the N/W-Fax Driver 69
Using the IP Fax Function
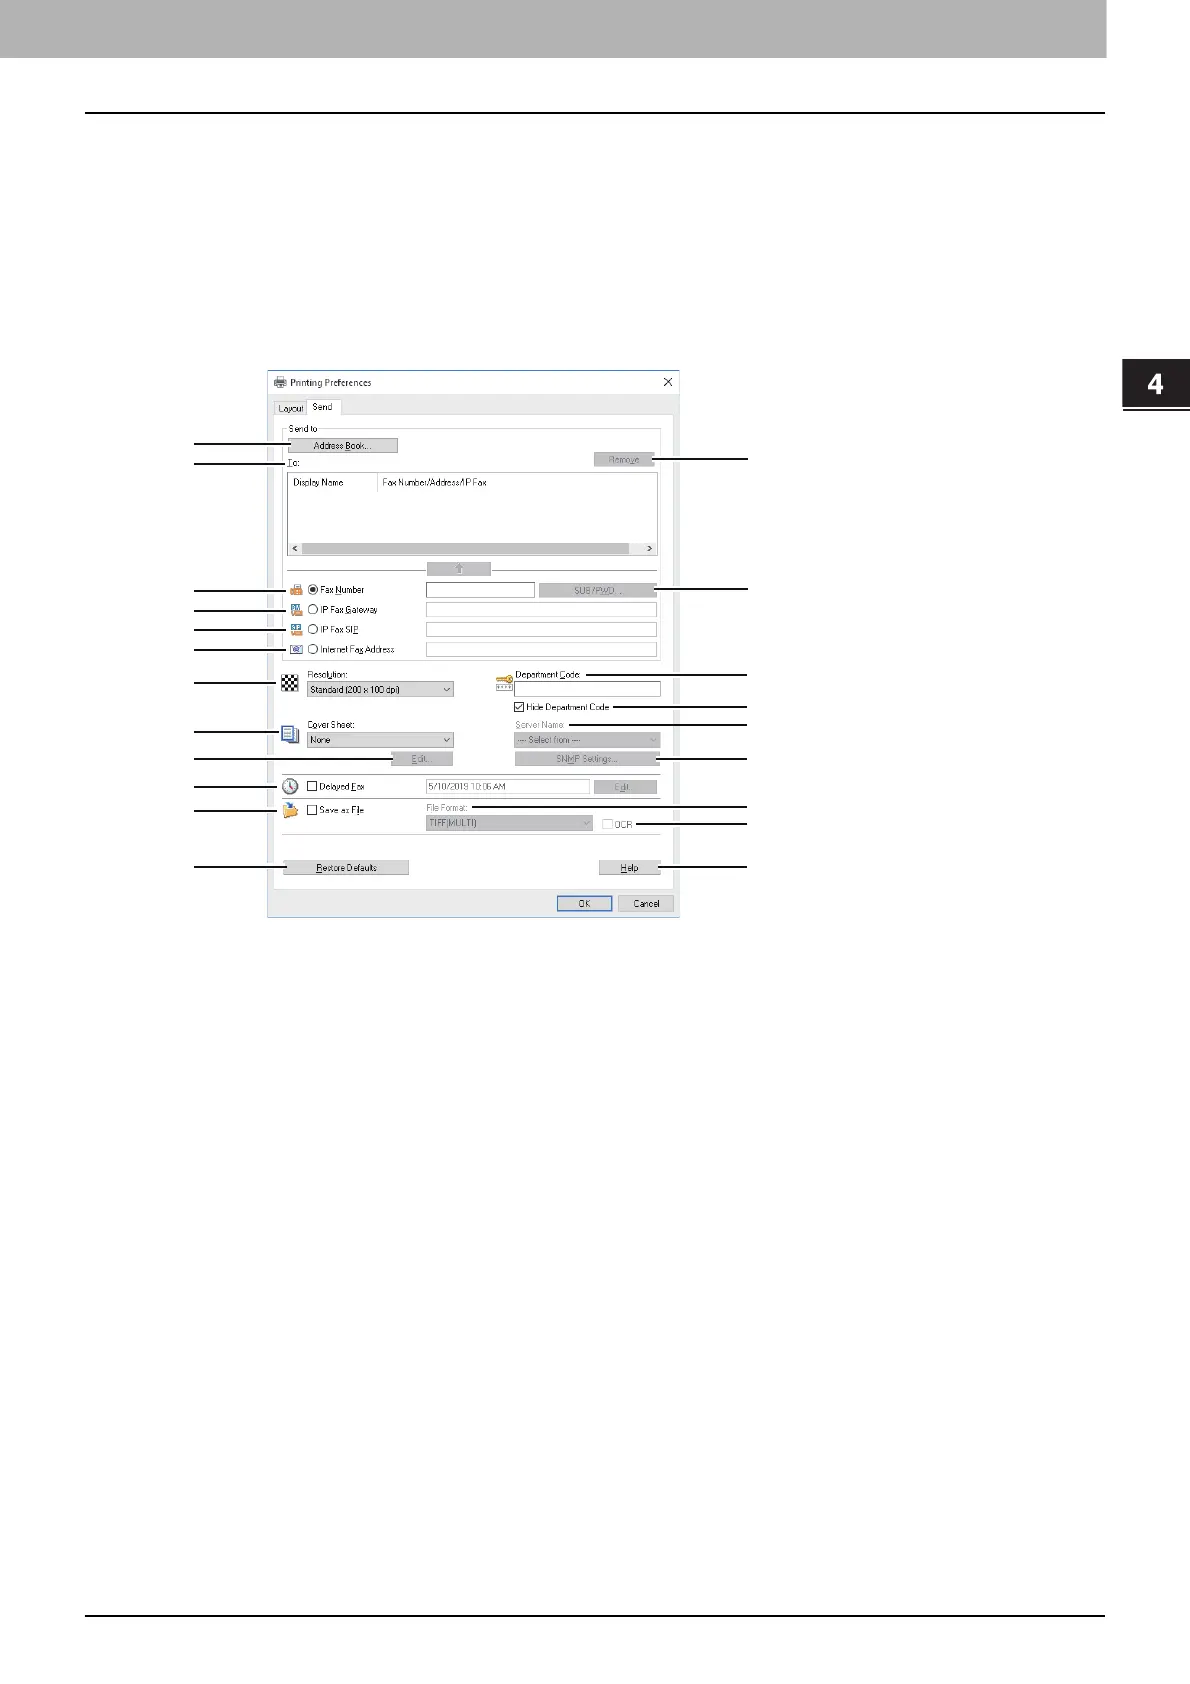
Setting up the [Send] tab
In the [Send] tab, you can specify the recipients and how the IP Fax will be sent.
Setting the N/W-Fax driver options by displaying the printer properties from the [Print] dialog box within an
application will establish the settings for the current N/W-Fax job. The N/W-Fax driver option settings specific to each
N/W-Fax job set using this method will become disabled when the application is closed.
1
Click the [File] menu and select [Print] on an application.
2
Select [TOSHIBA e-STUDIO Fax] and click [Properties] or [Preferences].
1. [Address Book]
Runs AddressBook Viewer to select the recipients from the address book.
P.61 “Selecting recipients from the address book”
2. To
This displays the specified recipients list.
For details about the setting, refer to the Fax Guide.
The Display Name in [To] can be changed by double-clicking it.
3. [Delete]
Deletes the selected recipients from the list.
P.68 “Removing recipients”
4. Fax Number
Enters the recipient’s fax number directly.
P.60 “Entering recipients from the keyboard”
5. [SUB/PWD]
Click this to display the [SUB/PWD] dialog box. You can add a sub address and a password to the entered fax
number.
P.60 “Entering recipients from the keyboard”
6. IP Fax gateway
Enters the recipient’s fax number directly to send an IP Fax to a G3 Fax machine via a T.38 supporting gateway.
P.60 “Entering recipients from the keyboard”
21
19
5
3
10
12
18
1
2
4
6
7
11
9
14
15
13
16
8
17
20
 Loading...