4.Using the IP Fax Function
78 Using the IP Fax Function from TopAccess
Entering the destinations manually
You can add a destination manually to the Recipient List.
You cannot enter destinations if [Restriction of Destination Selection Method]-[Prohibit Direct Entry] is enabled.
For details about the operation of “Restriction of Destination Method”, refer to the TopAccess Guide.
For details about the [Recipient List] screen and the [Contact Property] screen, refer to the TopAccess Guide.
P.84 “IP Fax Received Forward (Admin)”
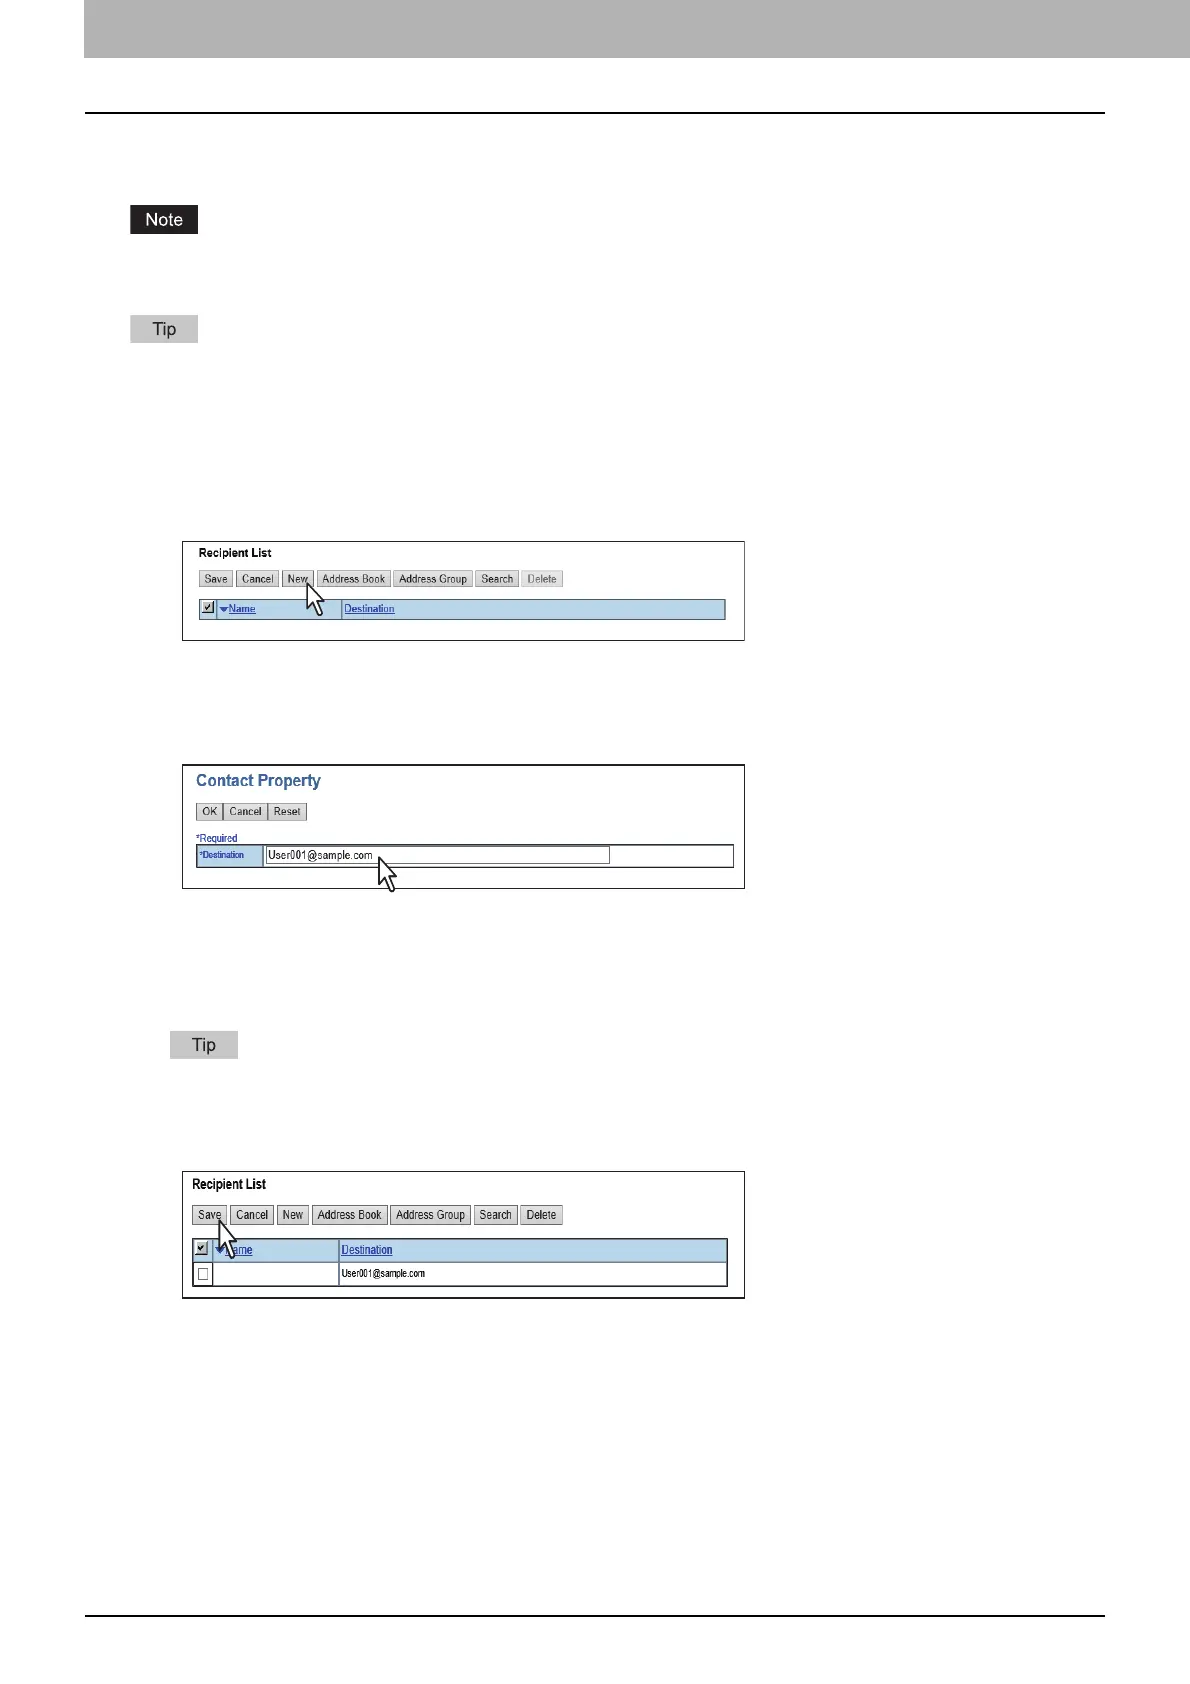
1
Click [Destination Setting] (when creating a Fax/Internet Fax agent) or [TO: Destination Setting] /
[CC: Destination Setting] / [BCC: Destination Setting] (when creating an Email agent) to open the
Recipient List page.
2
Click [New].
The Contact Property page is displayed.
3
Enter the E-mail address or IP Fax number of the destination in the [Destination] box and select
the destination’s fax type in the [Fax Type] box.
4
Click [OK].
The destination is added to the Recipient List page.
5
Repeat steps 2 to 4 to add all additional destinations that you require.
You can remove the destinations you added to the Recipient List before saving the destination settings.
For details, refer to the TopAccess Guide.
6
Click [Save].
The recipients are added as destinations.
 Loading...