4.Using the IP Fax Function
Using the IP Fax Function from the Touch Panel 55
Using the IP Fax Function
Example of how receiver information is printed on originals you receive
Receiver information is printed about 5 mm (0.2 inch) from the bottom edge of the received copy of the original.
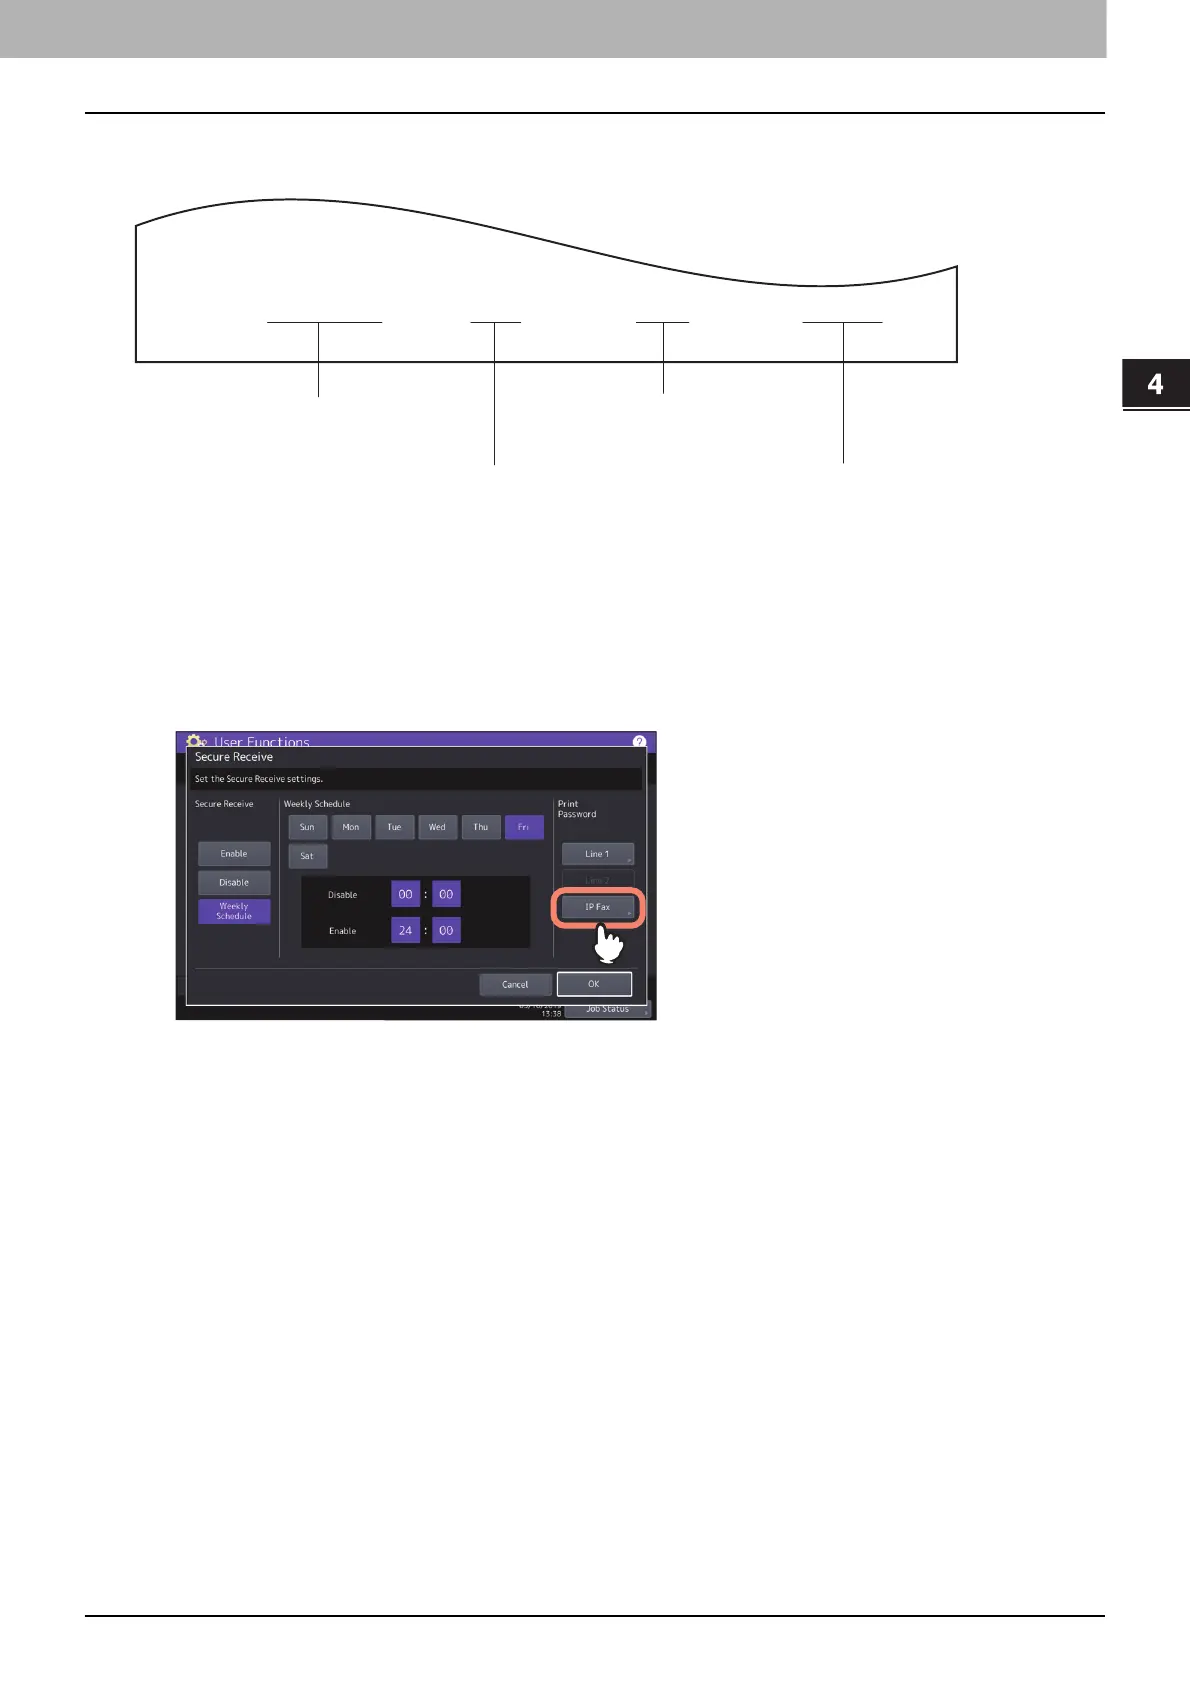
Setting the password for printing the secure receive function
The Secure Receive function allows you to store received IP Fax jobs in the equipment without printing them.
For details about the Secure Receive function, refer to the MFP Management Guide.
You can set a password for printing a received Secure Receive IP Fax jobs.
1
Select [IP Fax].
2
Enter the password in [New Password] and [Retype New Password], and then press [OK].
Up to 20 alphanumeric characters (including the following symbols) can be entered for the password.
You can use alphanumerics and the following symbols.
# $ ( ) * + , - . / : ; = ? @ \ ^ _ ` { | } ~
3
Press [OK].
RECEIVED 05
-
10
-
’19 15:08 FROM
-
Cccddd TO
-
Aaabbb P0001/0001
Date received
(automatically attached)
Remote IP Fax ID information
Receiver’s
ID name
Number of pages
Pages sent
 Loading...