SCXF-SVX01Q-EN
55
Connecting to Tracer Summit
WWAARRNNIINNGG
HHaazzaarrddoouuss VVoollttaaggee ww//CCaappaacciittoorrss!!
FFaaiilluurree ttoo ddiissccoonnnneecctt ppoowweerr aanndd ddiisscchhaarrggee
ccaappaacciittoorrss bbeeffoorree sseerrvviicciinngg ccoouulldd rreessuulltt iinn ddeeaatthh oorr
sseerriioouuss iinnjjuurryy..
DDiissccoonnnneecctt aallll eelleeccttrriicc ppoowweerr,, iinncclluuddiinngg rreemmoottee
ddiissccoonnnneeccttss aanndd ddiisscchhaarrggee aallll mmoottoorr ssttaarrtt//rruunn
ccaappaacciittoorrss bbeeffoorree sseerrvviicciinngg.. FFoollllooww pprrooppeerr
lloocckkoouutt//ttaaggoouutt pprroocceedduurreess ttoo eennssuurree tthhee ppoowweerr
ccaannnnoott bbee iinnaaddvveerrtteennttllyy eenneerrggiizzeedd.. FFoorr vvaarriiaabbllee
ffrreeqquueennccyy ddrriivveess oorr ootthheerr eenneerrggyy ssttoorriinngg
ccoommppoonneennttss pprroovviiddeedd bbyy TTrraannee oorr ootthheerrss,, rreeffeerr ttoo
tthhee aapppprroopprriiaattee mmaannuuffaaccttuurreerr’’ss lliitteerraattuurree ffoorr
aalllloowwaabbllee wwaaiittiinngg ppeerriiooddss ffoorr ddiisscchhaarrggee ooff
ccaappaacciittoorrss.. VVeerriiffyy wwiitthh aa CCAATT IIIIII oorr IIVV vvoollttmmeetteerr
rraatteedd ppeerr NNFFPPAA 7700EE tthhaatt aallll ccaappaacciittoorrss hhaavvee
ddiisscchhaarrggeedd..
FFoorr aaddddiittiioonnaall iinnffoorrmmaattiioonn rreeggaarrddiinngg tthhee ssaaffee
ddiisscchhaarrggee ooff ccaappaacciittoorrss,, sseeee PPRROODD--SSVVBB0066**--EENN..
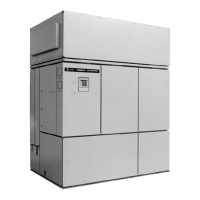
IntelliPak™ commercial self-contained (CSC) units
operate with Trane building automation software,
Tracer Summit version 10.0.4 or later or any OS2
operating system.
NNoottee:: Tape the non-insulated end of the shield on
shielded wire at the unit. Any connection
between the shield and ground will cause a
malfunction. If daisy-chained in the unit, splice
and tape the shields to prevent contact with
ground.
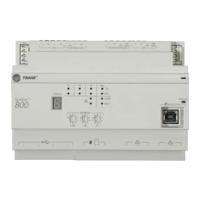
Communication Wiring
NNoottee:: Communication link wiring is a shielded, twisted
pair of wire and must comply with applicable
electrical codes.
An optional communication link provides a serial
communication interface (SCI) between Tracer Summit
and each commercial self-contained (CSC) unit in the
system. The CSC system can have a maximum of 12
CSC units per connection link to Tracer Summit. Use a
single 18 AWG shielded, twisted pair wire with
stranded, thinned copper conductors to establish each
communication link between Tracer Summit and each
unit.
Programming the Time Clock
Option
Setting the Time Clock
Use the following instructions to set the time clock:
IImmppoorrttaanntt:: Depress the reset key before beginning to
set time and program.
1. Select military (24:00 hr.) or AM/PM (12:00 hr.) time
mode by depressing and holding the “h” key while
pressing “+ 1h” key to toggle between military and
AM/PM. (AM appears in the display when in AM/PM
mode.)
2. Press and hold down “🕒” key.
3. If setting the time when daylight savings time is in
effect, press “+ 1h” key once (+ 1h will appear in
display).
4. Set hour with “h” key. If AM or PM does not appear
in display, the unit is in military time. See note
above to change display.
5. Set minutes with “m” key.
6. Press “Day” key repeatedly to the day of the week.
(1 is Monday, 7 is Sunday)
7. Release “🕒” key, colon will begin flashing.
NNoottee:: If keys h + or m + are kept depressed for longer
than 2 seconds, a rapid advance of figures will
result.
The “Digi 20” electronic time switch is freely
programmable for each day of the week in one minute
increments. For easy and quick programming, the
following 4 block programs are available:
• Monday through Sunday
• Monday through Saturday
• Monday through Friday
• Saturday and Sunday
Programming the Time Clock
Use the following instructions to program the time
clock:
1. Press “Prog.” key. 1234567 AM —:— will appear in
display. (Pressing “Prog.” key again, display will
show the number of free programs “Fr 20”). Press
again to RETURN to 1st program.
2. Press “👌”key,“◉” ON symbol will appear. Pressing
the key again will toggle to OFF “❍”. Select ON or
OFF for the program.
3. Press “h+” to select hour for switching time.
4. Press “m+” to select minute for switching time.
5. If the program is to occur every day of the week, (24
hour time control) ignore “Day” key and press
“Prog.” key to advance to program.
6. For 7 day time control, press “Day” key. 1 2 3 4 5 6
(Monday through Saturday) block of days appears
in display. Pressing “Day” key again, 1 2 3 4 5
(Monday through Friday) appears in display.
Repeated presses will cycle through all days of the
week and back to 1 through 7 (Monday through
Sunday). Select day or block of days desired.
7. Press “Prog.” key and repeat steps 2 through 6a to
enter additional programs of ON and OFF times.
(Note that more than one OFF time may be
programmed, enabling automatic control or
manual overrides.)
IInnssttaallllaattiioonn -- EElleeccttrriiccaall

 Loading...