SCXF-SVX01Q-EN
85
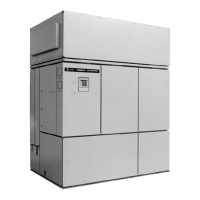
Maintenance
Service Access
Access unit controls through the front, top left panel.
The panel is secured with two quick- acting fasteners
and an automatic latch, which require a screwdriver to
remove.
Removable unit panels on the right-hand side provide
access to compressors, fan, motor belts, extended
grease line fittings, and drive side bearing. On the
unit’s left side, removable panels allow access to the
expansion valves, filter driers, refrigerant sight glasses,
liquid line valves, opposite drive fan bearing, extended
grease line fittings, condensers, and waterside
economizer control valve.
The compressor, condenser, and fan motor access
panels are secured with quick acting fasteners. Fast
thread screws secure access panels for economizer
coils, evaporator coils expansion valves, water valves,
and left fan bearing. Access to other components
requires removal of semipermanent panels secured
with sheet metal screws. During operation, sight
glasses are viewable through the portholes on the
unit’s left upper panel.
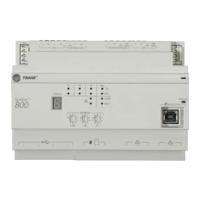
Variable Frequency Drive (VFD)
WWAARRNNIINNGG
HHaazzaarrddoouuss VVoollttaaggee ww//CCaappaacciittoorrss!!
FFaaiilluurree ttoo ddiissccoonnnneecctt ppoowweerr aanndd ddiisscchhaarrggee
ccaappaacciittoorrss bbeeffoorree sseerrvviicciinngg ccoouulldd rreessuulltt iinn ddeeaatthh oorr
sseerriioouuss iinnjjuurryy..
DDiissccoonnnneecctt aallll eelleeccttrriicc ppoowweerr,, iinncclluuddiinngg rreemmoottee
ddiissccoonnnneeccttss aanndd ddiisscchhaarrggee aallll mmoottoorr ssttaarrtt//rruunn
ccaappaacciittoorrss bbeeffoorree sseerrvviicciinngg.. FFoollllooww pprrooppeerr
lloocckkoouutt//ttaaggoouutt pprroocceedduurreess ttoo eennssuurree tthhee ppoowweerr
ccaannnnoott bbee iinnaaddvveerrtteennttllyy eenneerrggiizzeedd.. FFoorr vvaarriiaabbllee
ffrreeqquueennccyy ddrriivveess oorr ootthheerr eenneerrggyy ssttoorriinngg
ccoommppoonneennttss pprroovviiddeedd bbyy TTrraannee oorr ootthheerrss,, rreeffeerr ttoo
tthhee aapppprroopprriiaattee mmaannuuffaaccttuurreerr’’ss lliitteerraattuurree ffoorr
aalllloowwaabbllee wwaaiittiinngg ppeerriiooddss ffoorr ddiisscchhaarrggee ooff
ccaappaacciittoorrss.. VVeerriiffyy wwiitthh aa CCAATT IIIIII oorr IIVV vvoollttmmeetteerr
rraatteedd ppeerr NNFFPPAA 7700EE tthhaatt aallll ccaappaacciittoorrss hhaavvee
ddiisscchhaarrggeedd..
FFoorr aaddddiittiioonnaall iinnffoorrmmaattiioonn rreeggaarrddiinngg tthhee ssaaffee
ddiisscchhaarrggee ooff ccaappaacciittoorrss,, sseeee PPRROODD--SSVVBB0066**--EENN..
The VFD access panel is hinged to allow service access
to the fan motor and belt drive components that are
located behind it. To swing the panel open:
1. Remove the unit center cover panel to the left of the
VFD panel.
2. Remove and discard the sheet metal shipping
screws along the top and bottom edges of the VFD
panel.
3. Disconnect the communications cable from the
keypad on the VFD door panel.
4. Turn the two slotted-head fasteners on the right
edge of the VFD panel fully counterclockwise.
5. Pull on the handle to swing the panel 180°.
To close and reattach the panel, reverse the procedures
listed above.
NNootteess::
• To secure the panel in the open position
during service procedures, attach the chain
mounted to the cabinet frame behind the
unit center cover panel to the chain retainer
notch on the edge of the VFD panel.
• Verify that all wires are in their proper
position and not rubbing before replacing
the panel.
• Panel weight rating = 225 lbs. total,
including factory-installed components.
Air Filters
WWAARRNNIINNGG
HHaazzaarrddoouuss VVoollttaaggee ww//CCaappaacciittoorrss!!
FFaaiilluurree ttoo ddiissccoonnnneecctt ppoowweerr aanndd ddiisscchhaarrggee
ccaappaacciittoorrss bbeeffoorree sseerrvviicciinngg ccoouulldd rreessuulltt iinn ddeeaatthh oorr
sseerriioouuss iinnjjuurryy..
DDiissccoonnnneecctt aallll eelleeccttrriicc ppoowweerr,, iinncclluuddiinngg rreemmoottee
ddiissccoonnnneeccttss aanndd ddiisscchhaarrggee aallll mmoottoorr ssttaarrtt//rruunn
ccaappaacciittoorrss bbeeffoorree sseerrvviicciinngg.. FFoollllooww pprrooppeerr
lloocckkoouutt//ttaaggoouutt pprroocceedduurreess ttoo eennssuurree tthhee ppoowweerr
ccaannnnoott bbee iinnaaddvveerrtteennttllyy eenneerrggiizzeedd.. FFoorr vvaarriiaabbllee
ffrreeqquueennccyy ddrriivveess oorr ootthheerr eenneerrggyy ssttoorriinngg
ccoommppoonneennttss pprroovviiddeedd bbyy TTrraannee oorr ootthheerrss,, rreeffeerr ttoo
tthhee aapppprroopprriiaattee mmaannuuffaaccttuurreerr’’ss lliitteerraattuurree ffoorr
aalllloowwaabbllee wwaaiittiinngg ppeerriiooddss ffoorr ddiisscchhaarrggee ooff
ccaappaacciittoorrss.. VVeerriiffyy wwiitthh aa CCAATT IIIIII oorr IIVV vvoollttmmeetteerr
rraatteedd ppeerr NNFFPPAA 7700EE tthhaatt aallll ccaappaacciittoorrss hhaavvee
ddiisscchhaarrggeedd..
FFoorr aaddddiittiioonnaall iinnffoorrmmaattiioonn rreeggaarrddiinngg tthhee ssaaffee
ddiisscchhaarrggee ooff ccaappaacciittoorrss,, sseeee PPRROODD--SSVVBB0066**--EENN..
Filter access doors are on the unit’s left side. Filter
access for the 2" filter rack on optional steam and hot
water coils and airside economizers is also on the left
side of the unit. To replace throwaway filters, remove
the dirty elements and install new filters with the filter’s
directional arrows pointing toward the fan. Verify that
no air bypasses the filters. See Figure 38, p. 86 and
Figure 39, p. 86 for proper filter placement.

 Loading...