Repairs and Adjustments
Phaser 3100 MFP 04/08 4-87
REP 36 Main Motor
Parts List on: PL 11
WARNING
Switch off the electricity to the machine. Disconnect the power cord from the customer supply
while performing tasks that do not need electricity. Electricity can cause death or injury. Moving
parts can cause injury.
Preparation
• Remove the paper tray.
• Remove the print cartridge.
• Remove the output tray assembly, REP 14.
• Remove the laser unit, REP 24
.
Removal
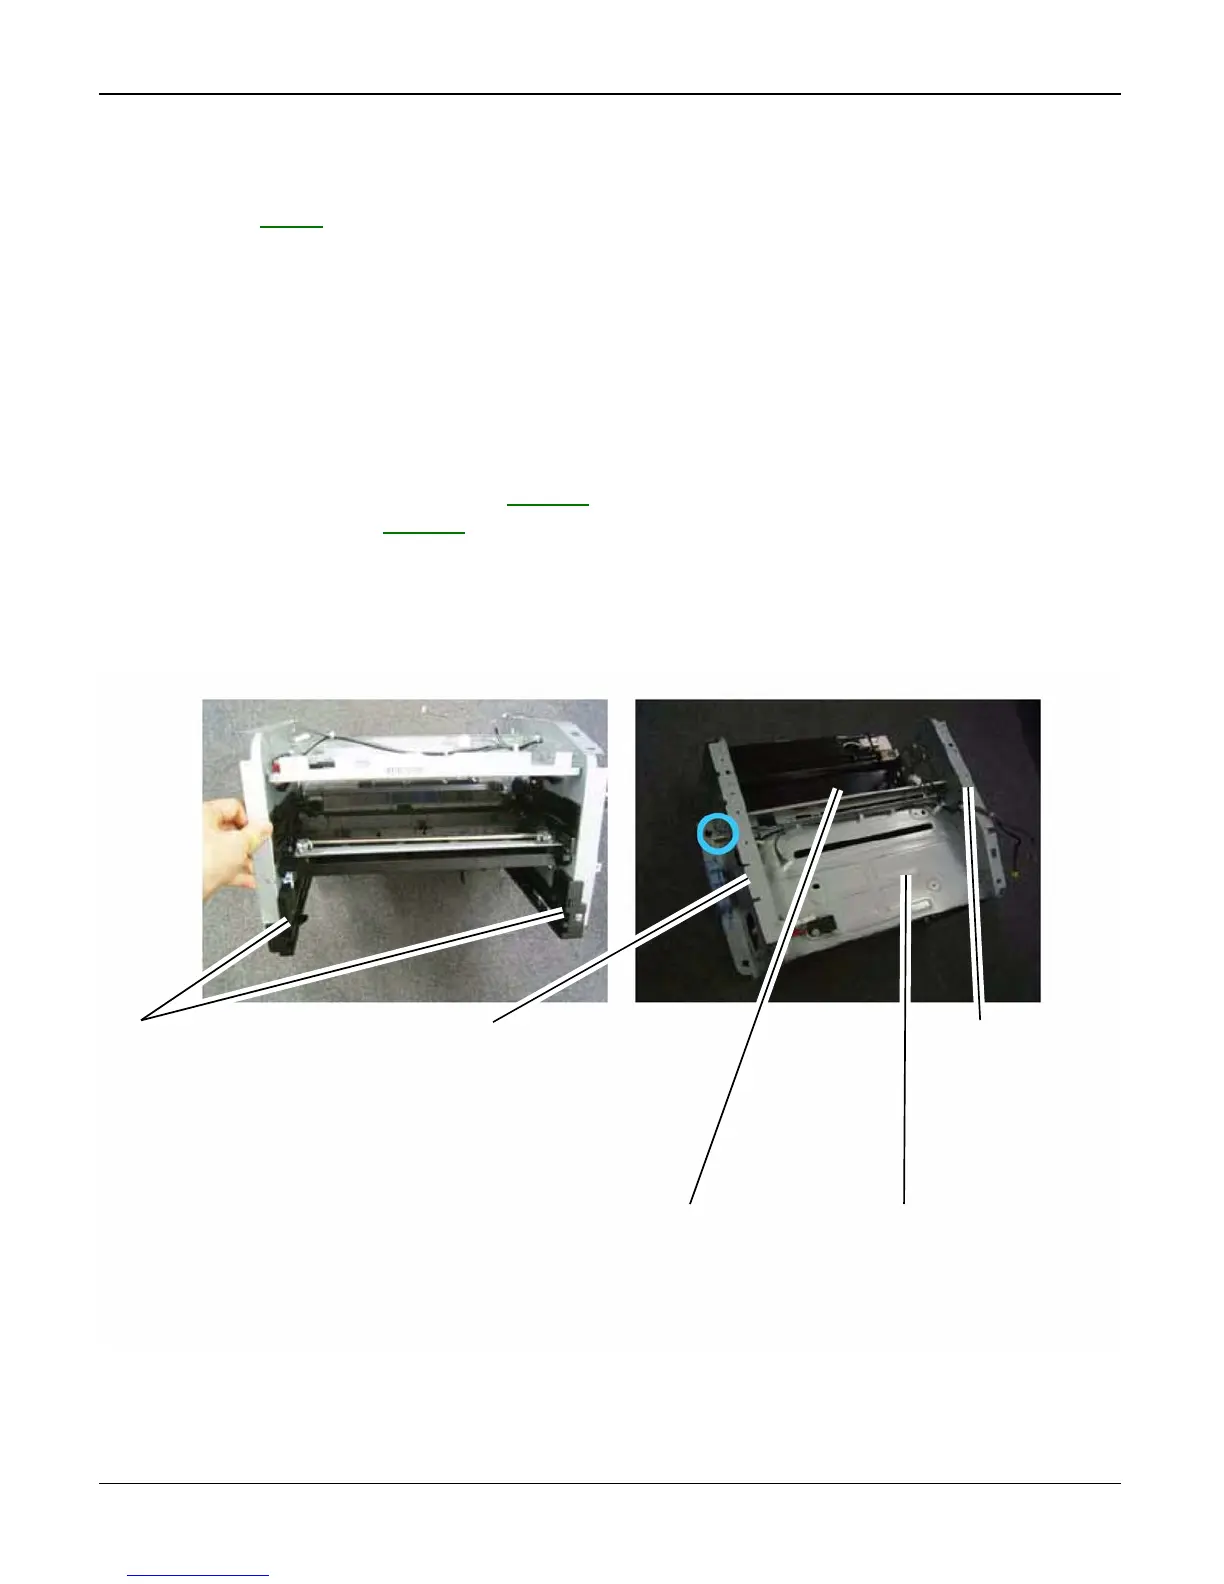
1. Remove the surrounding components, Figure 1 (detail Figure 2).
Figure 1
1
Remove the paper
tray guides, 2
screws
2
Remove the left
shield, 13 screws
and 2 screws at the
bottom
3
Remove the
right shield, 9
screws
4
Remove the laser
shield, 4 screws
5
Remove the
guide shield, 4
screws
6
Remove the main motor (circled in blue), 3
screws and 1 harness

 Loading...