Repairs and Adjustments
4-40 04/08 Phaser 3100 MFP
REP 16 Scanner Assembly
Parts List on: PL 2
WARNING
Switch off the electricity to the machine. Disconnect the power cord from the customer supply
while performing tasks that do not need electricity. Electricity can cause death or injury. Moving
parts can cause injury.
Preparation
• Print the machine’s parameters (user, administrator and technical) and the activity counter
values in order to keep a record ( 5 6). You can also store user parameters and directory
entries on a smart card ( * 6) and restore them ( * 9) after the machine is serviced.
• Remove the printer front door and the side covers, REP 3
.
• Remove the CPU shield plate, REP 11
.
Removal
1. Disconnect the scanner connector from the CPU board and remove it from its ferrite tube and
cable guide.
CAUTION
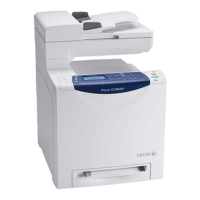
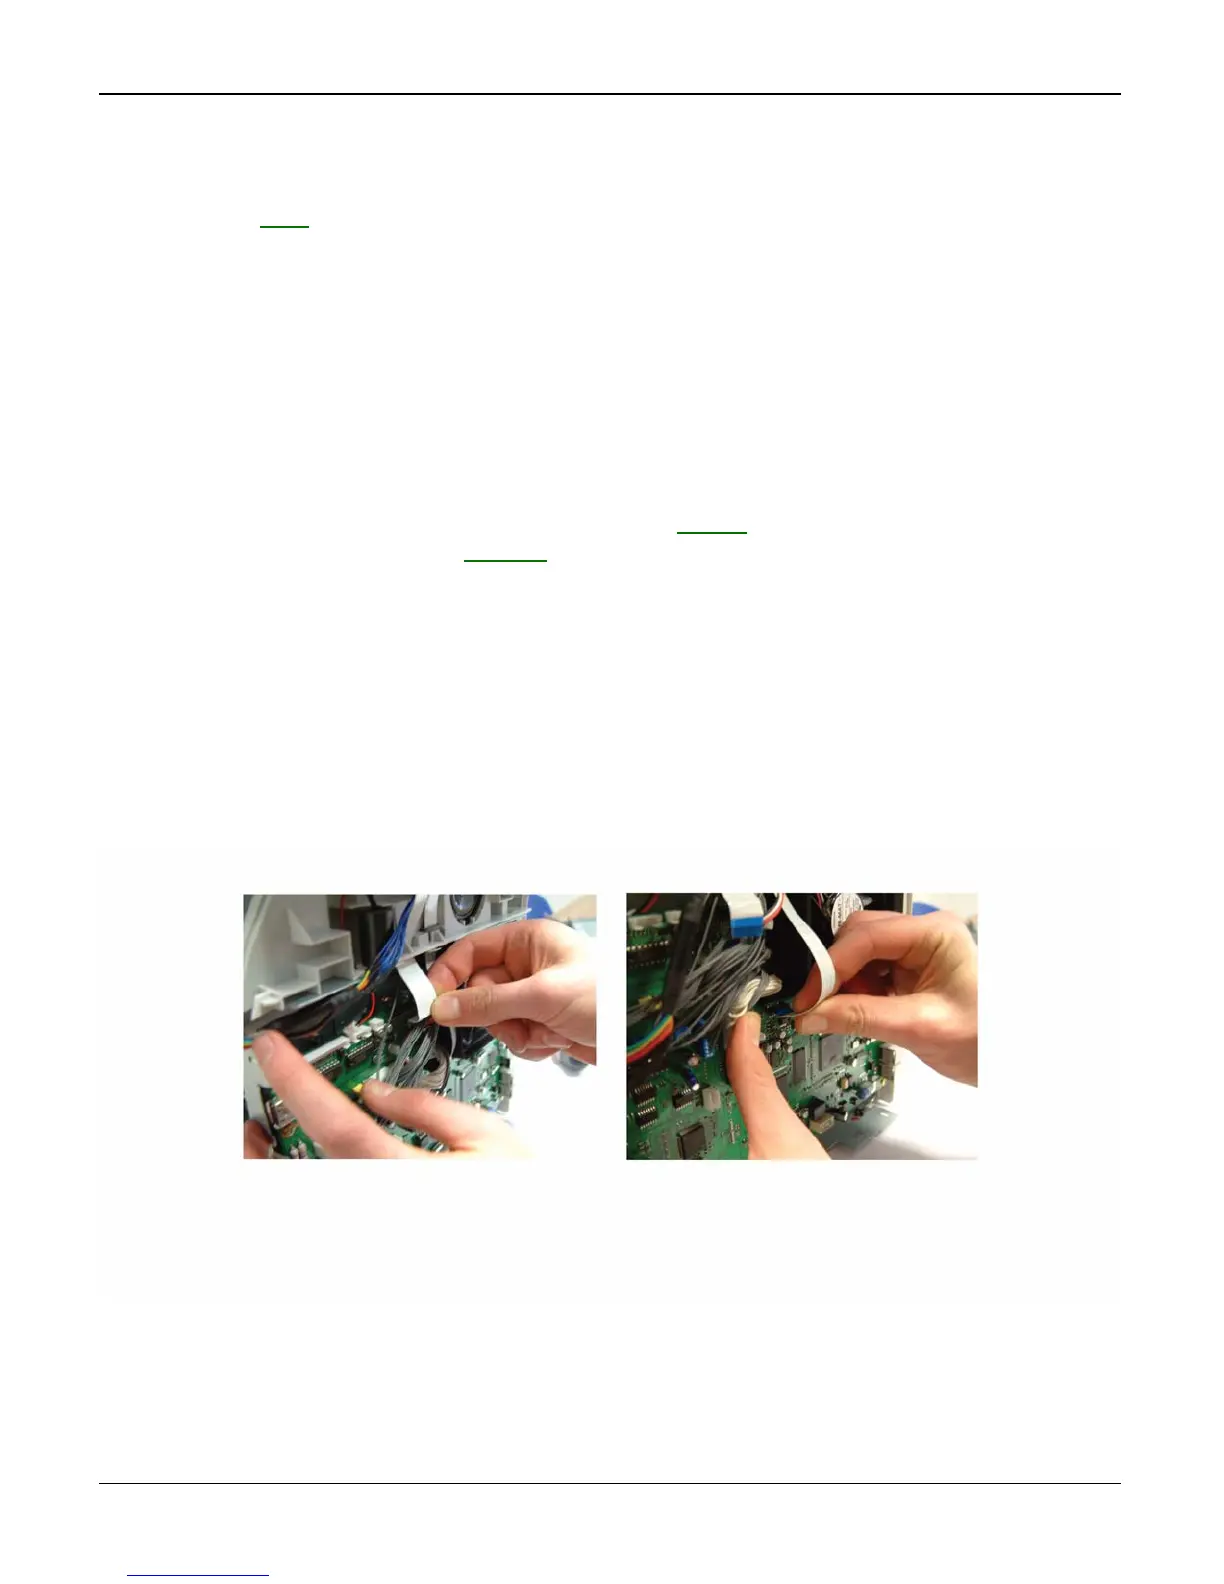
Before removing the ribbon connections make a note of the correct connection positions.
2. Disconnect the front panel ribbon cable and the CIS ribbon cable from the CPU board, Figure
1.
Figure 1
Panel ribbon connection CIS ribbon connection

 Loading...