Chapter 3: Getting Started with the Base Targeted Reference Design
34 www.xilinx.com ZC702 and ZVIK Getting Started Guide
UG926 (v3.0.1) February 12, 2013
Note:
If the evaluation kit design files were downloaded online, copy all the files within the
zynq_base_trd_14.x/sd_image folder directly onto the primary partition of the
SD MMC card (which is formatted as FAT32) at the root level using an SD MMC card reader.
The files in the SD MMC card should match the list described in SD MMC flash card
containing TRD binaries formatted with FAT32, page 30.
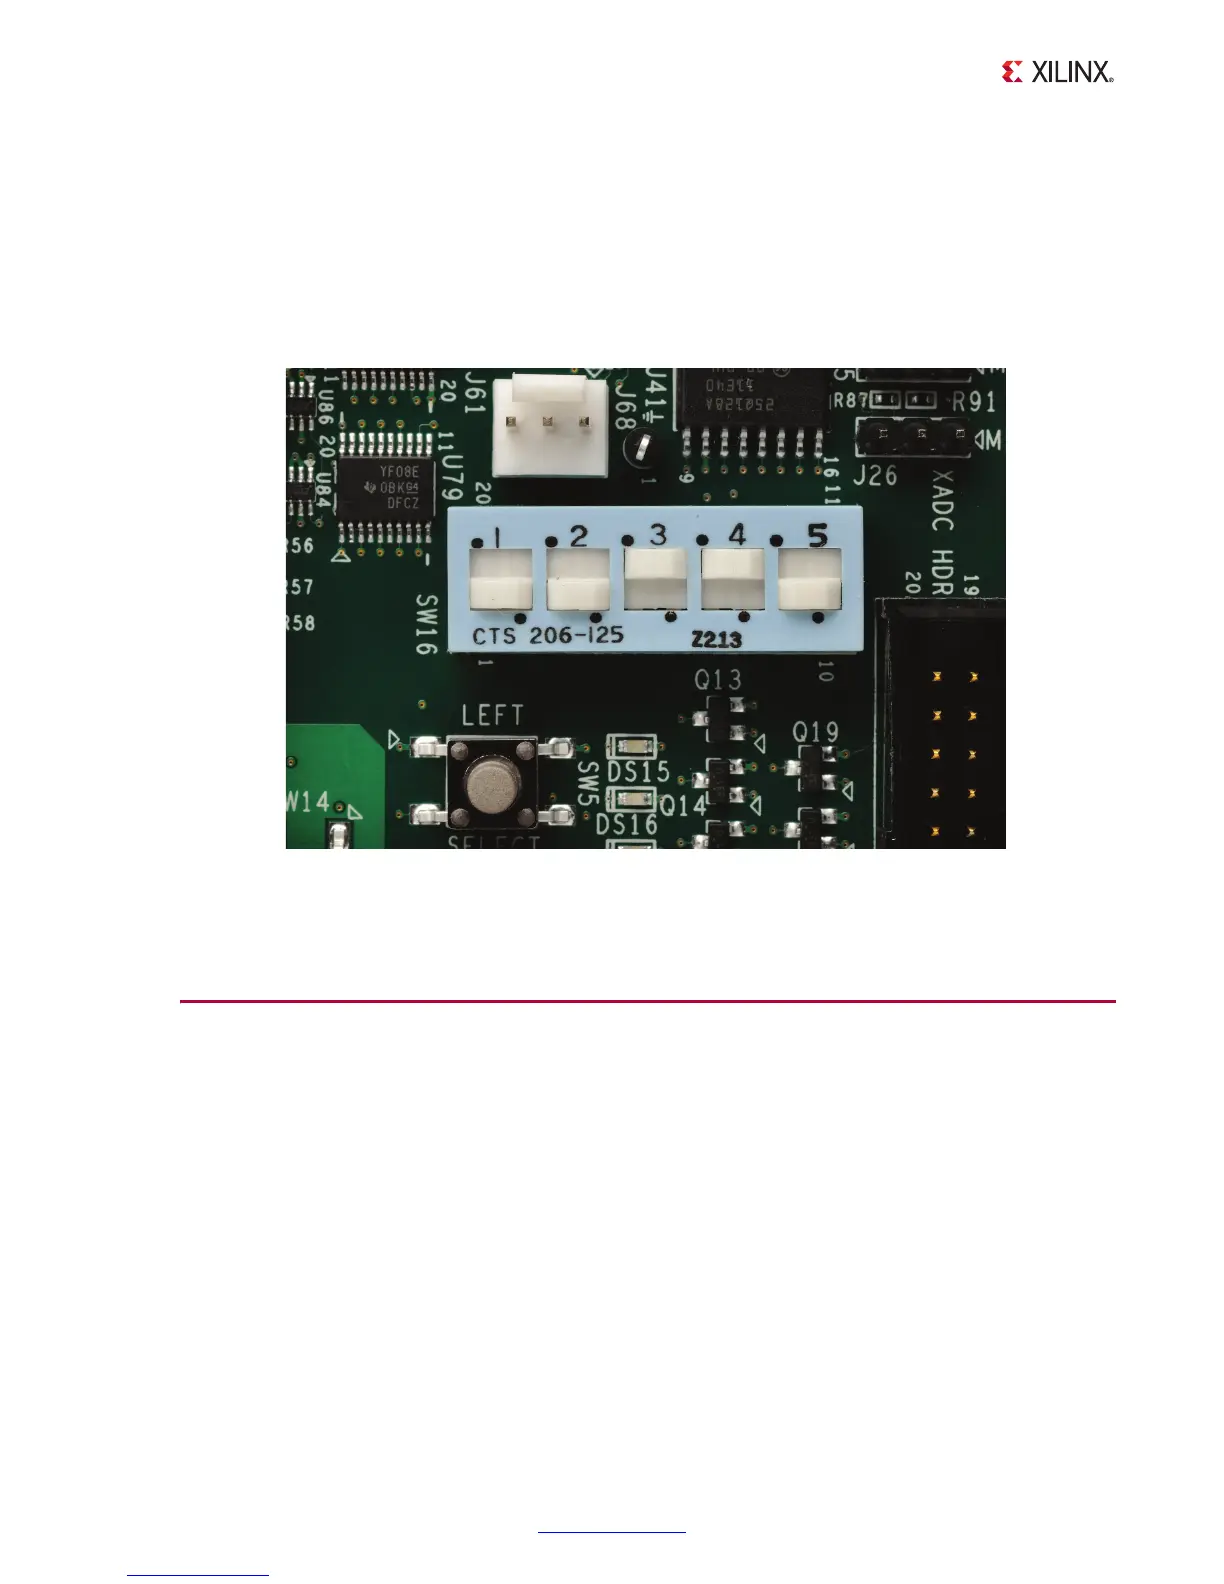
4. Make sure the switches are set as shown in Figure 3-4, which allows the ZC702 board to
boot from the
SD MMC card.
5. Make sure the display monitor is set for HDMI or DVI 1920 x 1080.
Running the Qt-Based GUI Application
Demonstration
1. Power on the ZC702 board. The default binary Linux device tree (devicetree.dtb)
configures and runs the video demonstration for 1080p video-out resolution.
2. Start the installed UART terminal program on your host PC (e.g., Tera Term Pro on a
Windows PC, GtkTerm on a Linux PC).
Use the following UART configuration: Baud rate = 115200, bits = 8, parity = none, and
stop bits = 1.
Note:
This step is required to view debug information or to run the UART Menu-Based
Demonstration application.
X-Ref Target - Fi gure 3-4
Figure 3-4: Switch Settings for the Mode Switch to Boot from the SD MMC Card
 Loading...