6 - 17
CHAS
FRONT BRAKE
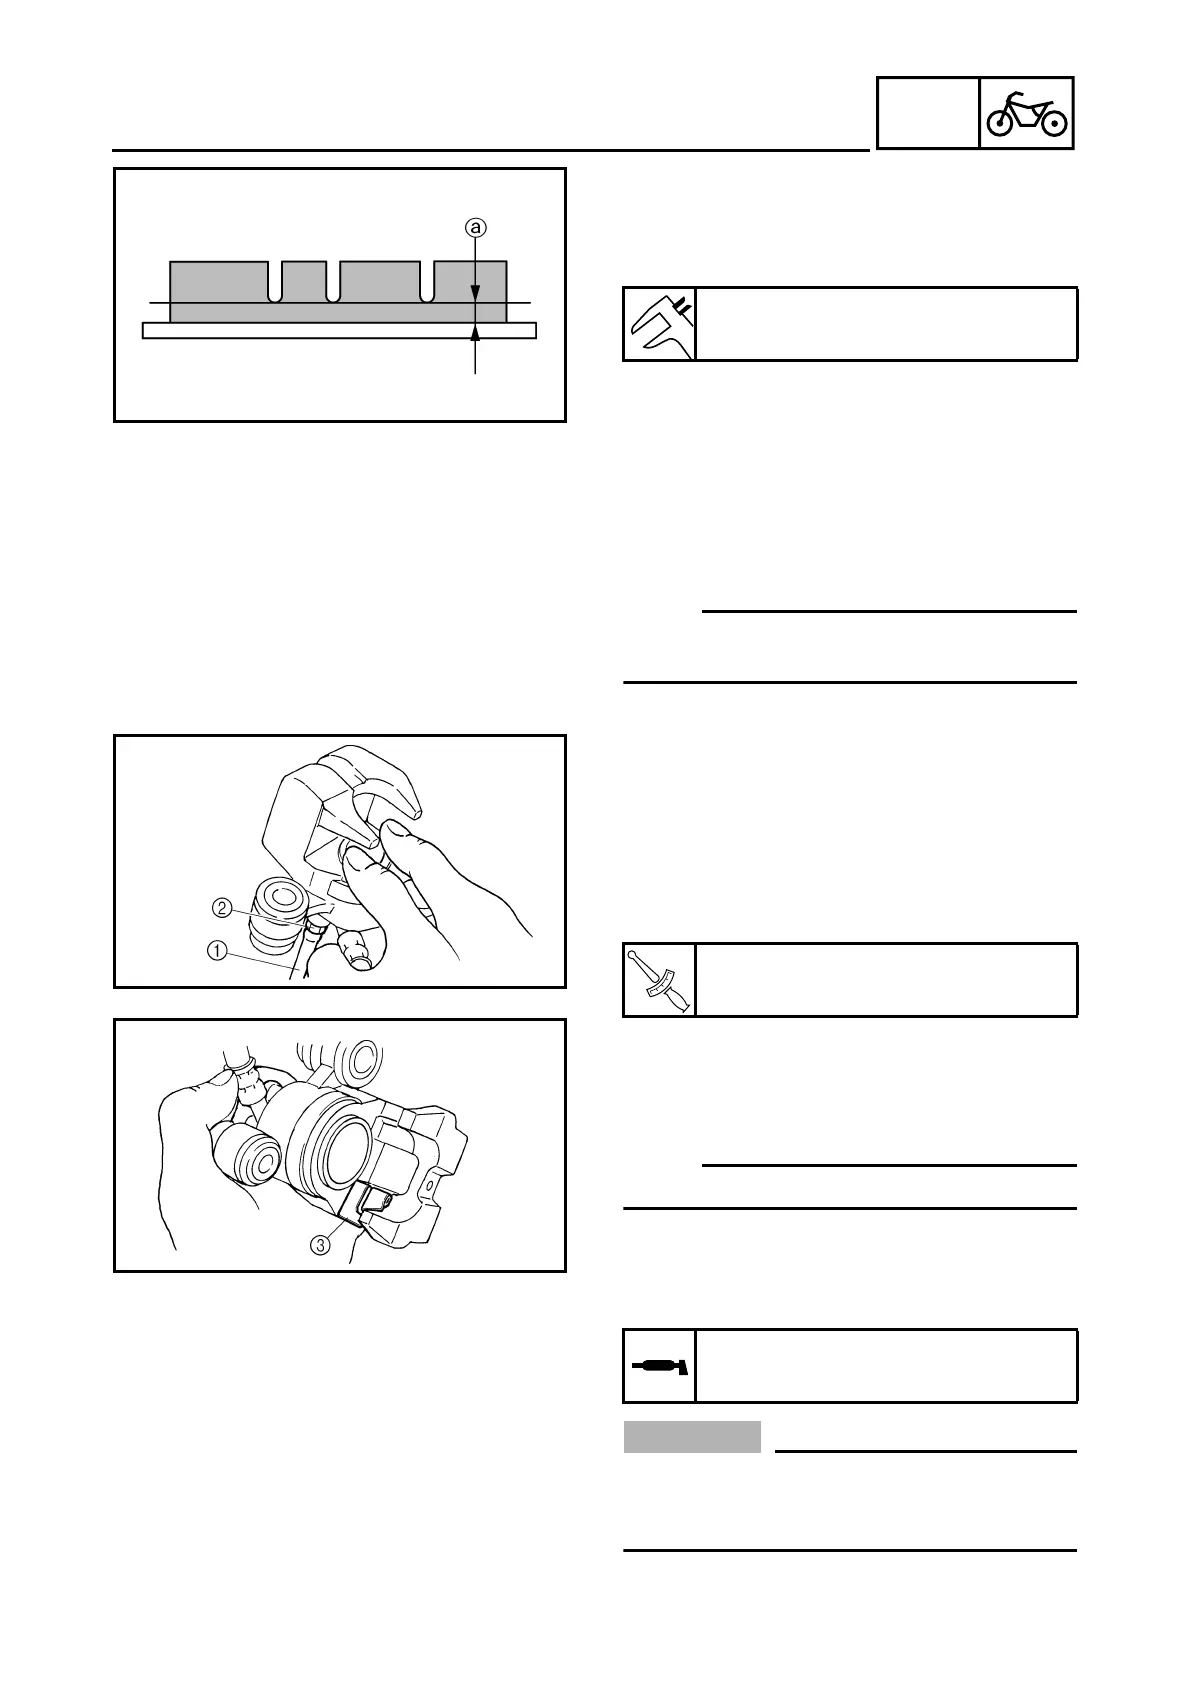
3. Measure:
• brake pad wear limit a
Out of specification → Replace the brake
pads as a set.
Brake pad wear limit
0.8 mm (0.031 in)
4. Install:
• brake pad shim
(onto the brake pad)
• brake pads
• brake pad spring
NOTE:
_
Always install new brake pads, a new brake
pad shim and a new brake pad spring as a set.
▼▼▼▼ ▼ ▼▼▼▼ ▼ ▼▼▼▼ ▼ ▼▼▼▼ ▼ ▼▼▼▼ ▼ ▼▼▼▼ ▼▼▼
a. Connect a clear plastic hose 1 tightly to the
bleed screw 2. Put the other end of the
hose into an open container.
b. Loosen the bleed screw and push the brake
caliper piston into the brake caliper with
your fingers.
c. Tighten the bleed screw.
d. Install a new brake pad shim onto the new
brake pad.
e. Install a new brake pad spring 3 and new
brake pads.
NOTE:
_
Install the brake pad spring as shown.
▲▲▲▲ ▲ ▲▲▲▲ ▲ ▲▲▲▲ ▲ ▲▲▲▲ ▲ ▲▲▲▲ ▲ ▲▲▲▲ ▲▲▲
5. Lubricate:
• brake caliper bolts
CAUTION:
_
• Do not allow grease to contact the brake
pads.
• Remove any excess grease.
T
R
.
.
Bleed screw
6 Nm (0.6 m · kg, 4.3 ft · lb)
Recommended lubricant
Lithium-soap-based grease
 Loading...