6 - 18
CHAS
FRONT BRAKE
6. Install:
• brake pad holding bolt
• pin
• brake caliper
• brake caliper upper bolt
• brake caliper lower bolt
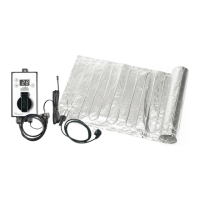
• brake hose holder 1
• brake hose holder bolt
NOTE:
_
Insert the end a of the brake hose holder 1
into the hole b in the outer tube, and then
install the brake hose holder.
7. Check:
• brake fluid level
Below the minimum level mark a → Add
the recommended brake fluid to the proper
level.
Refer to “CHECKING THE BRAKE FLUID
LEVEL” in chapter 3.
8. Check:
• brake lever operation
Soft or spongy feeling → Bleed the brake
system.
Refer to “BLEEDING THE HYDRAULIC
BRAKE SYSTEM” in chapter 3.
T
R
.
.
10 Nm (1.0 m · kg, 7.2 ft · lb)
New
T
R
.
.
43 Nm (4.3 m · kg, 31 ft · lb)
T
R
.
.
23 Nm (2.3 m · kg, 17 ft · lb)
T
R
.
.
7 Nm (0.7 m · kg, 5.1 ft · lb)
a
EAS00618
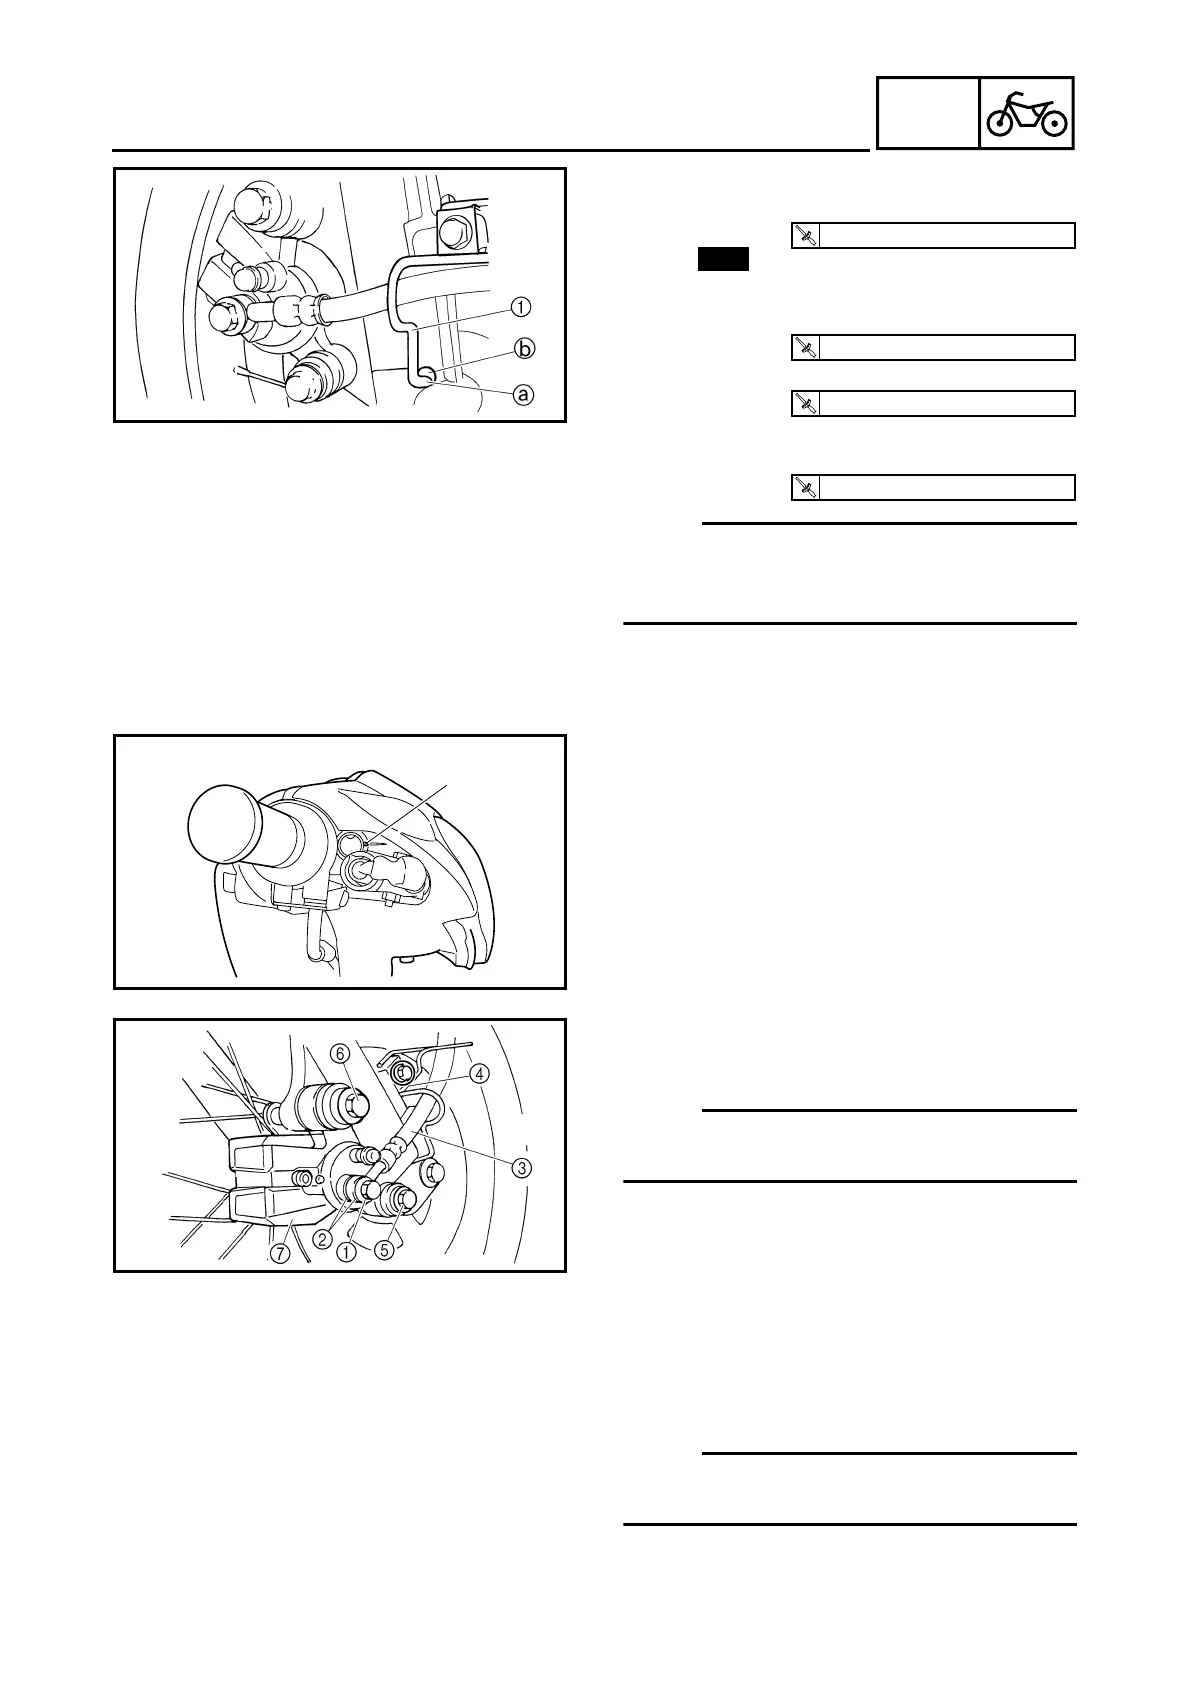
DISASSEMBLING THE FRONT BRAKE
CALIPER
NOTE:
_
Before disassembling the brake caliper, drain
the brake fluid from the entire brake system.
1. Remove:
• union bolt 1
• copper washers 2
• brake hose 3
• brake hose holder 4
• brake caliper lower bolt 5
• brake caliper upper bolt 6
• brake caliper 7
NOTE:
_
Put the end of the brake hose into a container
and pump out the brake fluid carefully.
 Loading...