&DOLEUDWLRQ
3.2.4. Updating revolution counters
3HAC 16578-1 Revision: E44
© Copyright 2003-2007 ABB. All rights reserved.
6WHS6WRULQJWKHUHYROXWLRQFRXQWHUVHWWLQJZLWKWKH)OH[3HQGDQW
This procedure details the second step when updating the revolution counter; storing the
revolution counter setting with the FlexPendant (RobotWare 5.0).
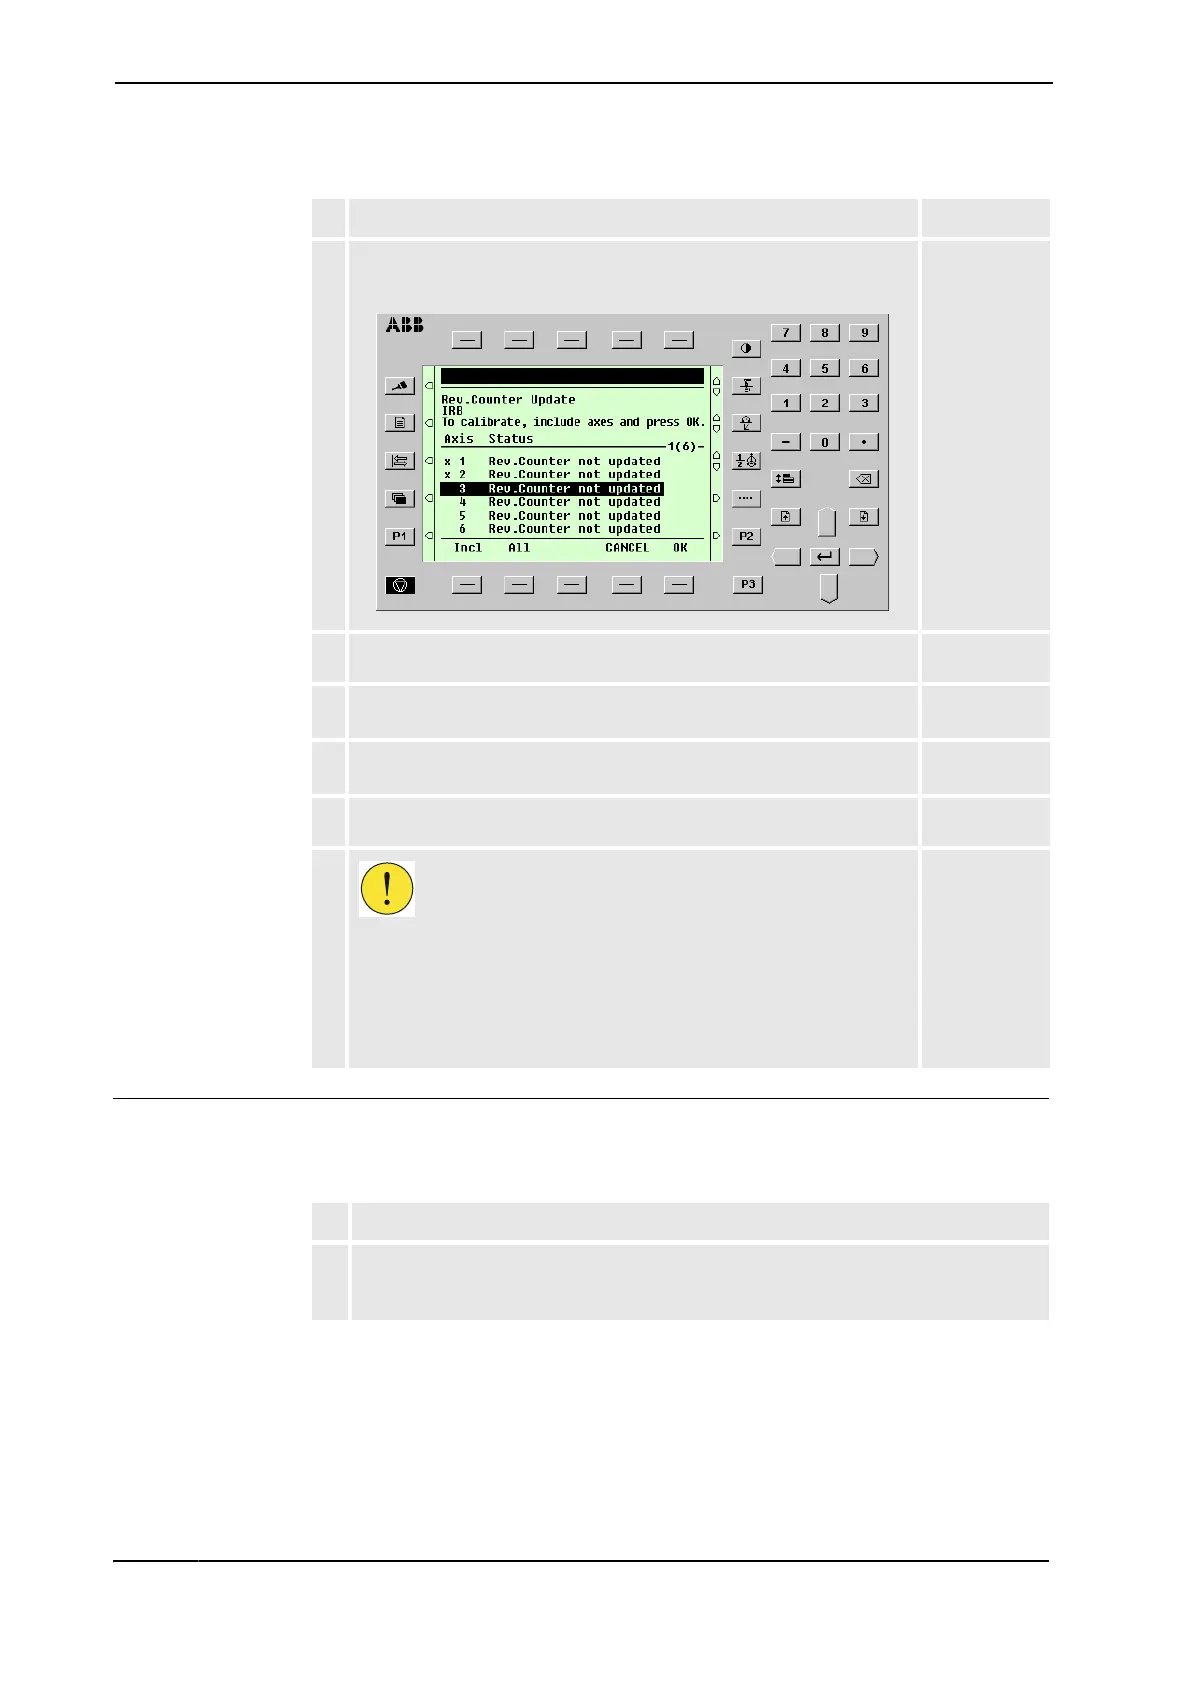
3. Select the desired unit and choose Rev Counter Update from the
Calib menu.
The Revolution Counter Update window appears.
xx0100000202
4. Select the desired axis and press Incl to include it (it will be marked
with an x) or press All to select all axes.
5. Press OK when all axes that are to be updated are marked with an x.
CANCEL returns to the Calibration window.
6. Press OK again to confirm and start the update.
CANCEL returns to the Revolution Counter Update window.
7. At this point, it is UHFRPPHQGHG that the revolution counter values are
saved to a diskette.
Not required.
8.
&$87,21
If a revolution counter is incorrectly updated, it will cause incorrect robot
positioning, which in turn may cause damage or injury!
Check the calibration position very carefully after each update.
How to perform the check is detailed in section &KHFNLQJWKHFDOLEUDWLRQ
SRVLWLRQRQSDJH.
$FWLRQ 1RWH
$FWLRQ
1. On the $%% menu, tap &DOLEUDWLRQ.
All mechanical units connected to the system are shown along with their calibration
status.
&RQWLQXHG
&RQWLQXHVRQQH[WSDJH
 Loading...