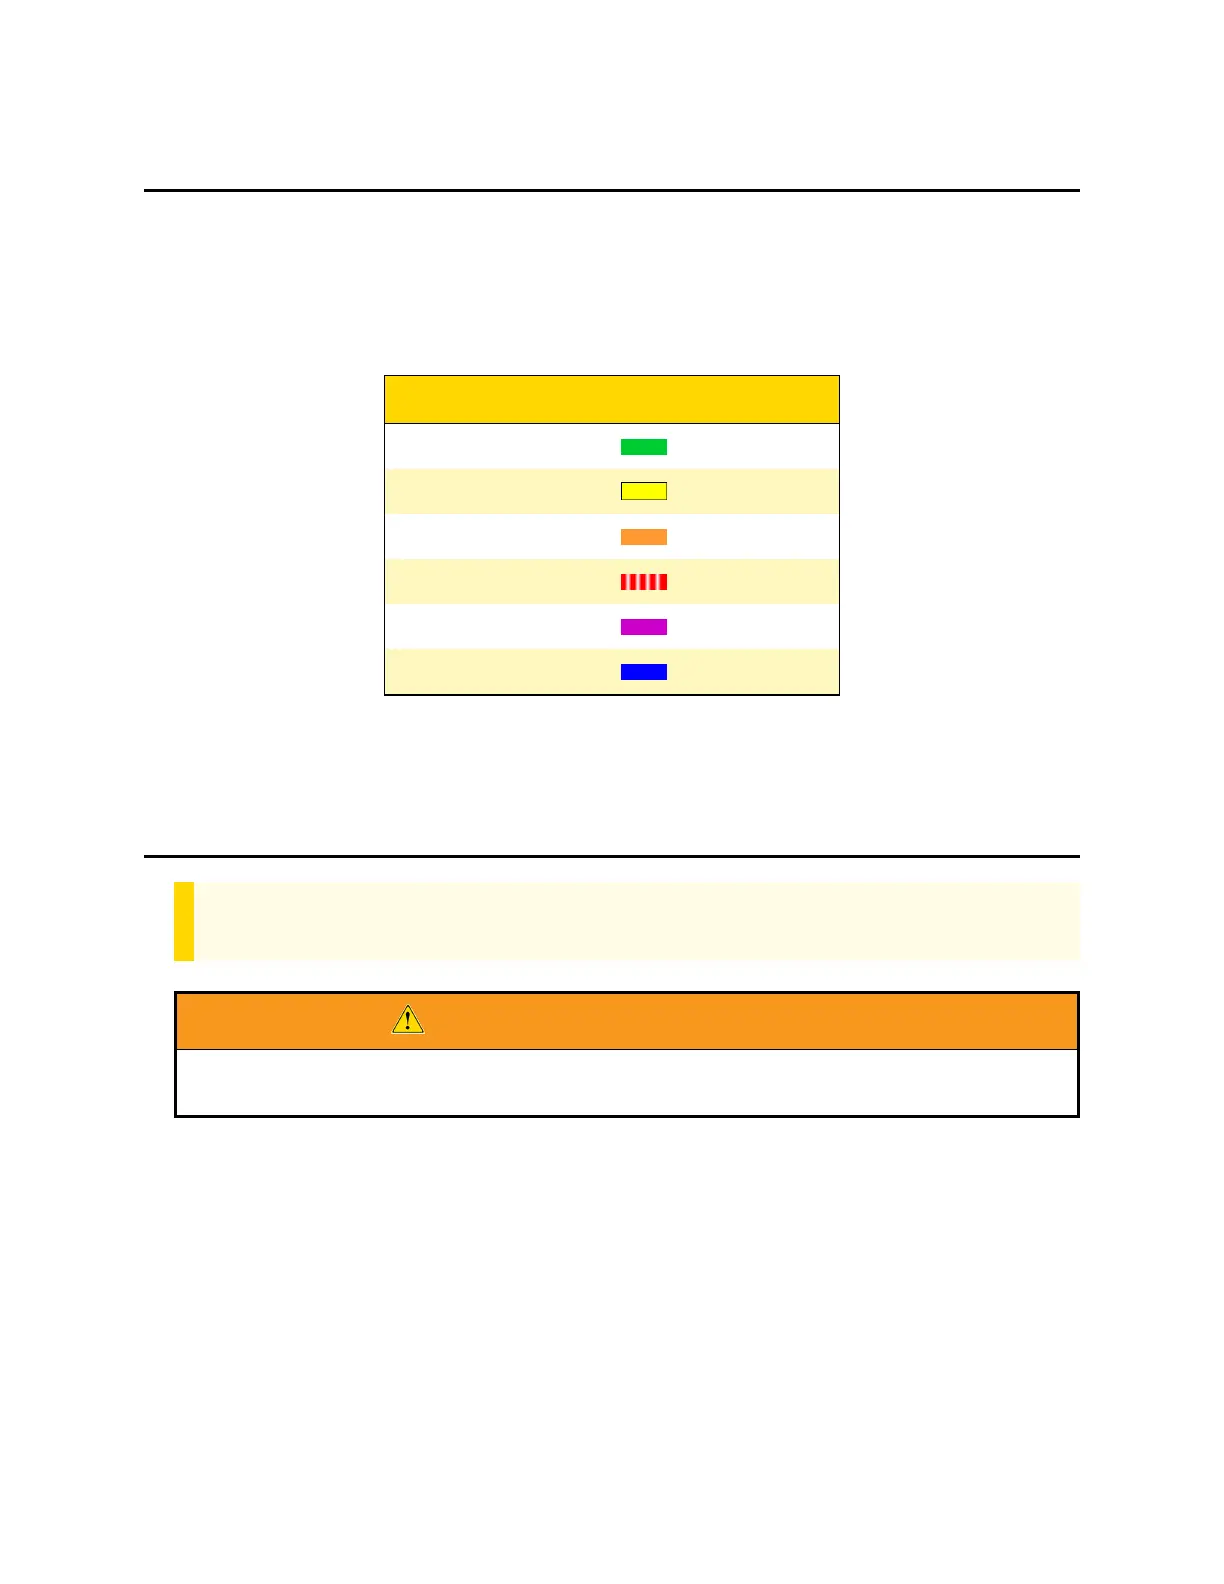
Sidelight LEDs
Identical Sidelight LEDs on each side of the TASER VRC indicate current battery level
(blinking) and trigger state, alternating between the two.
Once the controller recognizes the battery, the LEDs will display battery level and
trigger presses as noted below.
State/Message Sidelight LED Color
Battery >50% Green
Battery 15–50% Yellow
Battery 5–14% Orange
Battery 0–5% Red (rapid pulse)
Trigger press – Armed Purple
Trigger press – Safe Blue
Do not add stickers or markings to the top of the TASER VRC as these will affect
internal sensors.
Magazine
Note
TASER 10 VR Controller magazines are inert and will not accept live
cartridges.
WARNING! VR CONTROLLER MAGAZINE USE
NEVER attempt to attach a live TASER 10 magazine (whether loaded or unloaded) to a TASER 10
VR Controller. ONLY USE WHITE magazines with a VR controller.
The TASER 10 VR Controller (VRC) has a removable magazine that can be left
installed. Orient it properly before attempting to insert it.
To attach a TASER VRC magazine:
1. Set the selector switch to Off (Safe).
2. Hold the magazine from the bottom and align the upper guides on the magazine
with the rails on the device.
TASER 10 VR Controller User Guide
Axon Enterprise, Inc. 3
 Loading...