18
Preparation
Threading the Upper Thread
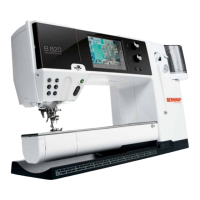
Automatic threading
► place thread spool on the rear or center spool pin
► thread the corresponding guide on the telescopic rod,
hold with both hands and guide into the threading
opening of the sewing computer, taking it up to the
thread guide in the needle clamp A and B and pull from
back to front over the thread cutter C
► touch the automatic threader button, a message and an
animation appear
► during threading the Start/Stop Button is illuminated red
► if the thread has not been threaded correctly, an error
message appears
► close the message with and start again
► if the thread has been threaded correctly the Start/Stop
Button is illuminated green
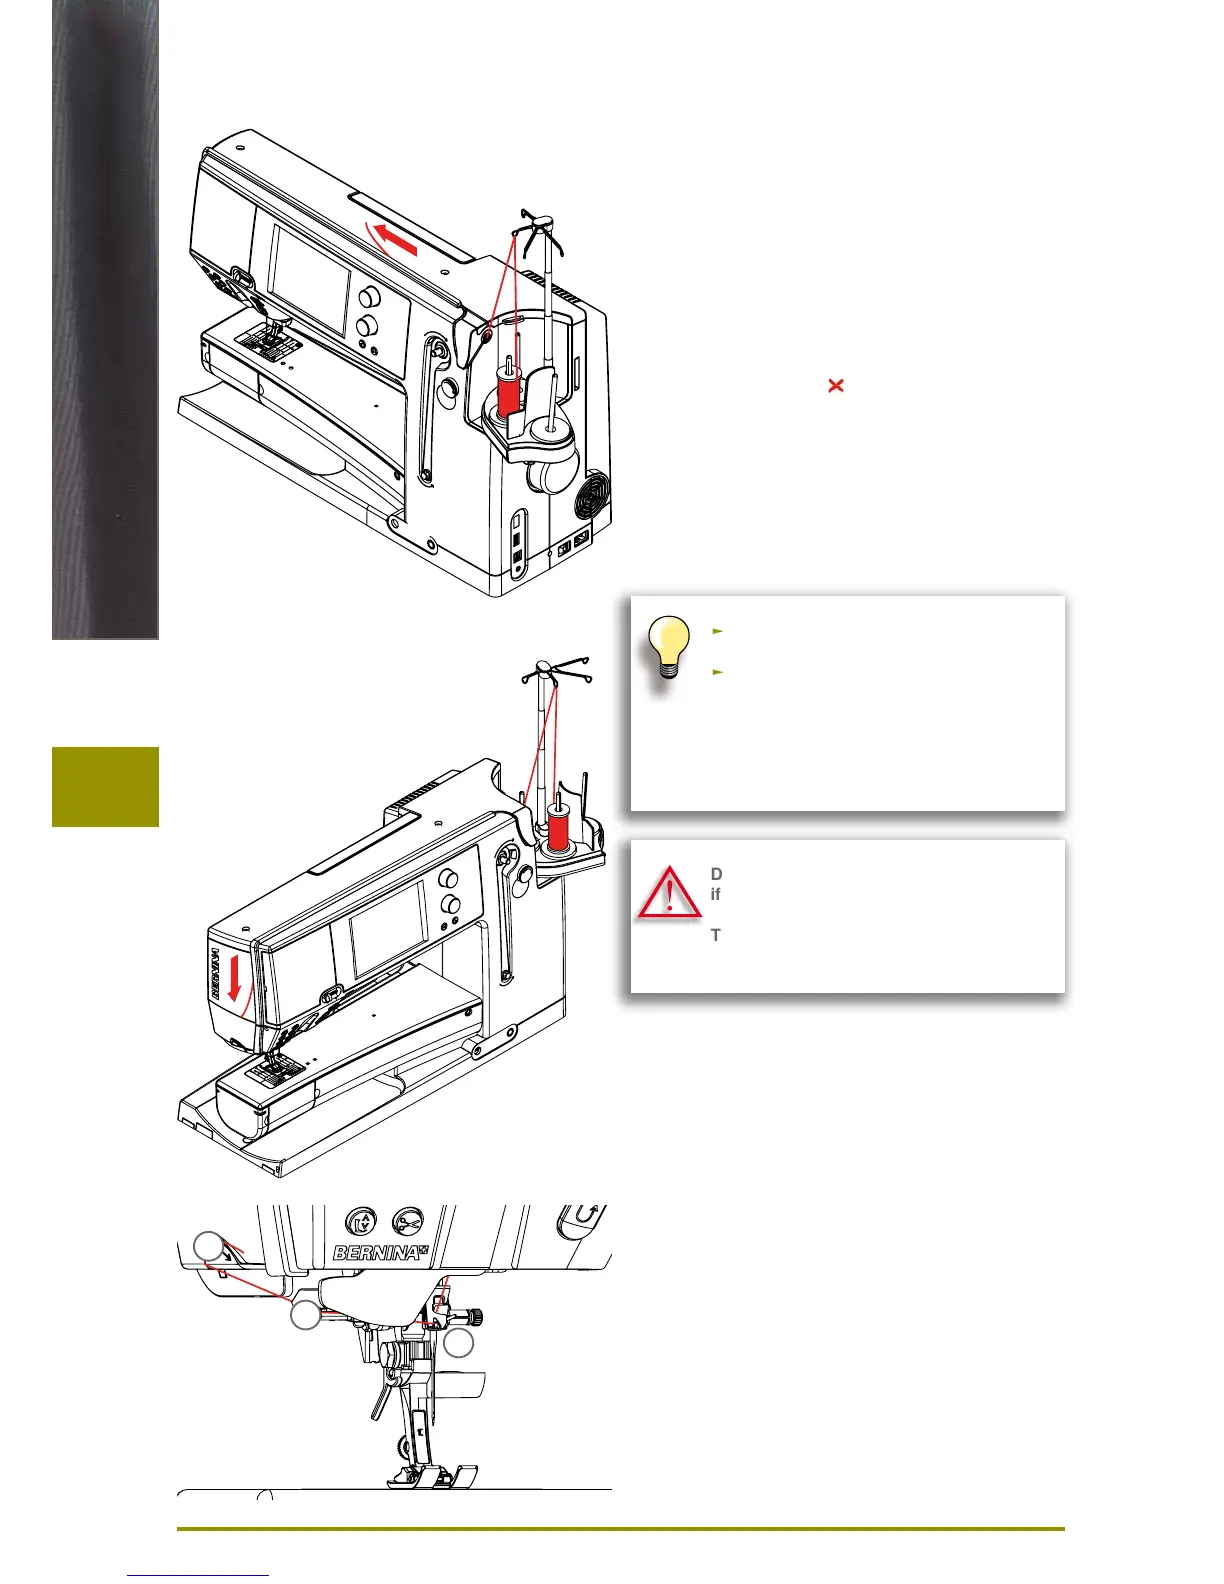
Manual threading
► follow the two first steps as described above
► touch «Manual threading» icon on screen
► press «Automatic threading» button, then thread the
needle by hand
► when using unruly threads, slip the net over
the upper thread spool
► large net for large spools, small net for
small spools
► this prevents the upper thread from slipping
and gives an even thread feed
► place the thread(s) under the presser foot
and to the back before starting to sew
Do not start the threaded sewing computer
if there is no fabric on the stitch plate.
The sewing computer must be switched
ON for threading.
A
B
C
 Loading...