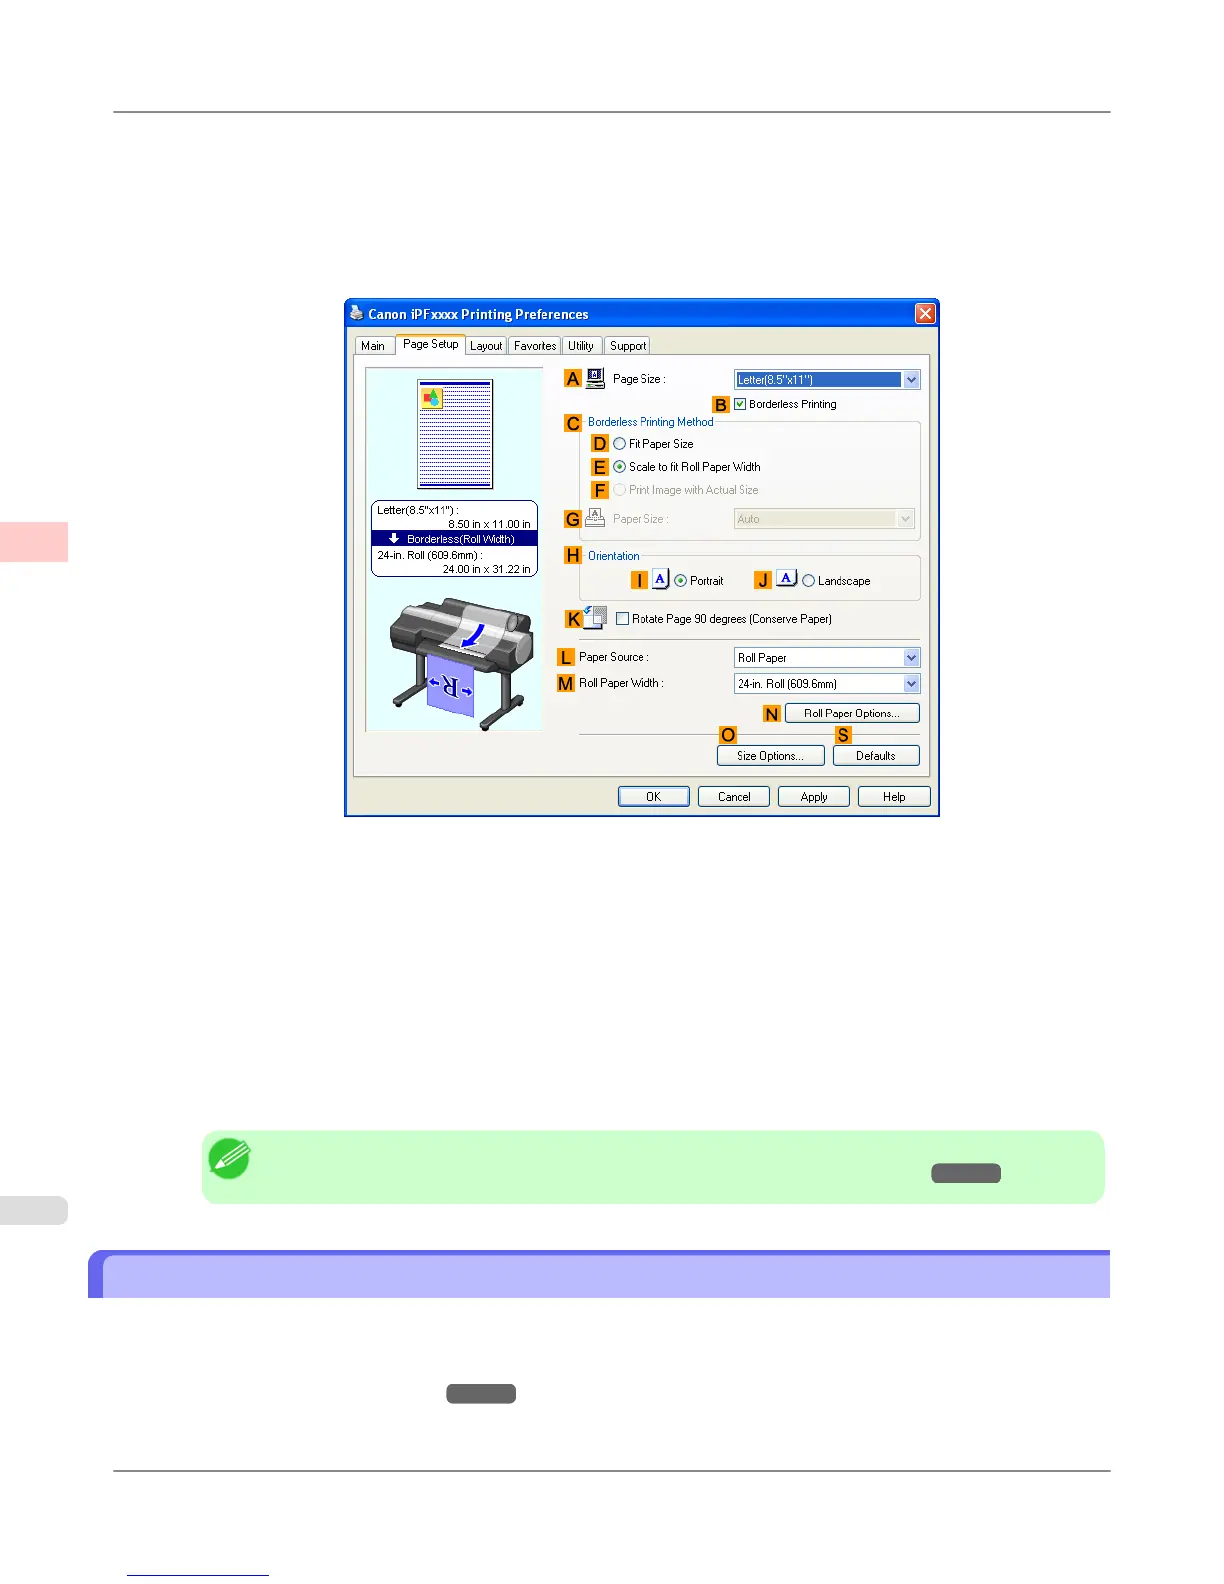
8. In the A Page Size list, click the size of the original as specified in the application. In this case, click 10"x12".
9. Select and click a roll paper in the L Paper Source list.
10. Select the B Borderless Printing check box to display the Information dialog box.
11. Select the width of the loaded roll in the Roll Paper Width list—in this case, click 10-in. Roll (254.0mm).
12. Click OK to close the Information dialog box.
13. In C Borderless Printing Method, click D Fit Paper Size.
14. Click Match Page Size in the G Paper Size list.
15. Confirm the print settings and print as desired.
Note
• For tips on confirming print settings, see "Confirming Print Settings (Windows) →P.200 "
Borderless Printing by Resizing Originals to Match the Paper Size (Mac OS X)
This topic describes how to enlarge originals before borderless printing to match the paper size, based on the following
example.
If you use an A1 or A2 roll for borderless printing, insert the provided Spacer for Borderless Printing on the Roll Holder.
(See "Loading Rolls on the Roll Holder
→P.718 ")
If you do not attach the Spacer for Borderless Printing, the Platen may be soiled from borderless printing.
Enhanced Printing Options
>
Borderless Printing
>
Borderless Printing by Resizing Originals to Match the Paper Size (Mac OS X) iPF6300
3
98
 Loading...