35
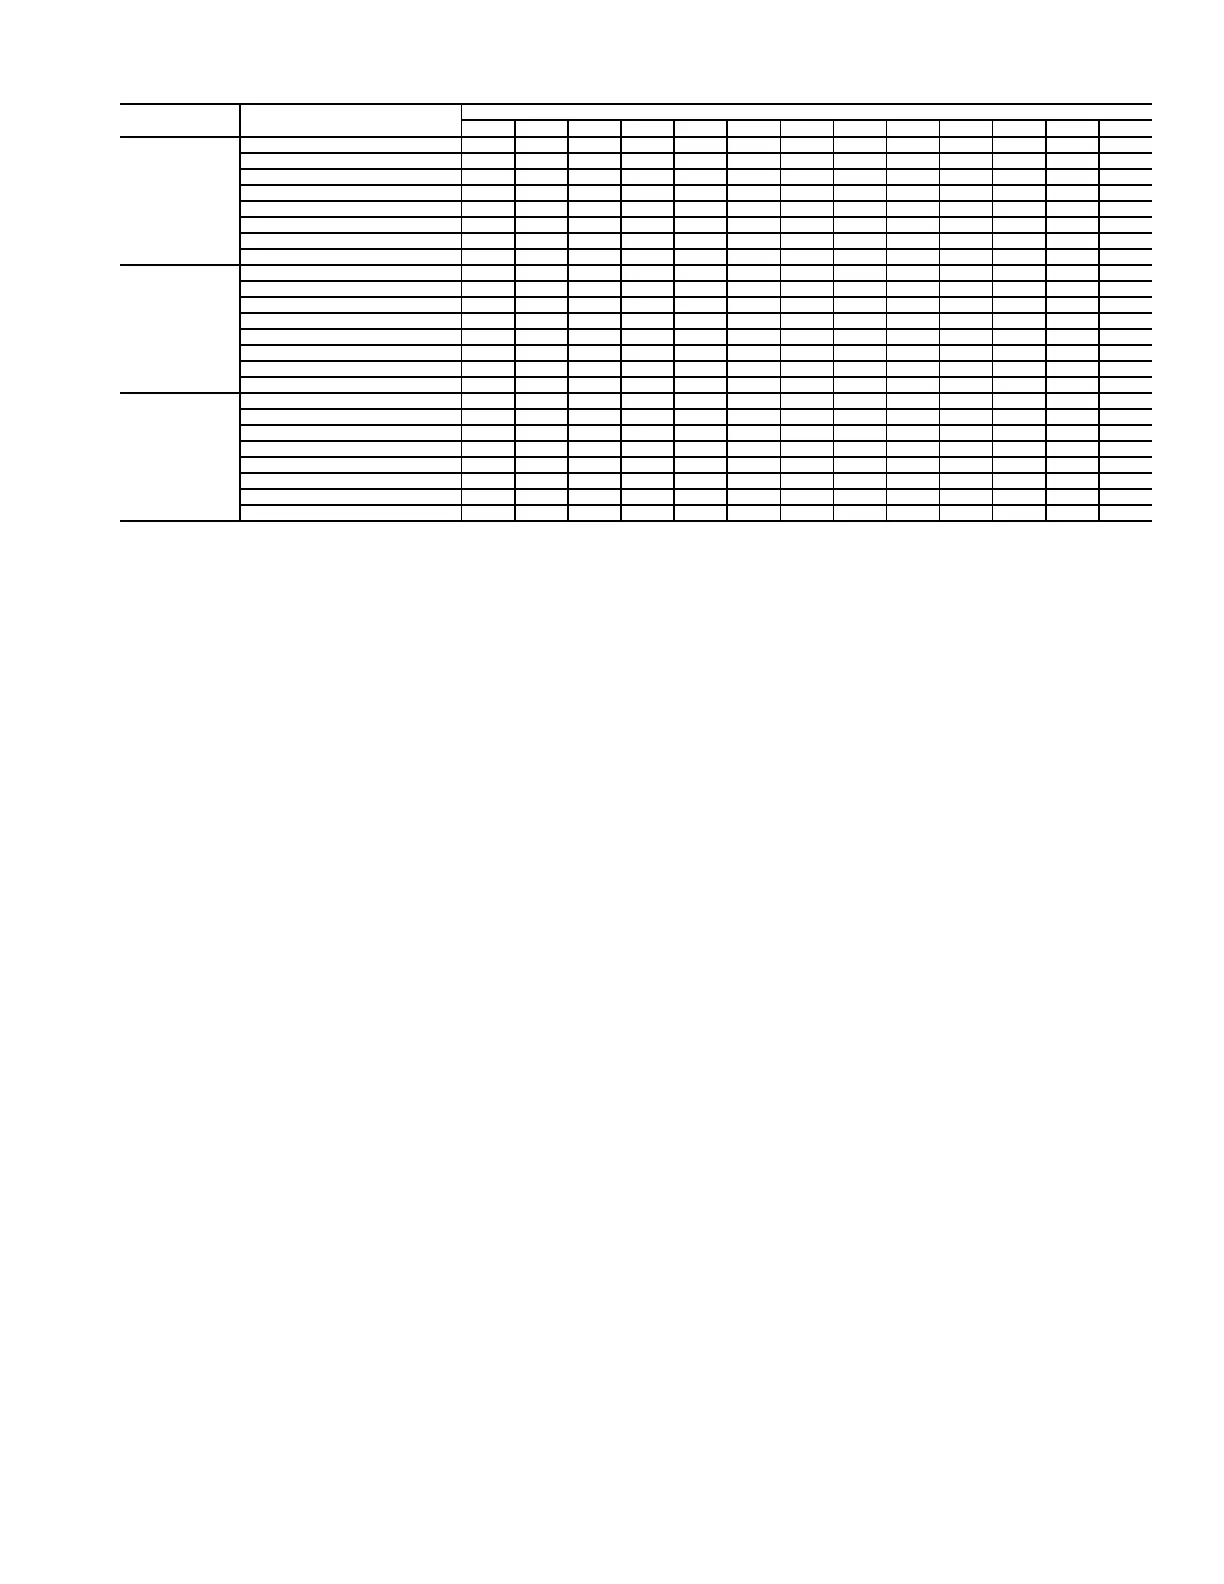
Table 34 — Fan Rpm At Motor Pulley Settings* — 50PG20-28
*Approximate fan rpm shown.
NOTE: Factory pulley speed setting is at 3 turns open.
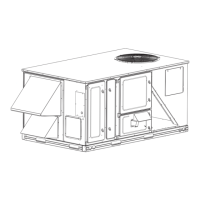
CONTROLS QUICK START
The following information will provide a quick guide to
setting up and configuring the 48/50PG series units with
ComfortLink™ controls. Unit controls are pre-configured at
the factory for factory-installed options. Field-installed acces-
sories will require configuration at start-up. Additionally,
specific job requirements may require changes to default
configuration values. See the CCN and Display parameter
tables and other sections of these instructions for more details.
Thermostat Control — Wire accessory thermostat to
the corresponding R, Y1, Y2, W1, W2, and G terminals on the
field connection terminal board located at the unit control box.
The Unit Control Type configuration, Configuration
→
UNIT
→
U.CTL,
default value is for Thermostat (2) so there
is no need to configure this item.
Space Temperature Sensor Control — Direct
Wired (T-55 or T-56) — Wire accessory space tempera-
ture sensor(s) to the T-55 terminals on the field connection
terminal board located at the unit control box. Refer to Field-
Installed Accessories section.
The Unit Control Type configuration, Configuration
→
UNIT
→
U.CTL, must be set to Space Sensor (3). The jumper
wire in the installer’s packet must be connected between R and
W1 for heating mode to operate.
Space Temperature Sensor Control — CCN
(T-58) —
Install the T-58 communicating thermostat. Con-
nect the CCN communication bus from the T-58 to the CCN
terminals on the field connection terminal board located at the
unit control box. Configure the 48/50PG unit CCN communi-
cation element number, bus number, and baud rate. Configure
the T-58 thermostat CCN communication element number and
also configure the T-58 with the 48/50PG unit element number.
The Unit Control Type configuration, Configuration
→
UNIT
→
U.CTL, must be set to Space Sensor (3). The jumper
wire in the installer’s packet must be connected between R and
W1 for heating mode to operate.
Space Temperature Control — CCN Link-
age —
The CCN communication must be properly configured
for the 48/50PG unit and all devices. Linkage configuration is
automatically done by the supervisory CCN Linkage device.
The Unit Control Type configuration, Configuration
→
UNIT
→
U.CTL must be set to Space Sensor (3). The jumper
wire in the installer’s packet must be connected between R and
W1 for heating mode to operate.
Installation of an accessory supply air temperature (SAT)
sensor in the supply duct is recommended for Linkage applica-
tions. A supply duct SAT measurement is valid for heating
mode display, while the factory-standard internal SAT is not
valid for heating due to its location upstream of the heating sec-
tion. When installing the supply duct SAT, the heating mode
display is enabled by setting Configuration
→
HEAT
→
SAT.H
to ENBL.
Space Humidity Control — Humidistat — Wire
the Humidistat accessory to terminals Humidistat 1 and 2 locat-
ed on the field connection terminal strip in the bottom of the
control box. The Space Humidity Switch setting is located at
Configuration
→
Unit
→
RH.SW. The factory default for units
with Humidi-MiZer™ system is 1 (normally open).
Space Humidity Control — Thermidistat™ —
Wire the Thermidistat accessory Dehum output to terminal
Humidistat1 located on the field connection terminal strip in
the bottom of the control box. The Space Humidity Switch set-
ting is located at Configuration
→
Unit
→
RH.SW. The factory
default for units with Humidi-MiZer system is 1 (normally
open).
Space Humidity Control — Relative Humidity
Sensor —
Wire the humidity sensor to terminals 3 (–) and
4 (+) located on the field connection terminal strip in the
bottom of the control box. The RH Sensor on OAQ Input set-
ting is located at Configuration
→
Unit
→
RH.S. The setting
must be configured to YES to use the relative humidity sensor.
CCN Communication — Configure Configuration
→
CCN
→
CCN.A to desired element number. (Default is 1.) Con-
figure Configuration
→
CCN
→
CCN.B to desired bus number.
(Default is 0.) Configure Configuration
→
CCN
→
BAUD to
desired code number for baud rate. (Default is 3 = 9600 baud.)
Accessories — See the Field-Installed Accessories sec-
tion, control connection tables, and CCN or Display parameter
tables for required connections and configurations.
Service Test — The Service Test function can be used to
verify proper operation of compressors, heating stages,
indoor fan, outdoor fans, power exhaust fans, economizer,
Humidi-MiZer system, and alarm relay. Use of Service Test is
recommended at initial system start-up and during trouble-
shooting.
50PG DRIVE
MOTOR PULLEY TURNS OPEN
0
1
/
2
11
1
/
2
22
1
/
2
33
1
/
2
44
1
/
2
55
1
/
2
6
20 and 24
(230 and
460 volt)
Low Range Vertical 685 706 727 749 770 791 812 833 854 876 897 918 939
Mid-Low Range Vertical 949 970 9921013103510561078109911201142116311851206
Mid-High Range Vertical 941 961 980 1000 1019 1039 1059 1078 1098 1117 1137 1156 1176
High Range Vertical 1014103810611085110811321156117912031226125012731297
Low Range Horizontal 685 706 727 749 770 791 812 833 854 876 897 918 939
Mid-Low Range Horizontal 949 970 992 1013 1035 1056 1078 1099 1120 1142 1163 1185 1206
Mid-High Range Horizontal 941 961 980 1000 1019 1039 1059 1078 1098 1117 1137 1156 1176
High Range Horizontal 1014 1038 1061 1085 1108 1132 1156 1179 1203 1226 1250 1273 1297
20 and 24
(575 Volt)
Low Range Vertical 751 768 785 802 819 836 853 869 886 903 920 937 954
Mid-Low Range Vertical 949 970 9921013103510561078109911201142116311851206
Mid-High Range Vertical 941 961 980 1000 1019 1039 1059 1078 1098 1117 1137 1156 1176
High Range Vertical 1014103810611085110811321156117912031226125012731297
Low Range Horizontal 751 768 785 802 819 836 853 869 886 903 920 937 954
Mid-Low Range Horizontal 949 970 992 1013 1035 1056 1078 1099 1120 1142 1163 1185 1206
Mid-High Range Horizontal 941 961 980 1000 1019 1039 1059 1078 1098 1117 1137 1156 1176
High Range Horizontal 1014 1038 1061 1085 1108 1132 1156 1179 1203 1226 1250 1273 1297
28
(all voltages)
Low Range Vertical 687 703 718 734 749 765 780 796 811 827 842 858 873
Mid-Low Range Vertical 805 822 839 856 872 889 906 923 940 957 973 990 1007
Mid-High Range Vertical 941 961 980 1000 1019 1039 1059 1078 1098 1117 1137 1156 1176
High Range Vertical 1014103810611085110811321156117912031226125012731297
Low Range Horizontal 687 703 718 734 749 765 780 796 811 827 842 858 873
Mid-Low Range Horizontal 805 822 839 856 872 889 906 923 940 957 973 990 1007
Mid-High Range Horizontal 941 961 980 1000 1019 1039 1059 1078 1098 1117 1137 1156 1176
High Range Horizontal 1014 1038 1061 1085 1108 1132 1156 1179 1203 1226 1250 1273 1297
 Loading...