EasyManua.ls Logo

Carrier Ecologic 30GX080-265 User Manual

Carrier Ecologic 30GX080-265
100 pages
To Next Page IconTo Next Page
To Previous Page IconTo Previous Page
Page #13 background imageLoading...
Page #13 background image
Cooler Heater Control Accessory cooler heaters
can be ordered for the 30GX chillers. If installed and en-
abled, these heaters are turned on only when the machine is
in the off state and the chiller is in a saturated suction tem-
perature freeze condition.
Keypad and Display Module (Also Called
HSIO-II)
This module allows the operator to commu-
nicate with the processor. It is used to enter configurations
and set points and to read data, perform tests, and set sched-
ules. The device consists of a keypad with 7 function keys,
5 operative keys, 12 numeric keys (0 to 9, •, and -), and a
2-line, 24-character alphanumeric liquid crystal display. See
Fig. 7.
ACCESSING FUNCTIONS AND SUBFUNCTIONS
Table 7 shows a brief description of the keypad buttons.
Table 8A shows the 6 functions (identified by name) and the
subfunctions (identified by number). Table 8B shows the 6
functions (identified by name) and the subfunctions (iden-
tified by number) when using the optional LID-2B control-
ler. Table 9 shows a brief example on how to access
subfunctions.
NOTE: It is not necessary to use the through every
item in a subfunction. For example, if you wanted to read
the oil pressure for the A1 compressor, press , then
press to go directly to A1 Oil Pressure. Use a simi-
lar procedure to view an item near the bottom of a subfunc-
tion. To view the Circuit A Oil Switch status, press
and . Use a similar procedure to view an item near
the bottom of a subfunction. To view Condenser Pump Flow
Switch status, press , , and . This proce-
dure is available in all functions except the TEST function.
AUTOMATIC DEFAULT DISPLAY When the keypad
has not been used for 10 minutes, the display automatically
switches to the rotating automatic default display. This dis-
play contains the 5 parts shown below.
Entering Fluid Temp
xx.x° F
Leaving Fluid Temp
xx.x° F
Percent Total Capacity
xxx.x%
Total Number of Alarms
xx
MODES : MODE_TBL
Current active modes
All functions are made up of a group of subfunctions. To
enter a subfunction, first press the subfunction number de-
sired. Then press the function key in which the subfunction
resides. To move within that subfunction, press the up or
down arrow keys. Another subfunction may be entered at
any time by pressing the subfunction number, then the func-
tion key. Depending on system type and configuration, all
displays may not be shown.
Table 7 Keypad and Display Module Usage
FUNCTION
KEYS
USE
STATUS For displaying diagnostic codes and
current operating information about the machine.
HISTORY For displaying run time, cycles, and
previous alarms.
SERVICE For entering specific unit configuration
information and enabling manual control function.
SCHEDULE For entering occupied/unoccupied
schedules for unit operation.
ALGORITHM Not used.
SET POINT For entering operating set points
and day/time information.
TEST For testing operating of the analog and
discrete outputs.
OPERATIVE
KEYS
USE
EXPAND For displaying a non-abbreviated
expansion of the display.
CLEAR For clearing the screen of all displays.
UP ARROW For returning to previous display
position.
DOWN ARROW For advancing to next display
position.
ENTER For entering data.
CLEAR
ENTER
1
2
3
4
5
6
7
8
9
0
.
-
STAT
SET
SCHD
EXPN
EDIT
SRVC
HIST
ALGO
TEST
ALRM
TWENTY-FOUR CHARACTER
TWO-LINE LCD DISPLAY
LEGEND
LCD Liquid Crystal Display
Fig. 7 Keypad and Display Module
13

Table of Contents

Question and Answer IconNeed help?

Do you have a question about the Carrier Ecologic 30GX080-265 and is the answer not in the manual?

Carrier Ecologic 30GX080-265 Specifications

General IconGeneral
BrandCarrier
ModelEcologic 30GX080-265
CategoryChiller
LanguageEnglish

Summary

SAFETY CONSIDERATIONS

Electrical Hazards

Warning about electrical shock and the need to shut off all power.

Control System Precautions

Caution against bypassing electronic control components to prevent damage.

Refrigerant Handling Safety

Safety instructions for venting refrigerant relief valves and general handling.

Safety Devices

Compressor Safety Features

Lists safety devices for compressor protection and their functions.

Cooler Safety Features

Lists safety devices related to cooler protection.

GENERAL UNIT INFORMATION

Refrigerant and Oil Specifications

Specifies refrigerant type (R-134a) and compressor oil used.

Control System Overview

Describes the microprocessor-based control system and its components.

MAJOR SYSTEM COMPONENTS

Core Control Modules

Details PSIO-1, DSIO-HV, EXD Module, CPM, PSIO-2, and HSIO-II modules.

Unit Control Interface

Explains the LOCAL/OFF/REMOTE switch for controlling unit operation modes.

OPERATION DATA

Electronic Expansion Device (EXD) Operation

Explains how the EXD controls refrigerant flow and cooler level.

Component Operations

Economizer Operation

How the economizer improves capacity and efficiency, and provides motor cooling.

Oil Pump and Motor Cooling

Details oil pump operation and motor cooling control logic.

Back Pressure Valve and Sensors

Function of the back pressure valve and the role of system sensors.

Compressor Protection Module (CPM)

Explains CPM functions, inputs, and outputs for compressor protection.

Compressor Protection Module (CPM)

CPM Status Indicators and Alarms

Explains CPM LEDs and lists alarm conditions with feedback codes.

Compressor Starting Options

Details the Wye-Delta vs. Across-the-Line starting options for compressors.

Capacity Control Logic

Capacity Control Routine

How the control system manages capacity stages to meet the set point.

Start-Up and Operation Delays

Explains "Minutes Left for Start" and "Minutes Off Time" parameters.

Loading Sequence

Describes the sequence for compressor and loader engagement for efficiency.

Capacity Control Sequences

Close Control Logic

How close control uses loading devices for precise temperature regulation.

Lead/Lag and Capacity Sequence Determination

Logic for determining lead/lag circuits and capacity stage order.

Minimum Load Valve and Overrides

Operation of the minimum load valve and capacity control overrides.

Control Logic Overrides

Temperature and Superheat Control

How overrides like slow change, ramp loading, and low superheat affect operation.

Head Pressure Control Logic

Control Adjustments and Pump Control

Unit Interface and Control

Keypad and Display Module (HSIO-II)

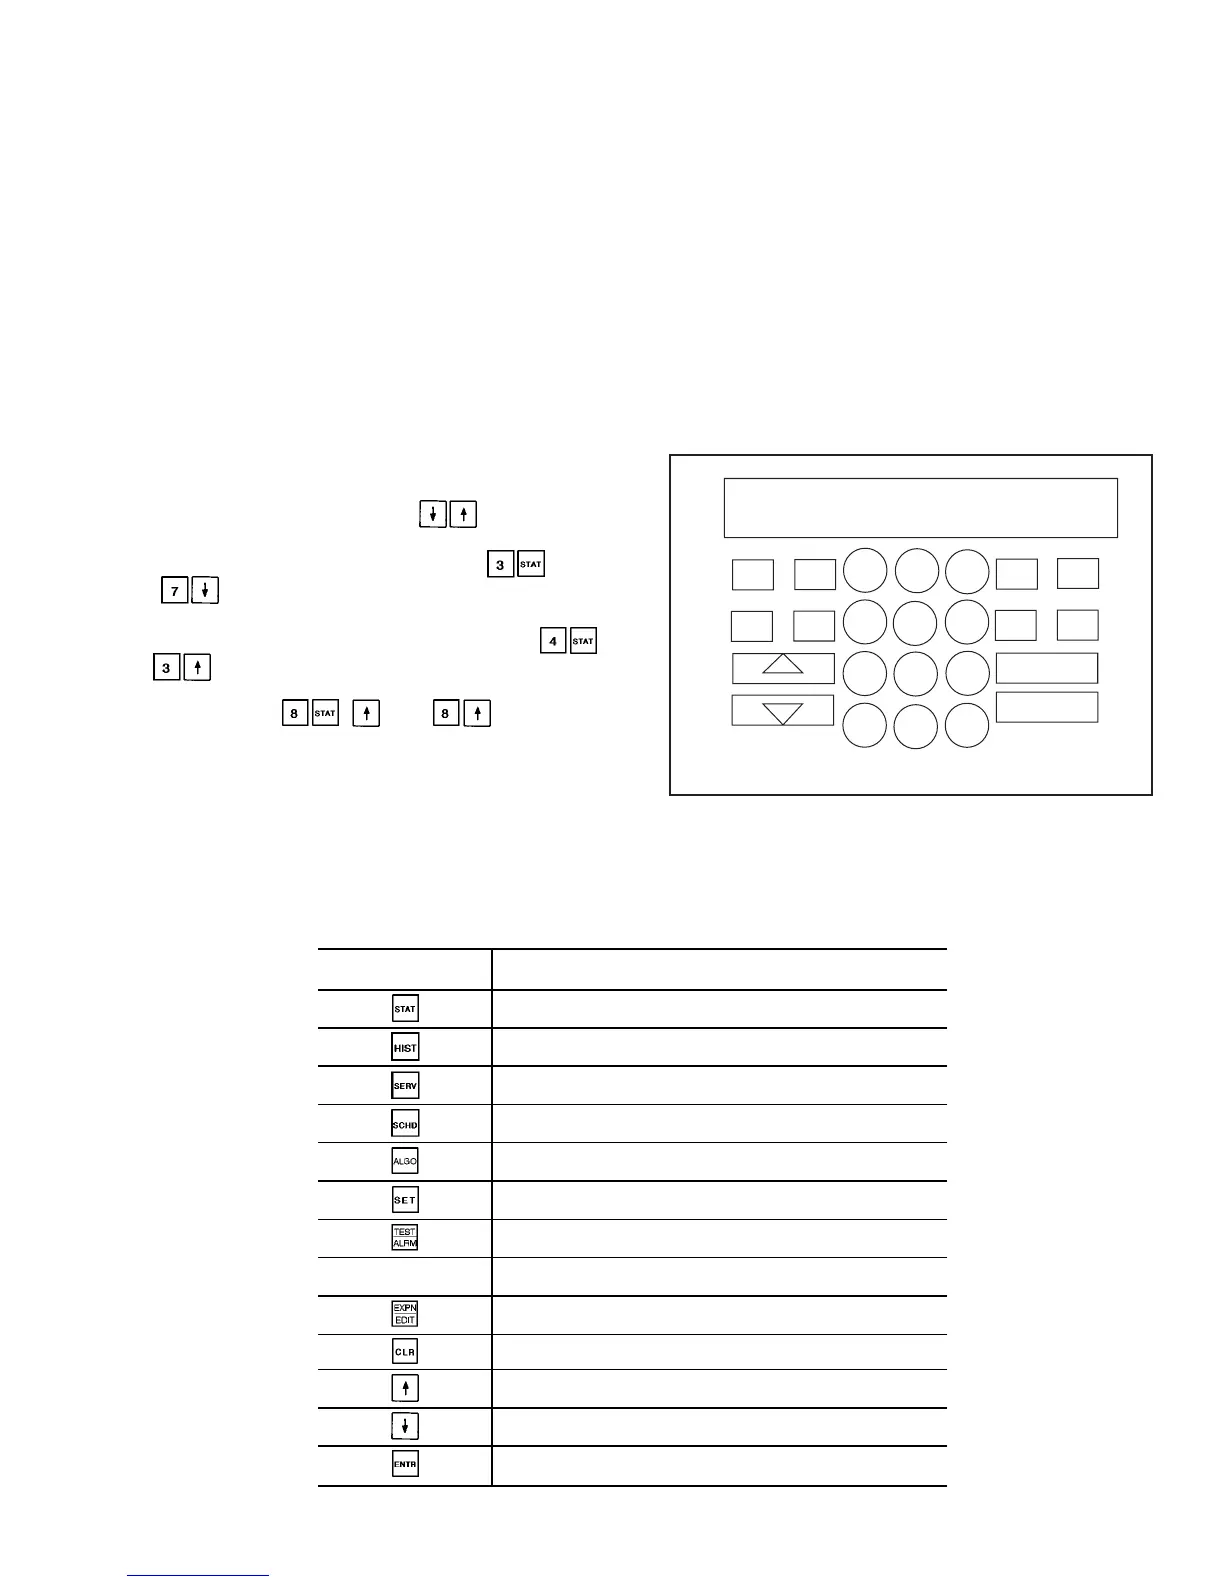
Description of the HSIO-II module for unit interaction and configuration.

Status Function Operations

System Monitoring Displays

Unit Testing and Configuration

Set Point Configuration

How to enter and adjust various unit set points.

SERVICE FUNCTION

Scheduling and Set Point Control

Temperature Reset and Demand Limit

Demand Limit Functionality

How demand limit reduces unit capacity during peak energy usage.

TROUBLESHOOTING GUIDANCE

Unit Stoppage and Restart Procedures

Lists causes of unit stoppages and procedures for restarting.

EXD Troubleshooting

Component Inspection Procedures

Service Procedures

Heat Exchanger Maintenance

Refrigerant Management

Low Refrigerant Charge Detection

Methods for identifying low refrigerant charge in 30HXC and 30HXA/GX systems.

Refrigerant and Oil Management

Oil Charging and Low Oil Alarms

Procedure for adding oil and addressing low oil level alarms.

Oil Filter Maintenance and Compressor Replacement

Compressor Changeout Sequence

Detailed steps for replacing a compressor, including wiring and handling.

System Monitoring and Troubleshooting

Thermistor Checks and Replacement

How to check thermistor performance and replace faulty units.

Pressure Transducer Calibration

How to calibrate pressure transducers using the HSIO software.

Pressure Transducer Calibration and Troubleshooting

Safety Devices and Protection

Control Module Operations

Compressor Control Troubleshooting

Pre-Start-Up and Start-Up Procedures

Start-Up and Operating Sequence

How to perform the actual start-up and understand the operating sequence.

FIELD WIRING DIAGRAMS

APPENDIX A - Compressor Must Trip Amps

APPENDIX B - Capacity Loading Sequence

APPENDIX C - Available Accessories

APPENDIX D - Compressor Protection Module Configuration

APPENDIX E - Pressure Drop Charts

APPENDIX E - Pressure Drop Charts (cont)

APPENDIX F - System Component Diagrams

APPENDIX F - System Component Diagrams (cont)

START-UP CHECKLIST

Preliminary Equipment Checks

Unit Start-Up Procedures

System Loop Pressure Drop Checks

PERFORM TEST FUNCTION

Configuration and Start-Up Data Recording

Final Start-Up Steps

Performing final valve/pump checks, starting the unit, and recording temperatures/pressures.

Related product manuals