EasyManua.ls Logo

Casio KL-7000 User Manual

Casio KL-7000
81 pages
To Next Page IconTo Next Page
To Previous Page IconTo Previous Page
Page #12 background image
11
AC Adaptor
Note the following important precautions when using an AC adaptor to power your Label
Printer.
Use only a genuine CASIO AD-A95100 AC adaptor with the same voltage rating as the
household current in your area. Using a wrong adaptor can damage your Label Printer.
Be sure to switch the Label Printer off before you connect the adaptor. Do not switch
power on until the adaptor is connected to the Label Printer and plugged into an AC
outlet.
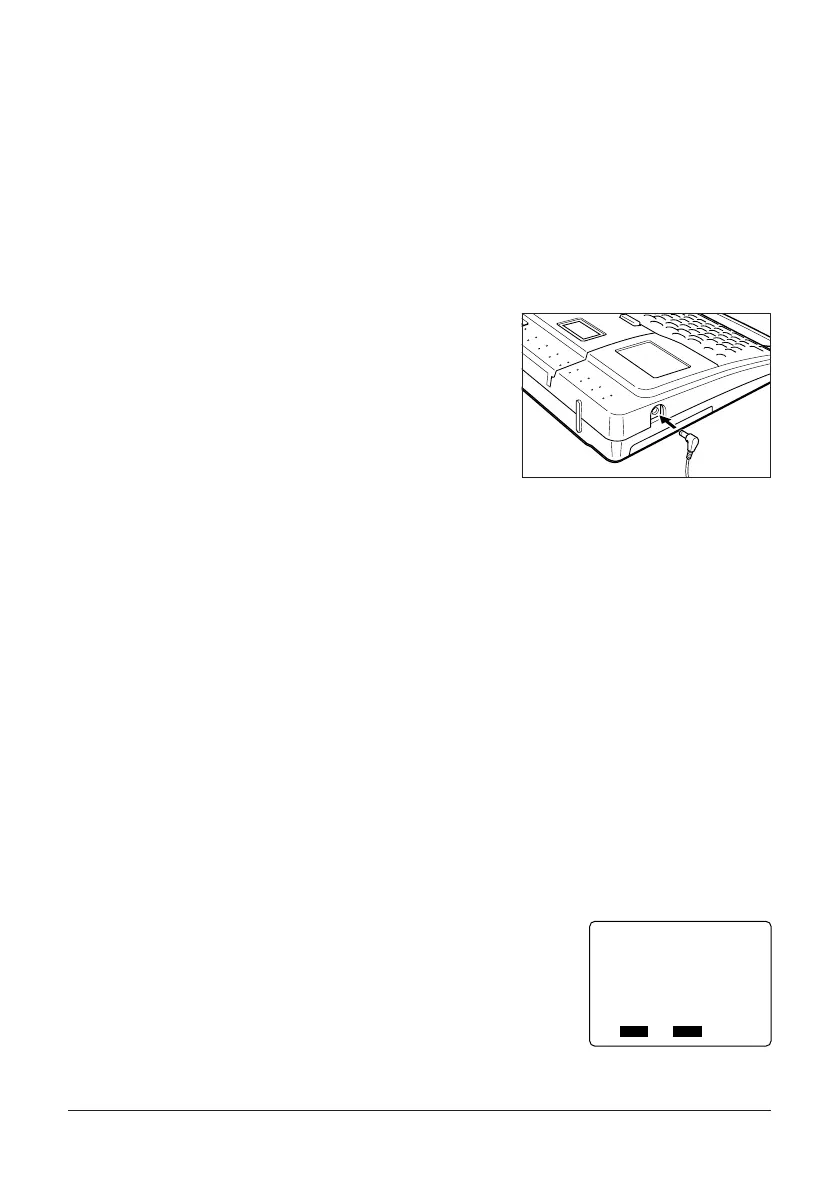
To connect the AC adaptor
Connect the AC adaptor to the Label Printer as
illustrated on the right. Plug the other end into a
standard household AC outlet.
Switching Power On and Off
Press ON to switch power on, and OFF to switch power off.
Important!
If you are using the Label Printer for the first time, you should use the procedure described
under Resetting the Memory to switch power on.
Resetting the Memory
You should reset the memory of the Label Printer before using it for the first time, after you
have not used it for a long time, or if nothing happens when you switch power on even after
you change the batteries.
Important!
Resetting Label Printer memory clears the memory of all input data.
To reset the memory
1. Make sure that Label Printer power is off.
2. While holding down the PRINT and ESC keys, press
ON to switch power on.
FUNC
SHIFT
CODE
VERT
MIROR
OVER
CAPS
A
A
SET
Yes No
ESC
INITIAL?

Table of Contents

Other manuals for Casio KL-7000

Questions and Answers:

Casio KL-7000 Specifications

General IconGeneral
BrandCasio
ModelKL-7000
CategoryLabel Maker
LanguageEnglish

Summary

Part 1 Getting Acquainted

Important Precautions for Safe Operation

Crucial safety guidelines and warnings to ensure proper and safe operation of the label printer.

Part 2 Getting Ready

Power and Battery Management

Details power sources, battery replacement, AC adapter usage, and powering on/off.

Memory Reset and Tape Loading

Procedure to reset memory and instructions for loading tape cartridges.

Part 3 Inputting Characters, Symbols, and Illustrations

Alpha-Numeric Input and CODE Key Usage

Basic input of letters/numbers and use of the CODE key for special characters.

Part 4 Deleting and Inserting Characters

Cursor Movement and Character Deletion

Explains cursor navigation and methods for deleting individual characters.

Series Deletion and Text Clearing

How to delete multiple characters and clear text using the CLS function.

Overwrite vs. Insert Modes

Explains the difference and usage of overwrite and insert modes for text input.

Part 5 Character Attributes and Text Effects

Specifying Character Attributes

Ways to set character attributes like font, style, and size before, during, or after input.

Modifying Text Attributes and Applying Effects

How to change attributes and apply text effects to text ranges.

Part 6 FORM Menu Functions

Part 7 Quick Formats

Part 8 Presets

Numbering Functionality

Part 9 Printing

Printing Precautions and Basic Tape Printing

Important precautions before printing and basic steps to print text onto tape.

Part 10 Memory Operations

Part 11 Reference Information

Printer Maintenance and Resetting Procedures

Procedure to clean printer parts and reset the unit in case of malfunction.

Troubleshooting Common Issues and Solutions

Common problems, their causes, and solutions for the label printer.

Printer Messages and Their Meanings

Explains various messages displayed by the printer and their meanings.

Related product manuals