Step 2
Place the controller upside down, on a smooth, flat surface.
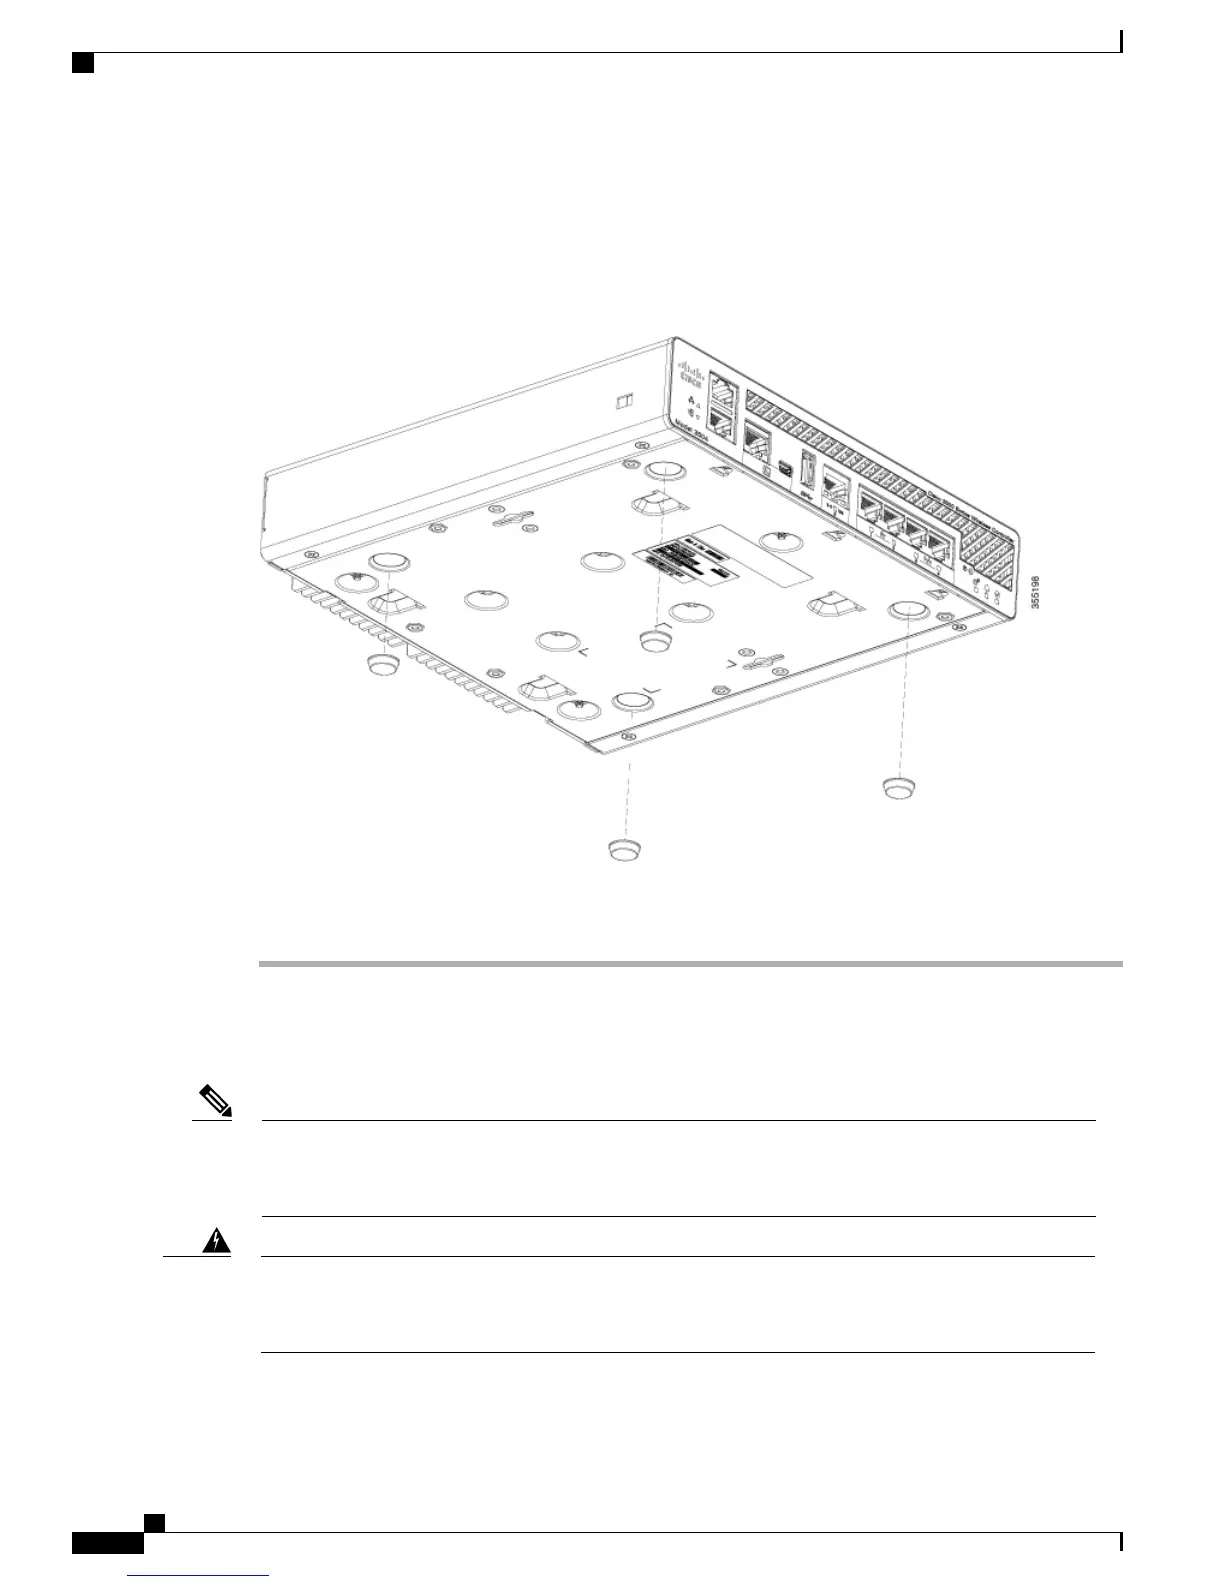
Step 3
Peel off the rubber feet from the black adhesive strip and press them adhesive-side down onto the bottom four
corners of the controller, see the figure below:
Figure 5: Attaching the Rubber Feet
Step 4
Place the controller right-side up on a flat, smooth, secure surface.
Step 5
Connect the interface cables.
Mounting the Controller on a Wall (Mounting Screws)
Do not wall-mount the device with its front panel facing up. Following safety regulations, wall-mount the
device with its front panel facing down or to the side to prevent airflow restriction and to provide easier
access to the cables.
Note
Read the wall-mounting carefully before beginning installation. Failure to use the correct hardware or to
follow the correct procedures could result in a hazardous situation to people and damage to the system.
Statement 378.
Warning
To mount the controller on a wall using mounting screws, follow these steps:
Cisco 3504 Wireless Controller Installation Guide
14
Installing the Cisco 3504 Wireless Controller
Mounting the Controller

 Loading...