3-32
Cisco UCS C240 M4 Server Installation and Service Guide
OL-32474-01
Chapter 3 Maintaining the Server
Installing or Replacing Server Components
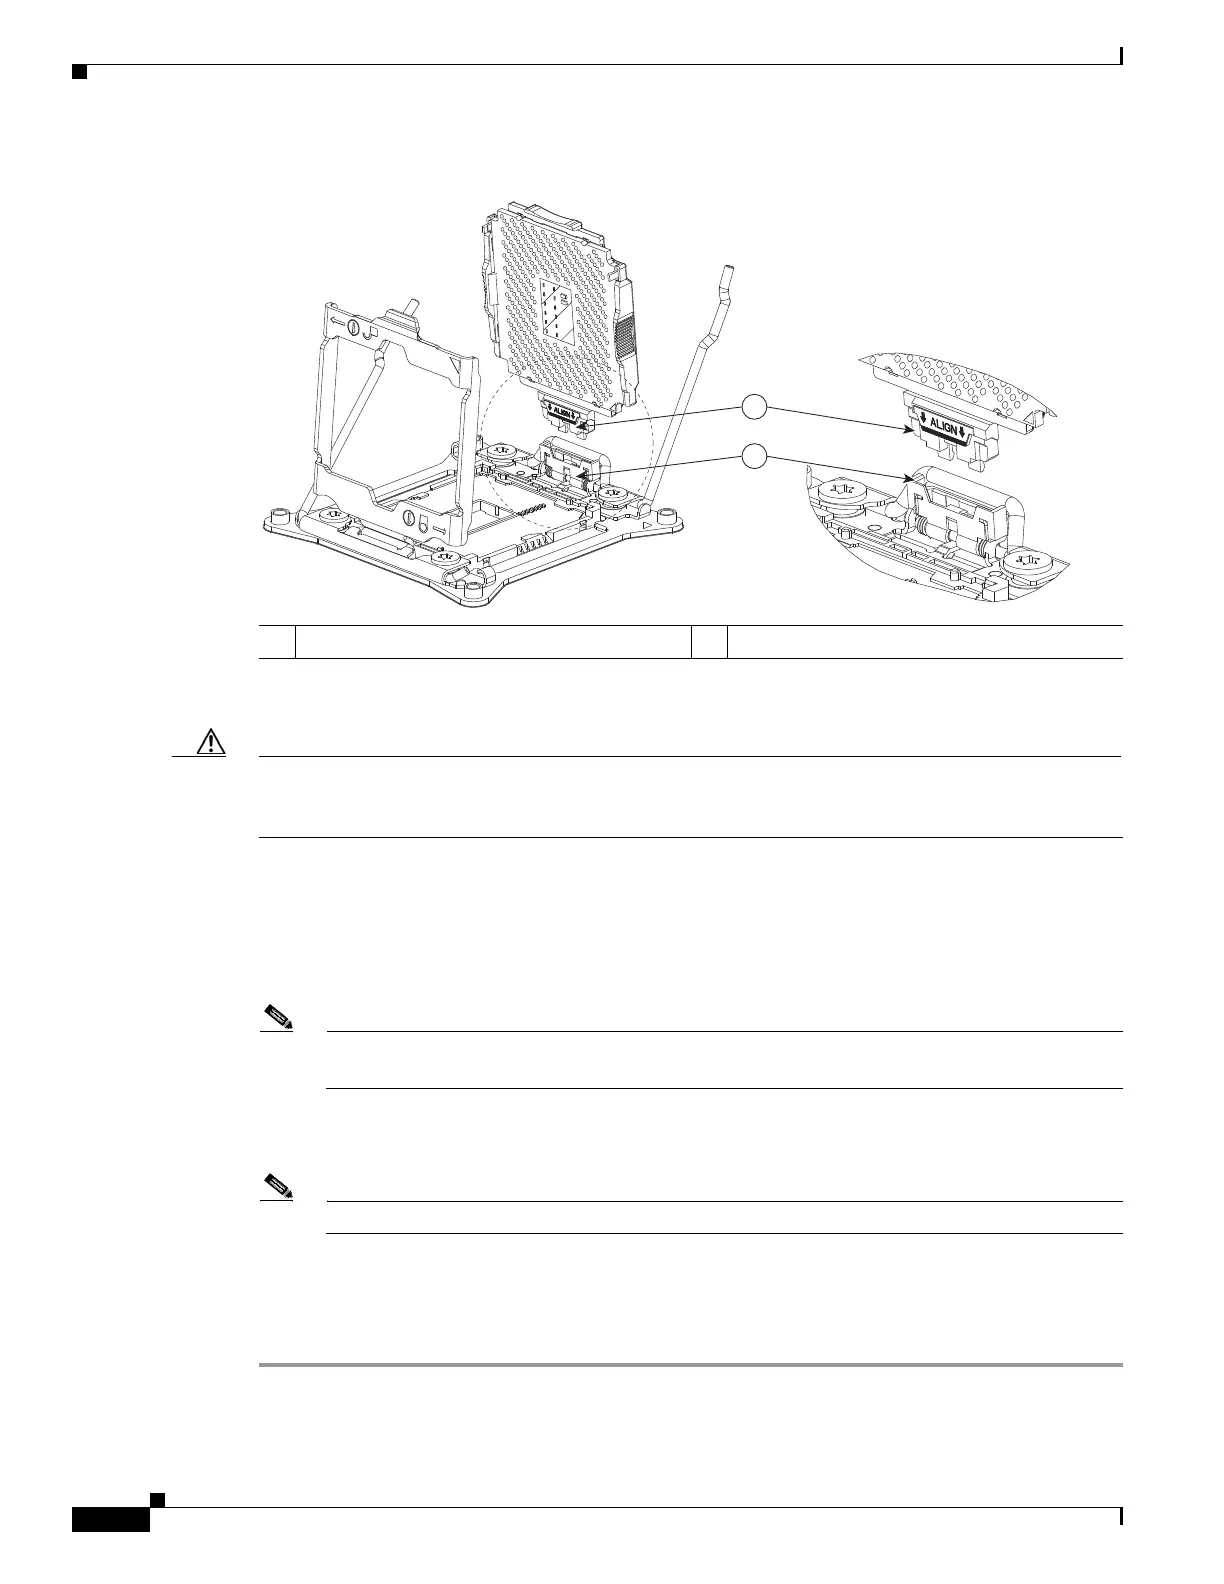
Figure 3-17 CPU and Socket Alignment Features
Step 9
Install a heat sink:
Caution The heat sink must have new thermal grease on the heat sink-to-CPU surface to ensure proper cooling.
If you are reusing a heat sink, you must remove the old thermal grease from the heatsink and the CPU
surface. If you are installing a new heat sink, skip to Step c.
a. Apply the cleaning solution, which is included with the heatsink cleaning kit (UCSX-HSCK=,
shipped with spare CPUs), to the old thermal grease on the heatsink and CPU and let it soak for a
least 15 seconds.
b. Wipe all of the old thermal grease off the old heat sink and CPU using the soft cloth that is included
with the heatsink cleaning kit. Be careful to not scratch the heat sink surface.
Note New heatsinks come with a pre-applied pad of thermal grease. If you are reusing a heatsink, you
must apply thermal grease from a syringe (UCS-CPU-GREASE3=).
c. Align the four heatsink captive screws with the motherboard standoffs, and then use a Number 2
Phillips-head screwdriver to tighten the captive screws evenly.
Note Alternate tightening each screw evenly to avoid damaging the heatsink or CPU.
Step 10 Replace the air baffle.
Step 11 Replace the top cover.
Step 12 Replace the server in the rack, replace cables, and then power on the server by pressing the Power button.
1 SLS mechanism on socket 2 Tab on CPU frame (labeled ALIGN)
 Loading...