FTX-N/U, FVXS-N, FDMQ-R Series EDUS091558E
417
3P124623-1E
22
INSTALLATION TABLE
When installing the equipment, mark the zone No. of each group and installation location in the below table.
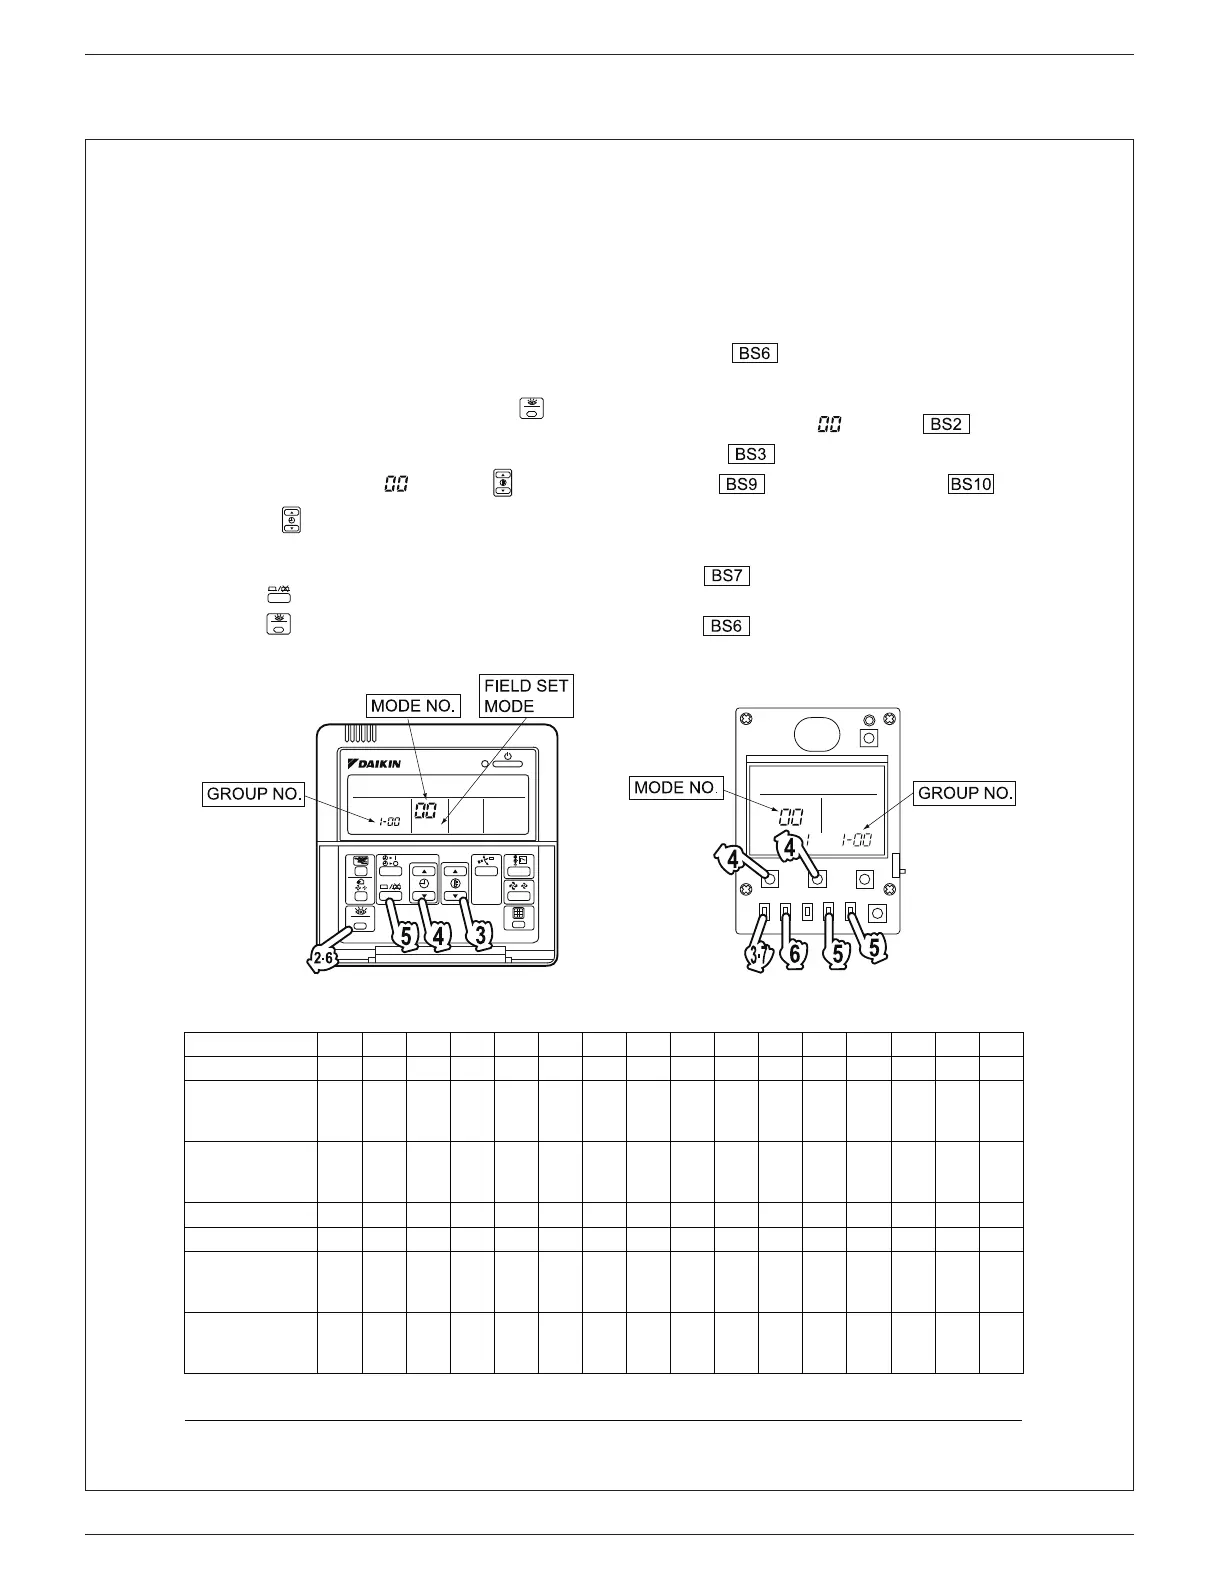
Setting group No.
(Setting is not possible unless power is activated to
both the central remote controller and indoor unit.)
Operated by remote controller
1. Activate power to both the central remote controller
and indoor unit.
2. While in the normal mode, hold down the “ ” but-
ton for a minimum of 4 seconds. The unified ON/
OFF controller will enter the FIELD SET MODE.
3. Select the MODE No. “ ” with the “ ” button.
4. Use the “ ” button to select the group No. for
each group. (Group No. increases in the order of
1-00, 1-01 ... 1-15, 2-00, ... 8-15.)
5. Press “ ” to set the selected group No.
6. Press “ ” to return to the NORMAL MODE.
Operated by simplified remote controller
1. Activate power to both the central remote controller
and indoor unit.
2. Remove the upper part of the remote controller.
3. Press the BUTTON (field set) on the PC
board. The controller will enter the FIELD SET
MODE.
4. Select the MODE No. “ ” with the BUT-
TON and BUTTON (temperature setting).
5. Use the BUTTON (set A) and
BUTTON (set B) to select the group No. for each
group. (Group No. increases in the order of 1-00,
1-01 ... 1-15, 2-00, ... 8-15.)
6. Press BUTTON (set/cancel) to set the
selected group No.
7. Press BUTTON (field set) to return to the
NORMAL MODE.
TEST
TEST
TEST
SETTING
UNIT
BS2
BS1
BS3
BS4
BS6 BS7 BS8 BS9 BS10
BS5
Zone No.
Group No.
–00 –01 –02 –03 –04 –05 –06 –07 –08 –09 –10 –11 –12 –13 –14 –15
Indoor unit
Quantity of units
Controlled by
Location
Zone No.
Group No.
–00 –01 –02 –03 –04 –05 –06 –07 –08 –09 –10 –11 –12 –13 –14 –15
Indoor unit
Quantity of units
Controlled by
Location
 Loading...