FTX-N/U, FVXS-N, FDMQ-R Series EDUS091558E
89
3P572321-1A
7
Indoor Unit Installation
CAUTION
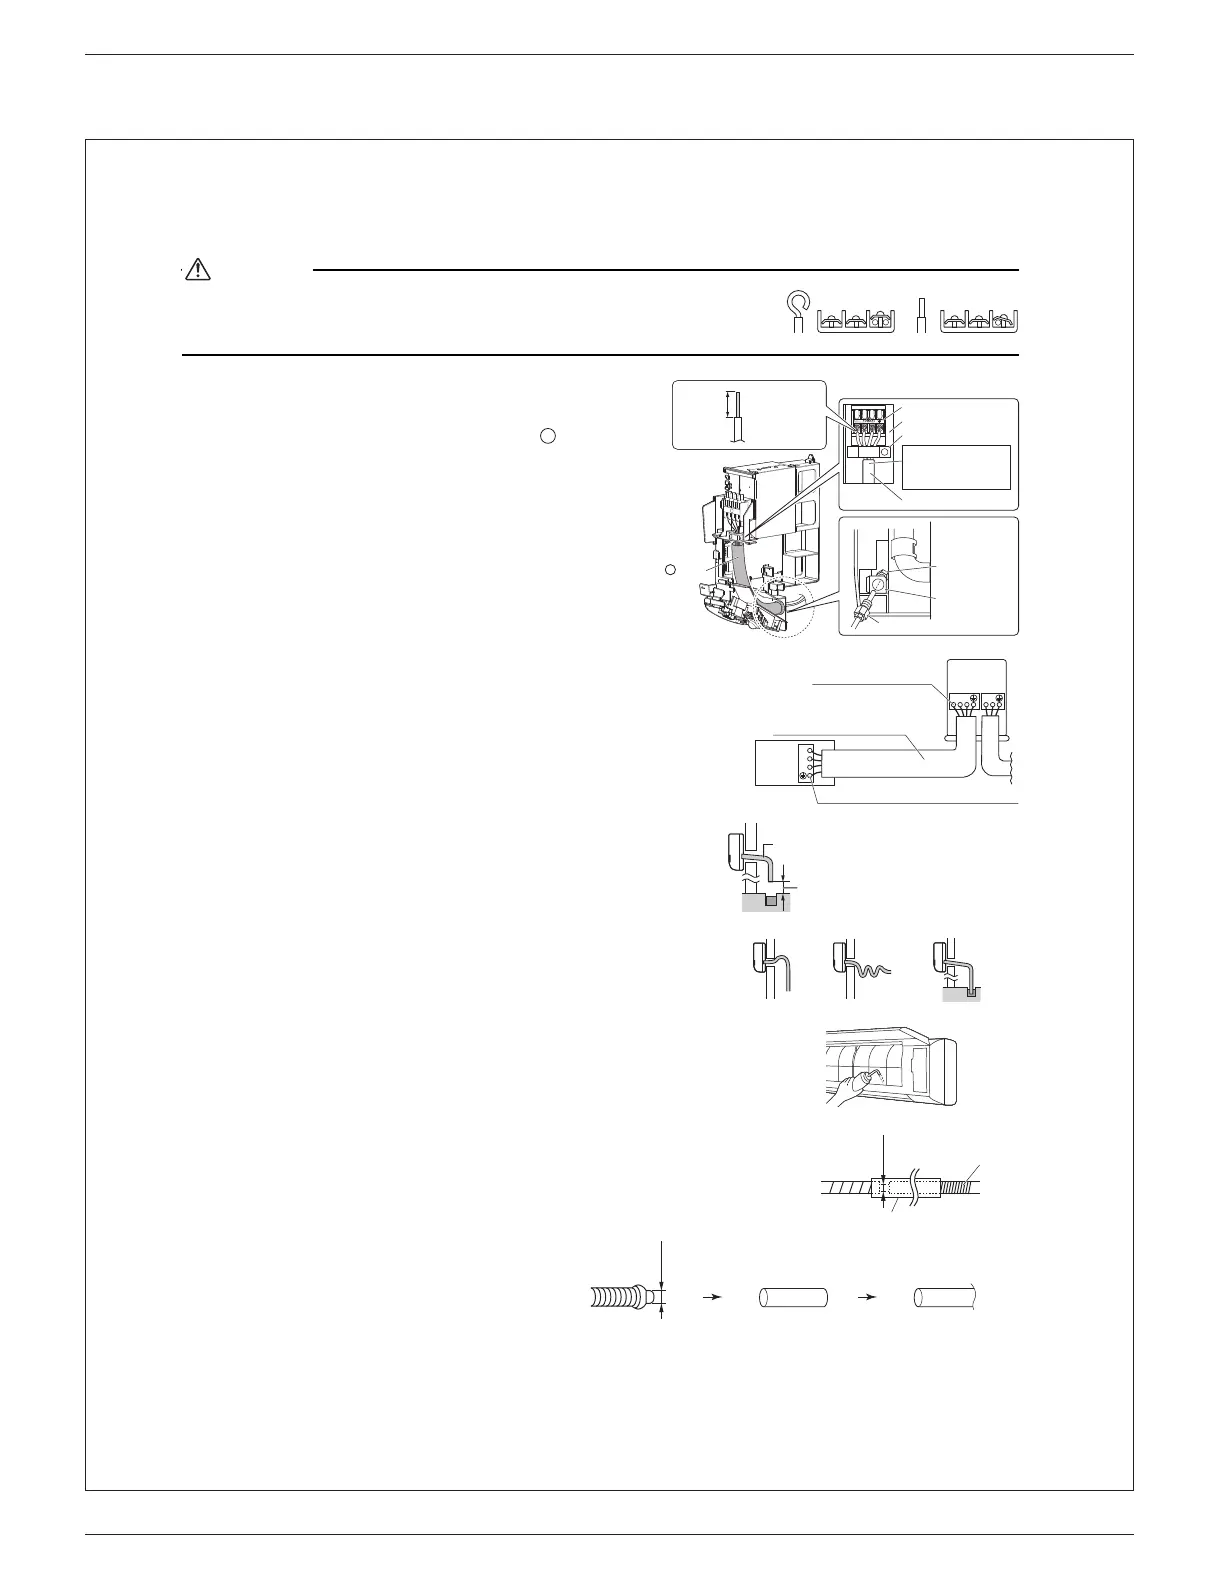
• When connecting the connection wire to the terminal block using a single core
wire, be sure to perform curling.
Problems with the installation may cause heat and fire.
1) As shown in the illustration on the right-hand side, insert the
wires including the ground wire into the conduit and secure
them with lock nut onto the conduit mounting plate.
2) Insert the wires including the ground wire into tube.
3) Strip wire ends (9/16 inch (15mm)).
4) Match wire colors with terminal numbers on the indoor and
outdoor unit’s terminal blocks and firmly secure the wires in the
corresponding terminals with the screws.
5) Connect the ground wires to the corresponding terminals.
6) Pull the wires lightly to make sure they are securely connected.
7) In case of connecting to an adapter system, run the remote
controller cable and attach the S21.
(Refer to “4. When connecting to an HA system” on page 9.)
8) Shape the wires so that the service lid fits securely, then close
the service lid.
5. Drain piping
1) Connect the drain hose, as described on the right.
• Avoid placing the end of the drain hose in a drainage location that could
cause bad odours or corrosive gas to flow backward into the outlet.
• The drainage water may change color due to bacteria or other
organisms. Place in a location where the flow of drainage water will not
cause a problem.
• Minimize the number of bends in the drain hose as much as possible.
If bending the drain hose, bend it gently.
2) Remove the air filters and transfer some water to the indoor heat
exchanger by pouring water into the drain pan.
3) Make sure that water flows out of the drain hose.
4) If drain hose extension or embedded drain piping is required, use appropriate parts
that match the hose front end.
• When extending the drain hose, use a commercially available extension hose with
an inner diameter of 5/8 inch (16mm).
Be sure to insulate the indoor section of the extension drain hose. Also, be careful
not to pull the extended part too much, as it may detach, and apply tape to the
connection to prevent water leakage.
• When connecting a rigid polyvinyl chloride pipe
(nominal diameter 1/2 inch (13mm)) directly to
the drain hose attached to the indoor unit as with
embedded piping work, use any commercially
available drain socket (nominal diameter 1/2 inch
(13mm)) as a joint.
Conduit
mounting plate
Lock nut
Back
Conduit
Terminal block
Electrical wiring box
Use the specified wire type.
Wire retainer
Shape wires so that
the service lid fits
securely.
Tube
K
Strip wire ends
(9/16 inch
(15mm)).
9/16 inch
(15mm)
K
1
2
3
123
L
1
L
2
Wire size and length must
comply with local codes.
the terminal screws.
Outdoor
unit
Indoor
unit
Firmly fix the wires with the terminal screws.
Make a downward slope
Getting higher
Containing waves
Wrong
With the end of the hose
in the drain outlet
Leave a gap of 50mm or more
at the end of the outlet
Indoor unit
drain hose
Extension drain hose
Heat insulation tube
ϕ5/8”
(ϕ16mm)
Commercially available
drain socket
(nominal diameter 1/2 inch
(13mm))
Commercially available
rigid polyvinyl chloride pipe
(nominal diameter 1/2 inch
(13mm))
Drain hose supplied with
the indoor unit
ϕ5/8”
(ϕ16mm)
01_EN_3P572321-1A.fm Page 7 Thursday, August 8, 2019 10:47 AM
 Loading...