4-25
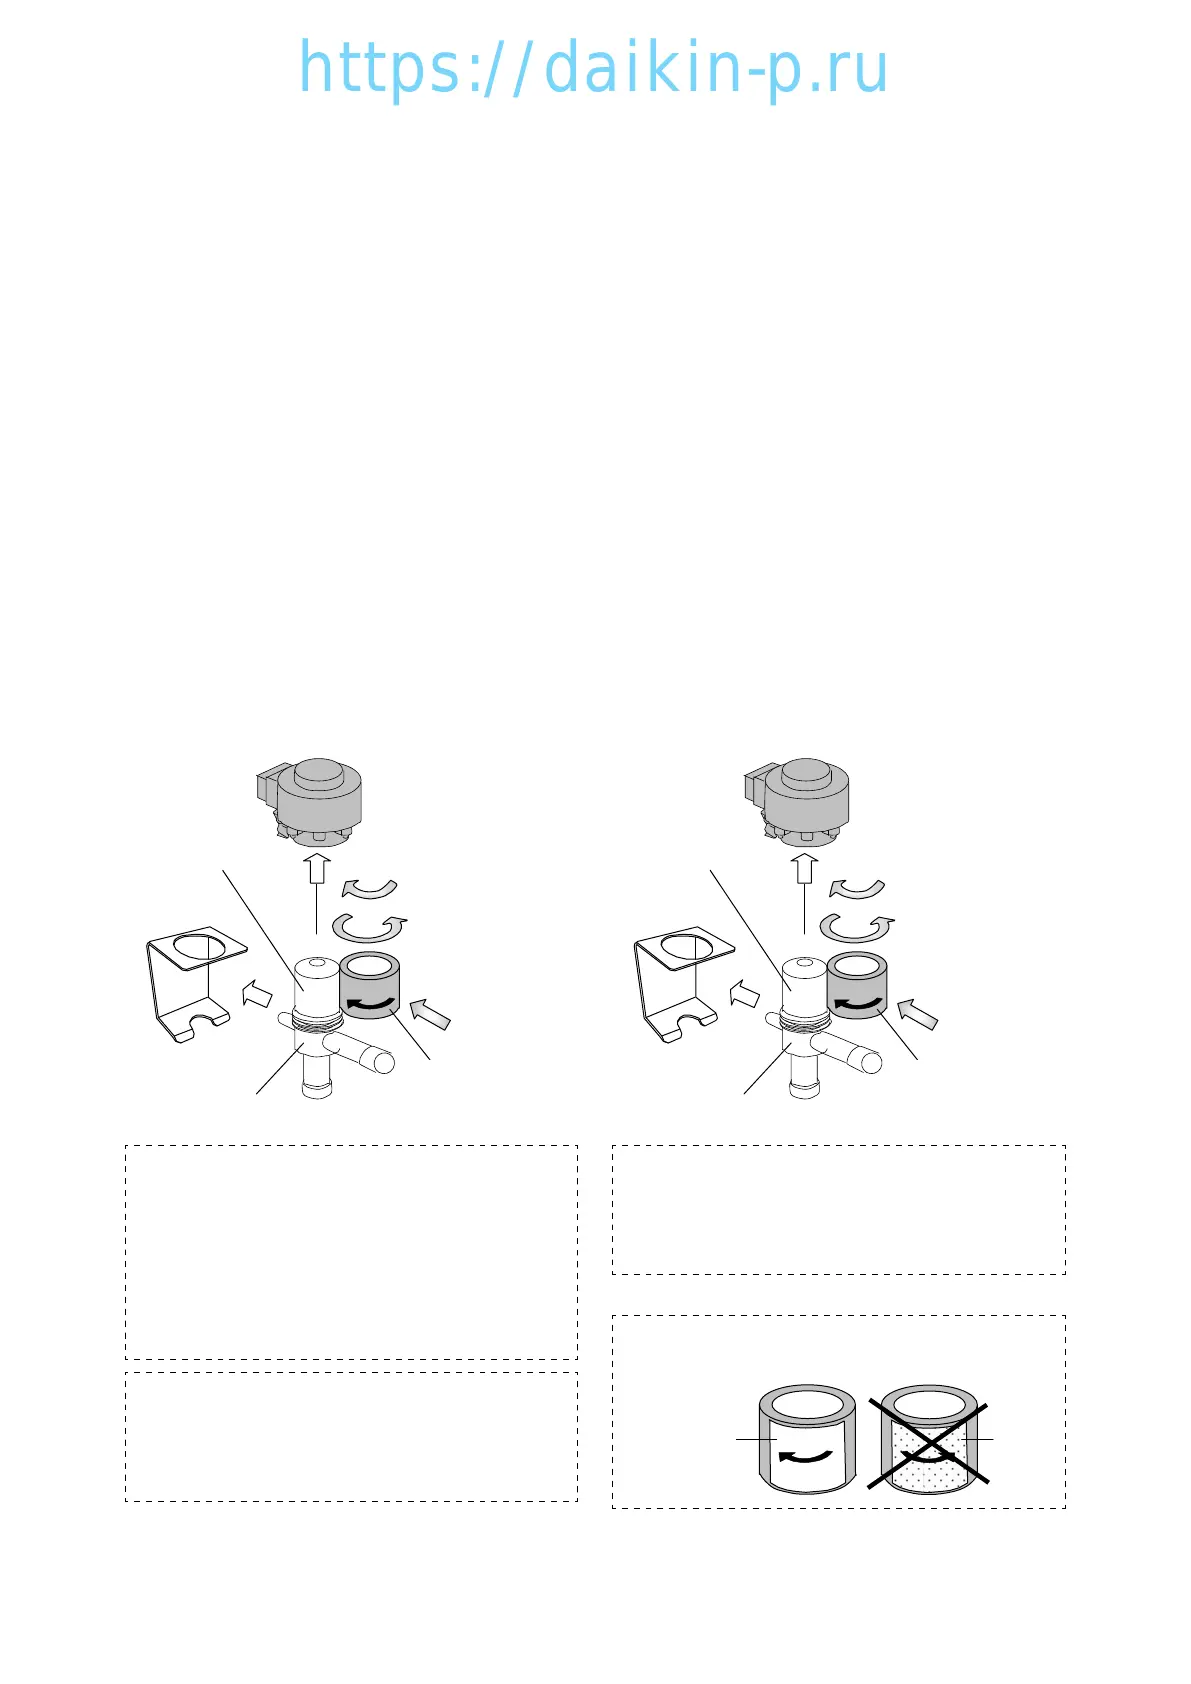
4.9.2 Fixing of EEV Opening
For the emergency operation when controller or
EEV coil is malfunctioned, EEV opening is fixed
using emergency magnet.
The fixing of opening is procedure with fully close
first and turn back 2.5 turns using emergency
magnet. (Approx. 20% opening)
Emergency magnet: Parts No.1896110.
① Disconnect connector X9A(Brown) on CPU
board. (To de-energized to EEV coil)
Refer the location of X9A to CPU board, in
paragraph 1.3.4.
②Remove fixing plate and EEV coil.
③ Bring the emergency magnet into contact with
valve head, turn the magnet counterclockwise to
close fully. There is a small click sound when the
valve is fully closed.
(Approximate 7 turns from full open to full close.)
④Then turn back 2.5 turns clockwise.
⑤Install coil and fixing plate.
Coil
Fixing plate
Valve body
②
①
①
②Full close
Valve head
③Turn back 2.5 turns
Emergency magnet
(Yellow label)
Upside
Recommendation !!
To quick pull-down, it is recommended EEV
opening to wider slightly.
However, keep watching the operation, and
close the valve opening if there is a frost around
suction pipe due to the wet operation or the
degree of super-heat becomes small.
ATTENTION !!
Make sure to reconnect connector X9A (Brown)
to the socket on CPU board when the operation
returns to normal.
4.9.3 Fixing of EMV Opening
For the emergency operation when controller or
EMV coil is malfunctioned, fix EMV opening using
emergency magnet.
The fixing of opening is procedure with fully close
once and turn back 3.5 turns using emergency
magnet.(Approx. 40% opening)
Emergency magnet : Parts No.1896110.
① Disconnect connector X10A(White) on CPU
board.(To de-energized EMV coil)
Refer the location of X10A to CPU board, in
paragraph 1.3.4.
②Remove fixing plate and EMV coil.
③ Bring the emergency magnet into contact with
valve head, turn the magnet counterclockwise to
close fully. There is a small click sound when the
valve is fully closed.
(Approximate 7 turns from full open to full close.)
④Then turn back 3.5 turns clockwise.
⑤Install coil and fixing plate.
Valve body
Valve head
Emergency magnet
(Yellow label)
Coil
Upside
Fixing plate
②
①
①
②Full close
③Turn back 3.5 turns
ATTENTION !!
Make sure to reconnect connector X10A (White)
to the socket on CPU board when the operation
returns to normal.
ATTENTION !!
Use emergency magnet with yellow label.
Up side
Open
Up side
Open
Yellow label
(No. 1896110)
Silver
label
0401-26LX10F11BEn.indd4-250401-26LX10F11BEn.indd4-25 2014/11/1916:42:312014/11/1916:42:31
 Loading...