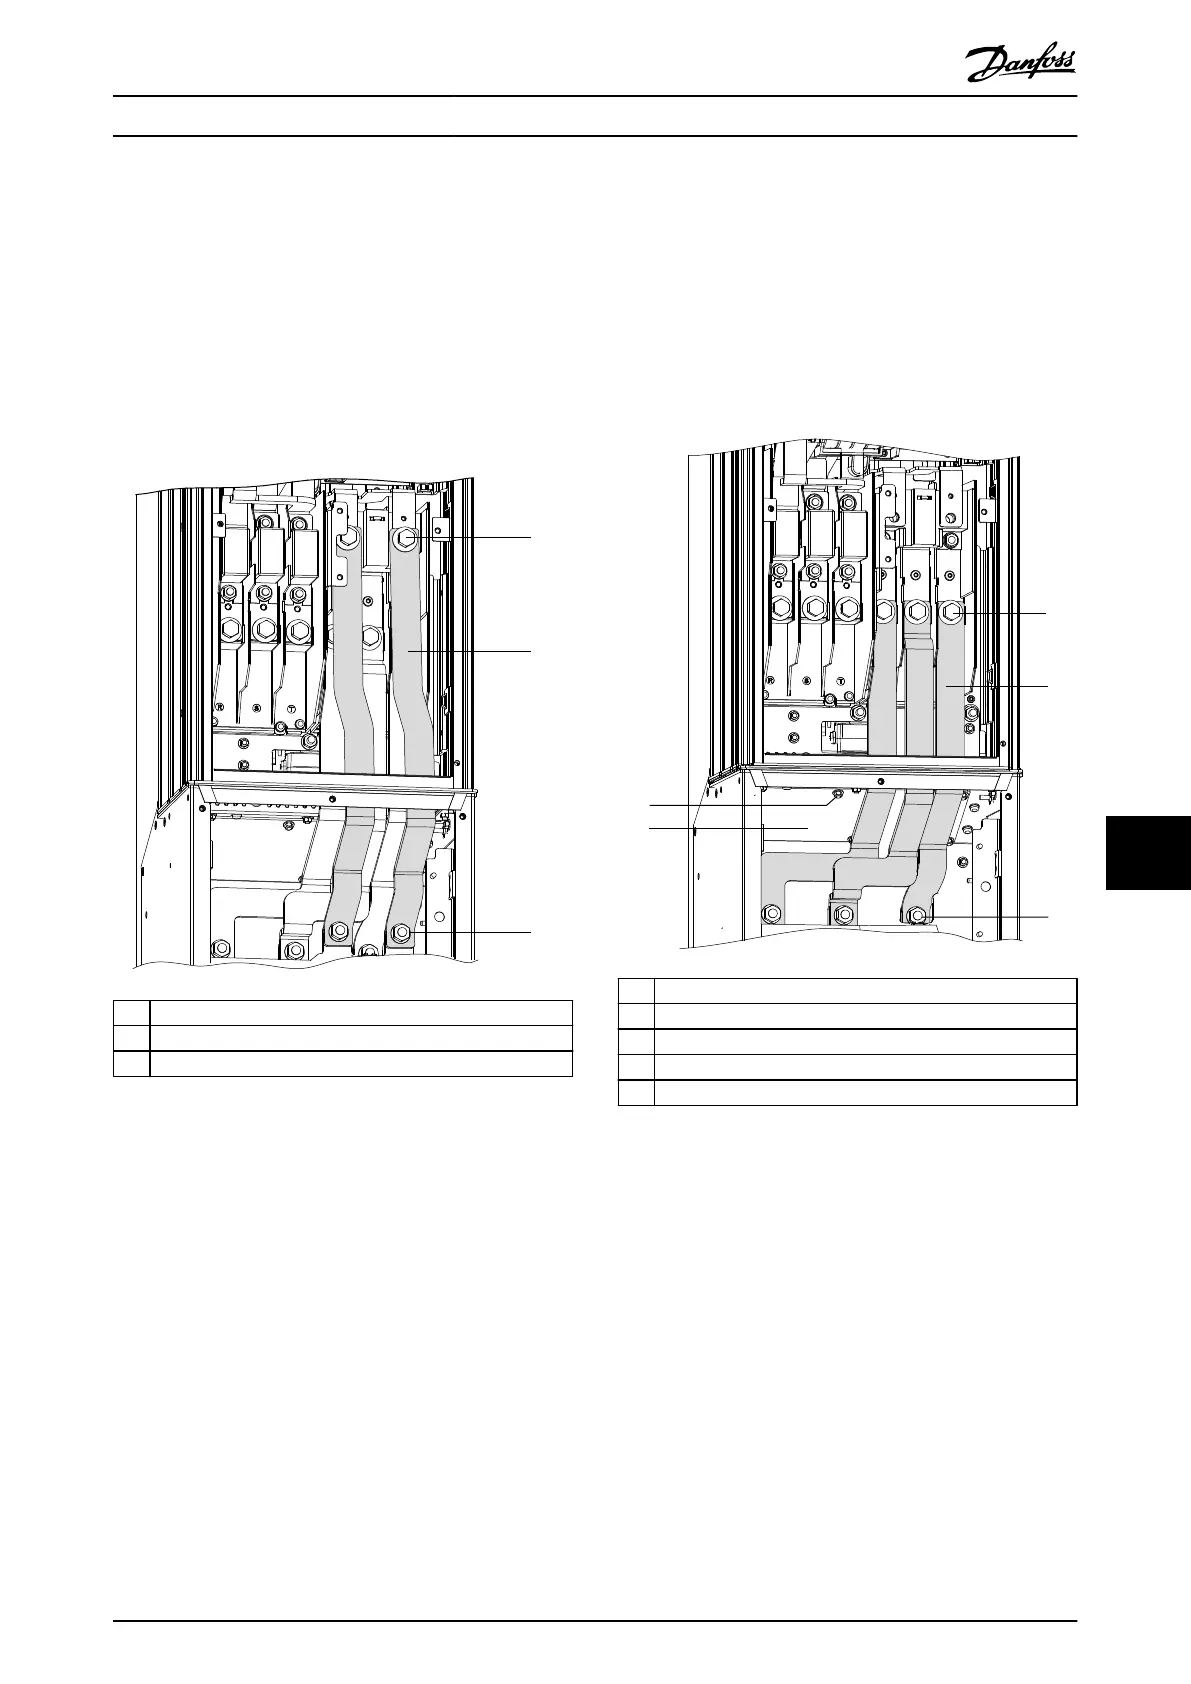
4. If optional brake is present, remove the 2 brake
jumper busbars between the main enclosure and
the extended options cabinet. See
Illustration 10.30:
4a Remove 2 nuts (17 mm) from the
bottom end of the brake jumper
busbars, 1 per busbar.
4b Remove 2 screws (17 mm) from the top
end of the brake jumper busbars, 1 per
busbar.
1 Screw (17 mm)
2 Brake jumper busbars
3 Nut (13 mm)
Illustration 10.30 Brake Jumper Busbars in D5h/D6h
5. Remove the 3 motor jumper busbars (U, V, and
W) between the main enclosure and the
extended options cabinet. See Illustration 10.31:
5a Remove 3 nuts (13 mm) at the bottom
of the motor jumper busbars, 1 per
busbar.
5b Remove 3 screws (17 mm) from the top
of the motor jumper busbars, 1 per
busbar.
1 Nut (8 mm)
2 Fan access panel
3 Screw (17 mm)
4 Motor output jumper busbars
5 Nut (13 mm)
Illustration 10.31 Motor Jumper Busbars in D5h/D6h
6. Access the heat sink fan cover by removing 6
nuts (8 mm) from the fan access panel.
7. Lift the fan access panel from the extended
options cabinet.
8. Remove the heat sink fan. See
chapter 10.2.24 Heat Sink Fan.
Reassembly
Reinstall in reverse order of this procedure. Tighten
hardware according to chapter 14.1 Fastener Torque Ratings.
D1h/D3h/D5h/D6h/J8 Drive Di... Service Guide
MG94A502 Danfoss A/S © 02/2019 All rights reserved. 179
10 10
 Loading...