Installing the expansion card risers
Prerequisites
1. Follow the safety guidelines listed in the Safety instructions.
2. Follow the procedure listed in the Before working inside your system.
3. Remove the air shroud.
4. If removed, install the expansion cards into the expansion card risers.
Steps
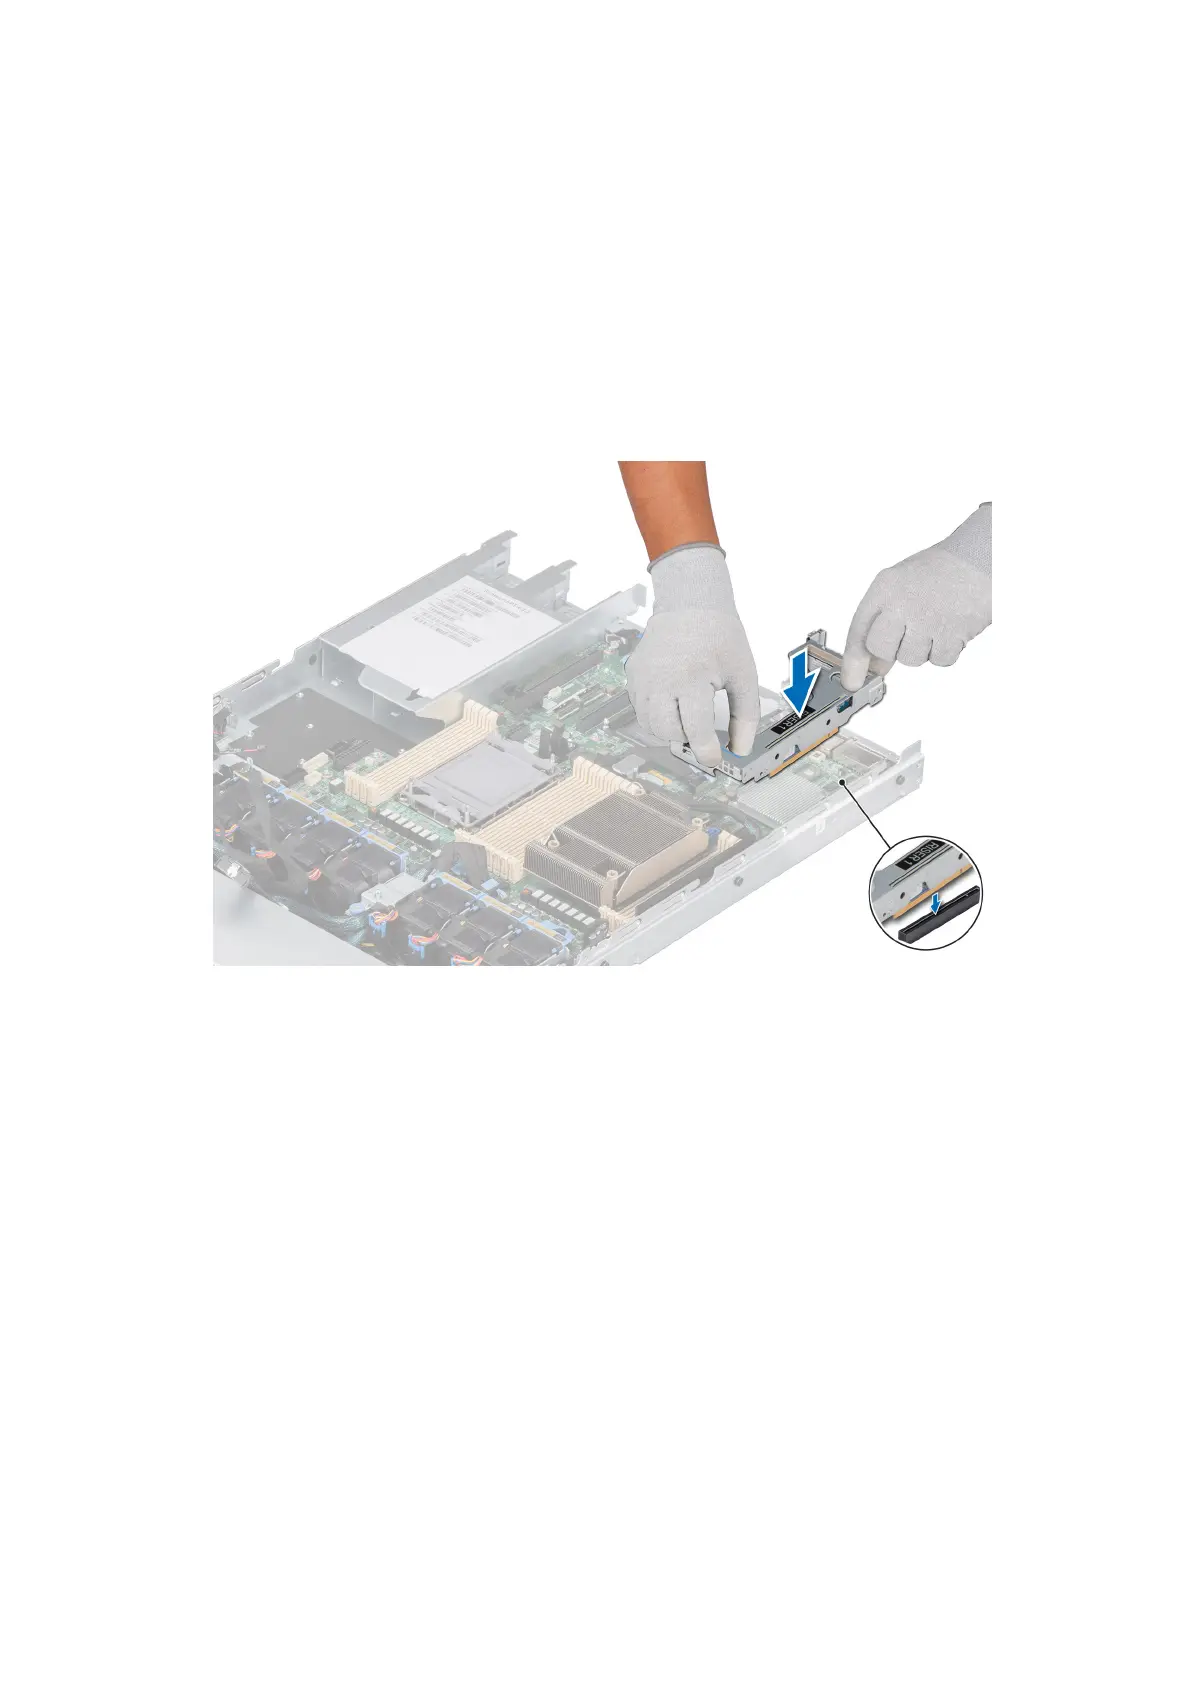
1. For Riser 1, release the blue latch and holding the touch points, align the expansion card riser with the connector and the
riser guide pin on the system board. Lower the expansion card riser into place until the expansion card riser connector is fully
seated in the connector.
Figure 73. Installing the Riser 1
2. For Riser 2a, release the blue latch and holding the touch points, align the expansion card riser with the connector and the
riser guide pin on the system board. Lower the expansion card riser into place until the expansion card riser connector is fully
seated in the connector.
Installing and removing system components
83
 Loading...