Steps
1. Align the slot on the rear drive cage with the guide on the system.
2. Slide the rear drive cage towards the rear of the chassis.
3. Using a Phillips #2 screwdriver, tighten the blue thumbscrew that secures the rear drive cage to the system.
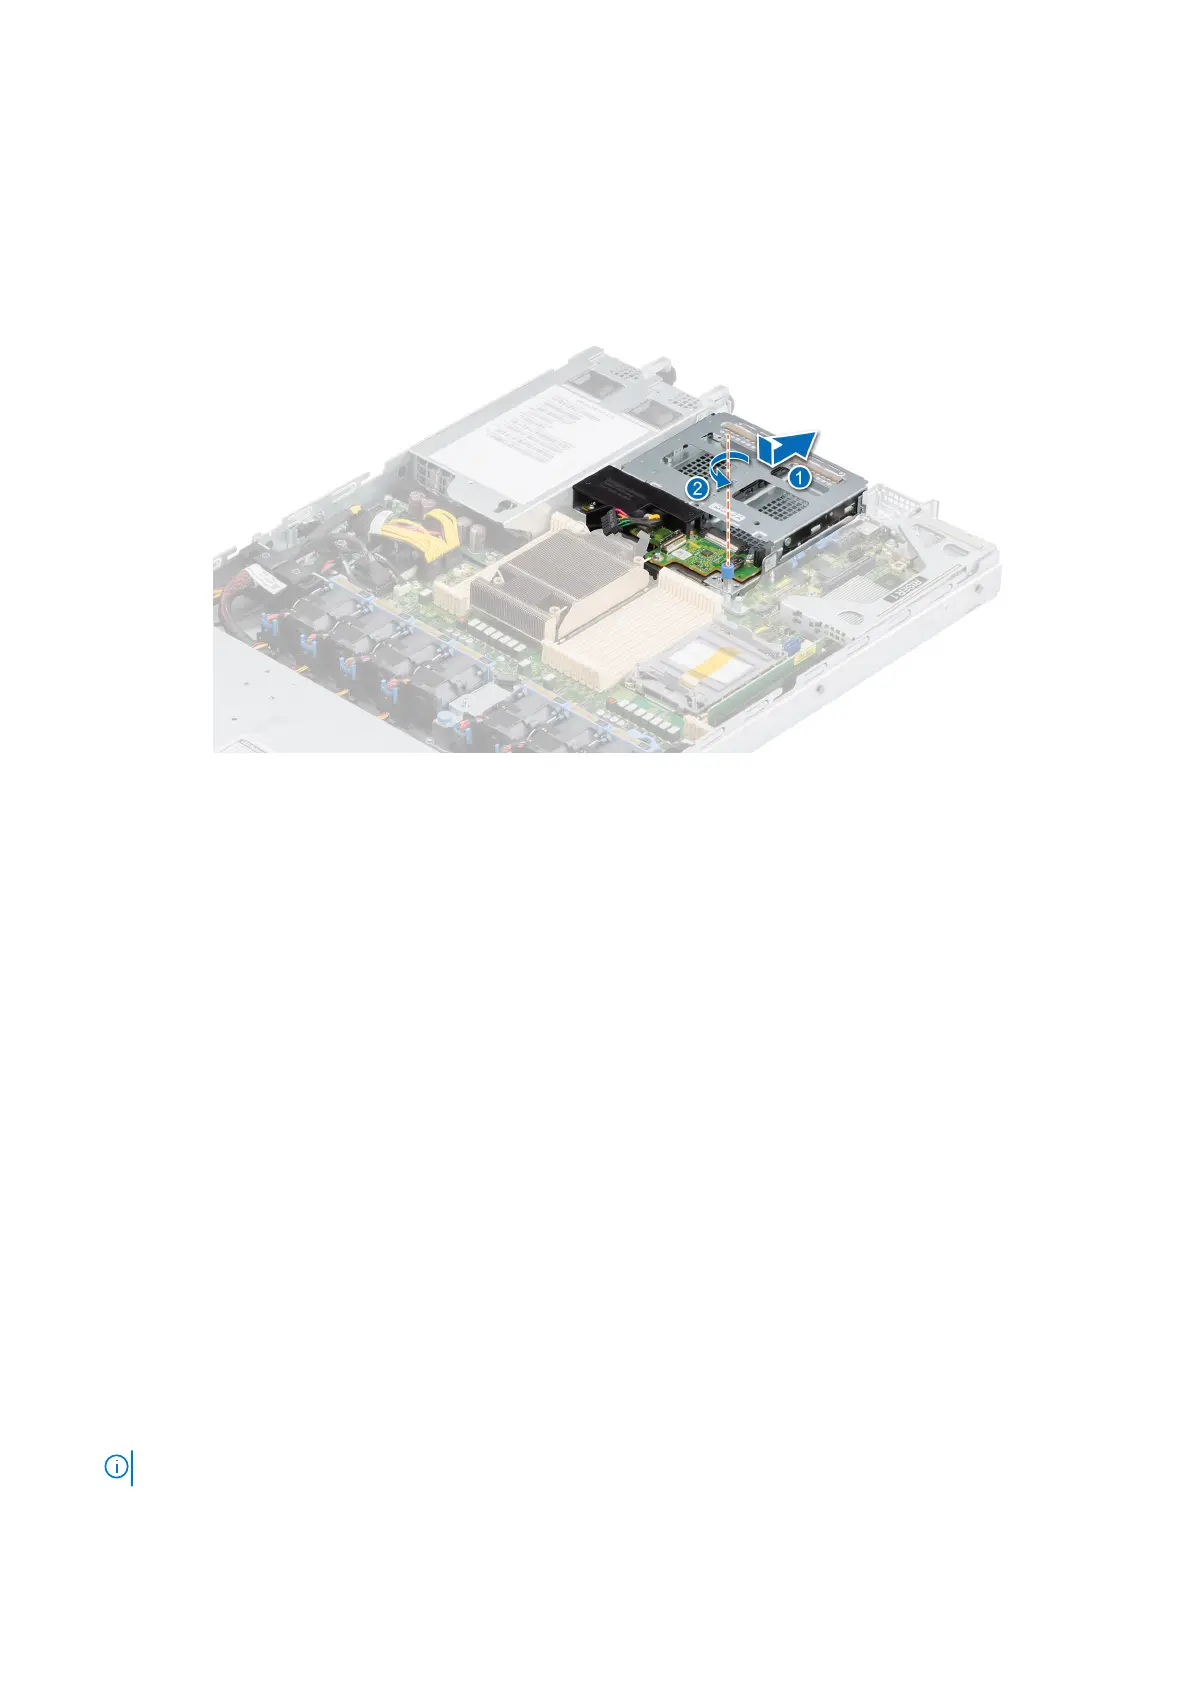
Figure 94. Installing the 2.5-inch rear drive cage
Next steps
1. Connect all the cables to the rear drive cage.
2. Install the drives.
3. If removed, install the air shroud.
4. Follow the procedure listed in After working inside your system.
Optional serial COM port
This is a service technician replaceable part only.
Removing the serial COM port
Prerequisites
1. Follow the safety guidelines listed in the Safety instructions.
2. Follow the procedure listed in Before working inside your system.
3. Remove the air shroud.
Steps
1. Lift the expansion card riser (Riser 1, Riser 2a, Riser 2b, Riser 2c) and disconnect the serial COM port cable from the
connector on the system board.
2. Open the latch, slide the serial COM port out of the expansion card riser, and the lock the latch .
NOTE: The numbers on the image do not depict the exact steps. The numbers are for representation of sequence.
Installing and removing system components 95
 Loading...