DVM-750 Installation Guide 860-0008-00 Rev C
Digital Ally, Inc |DVM-750 Installation Guide
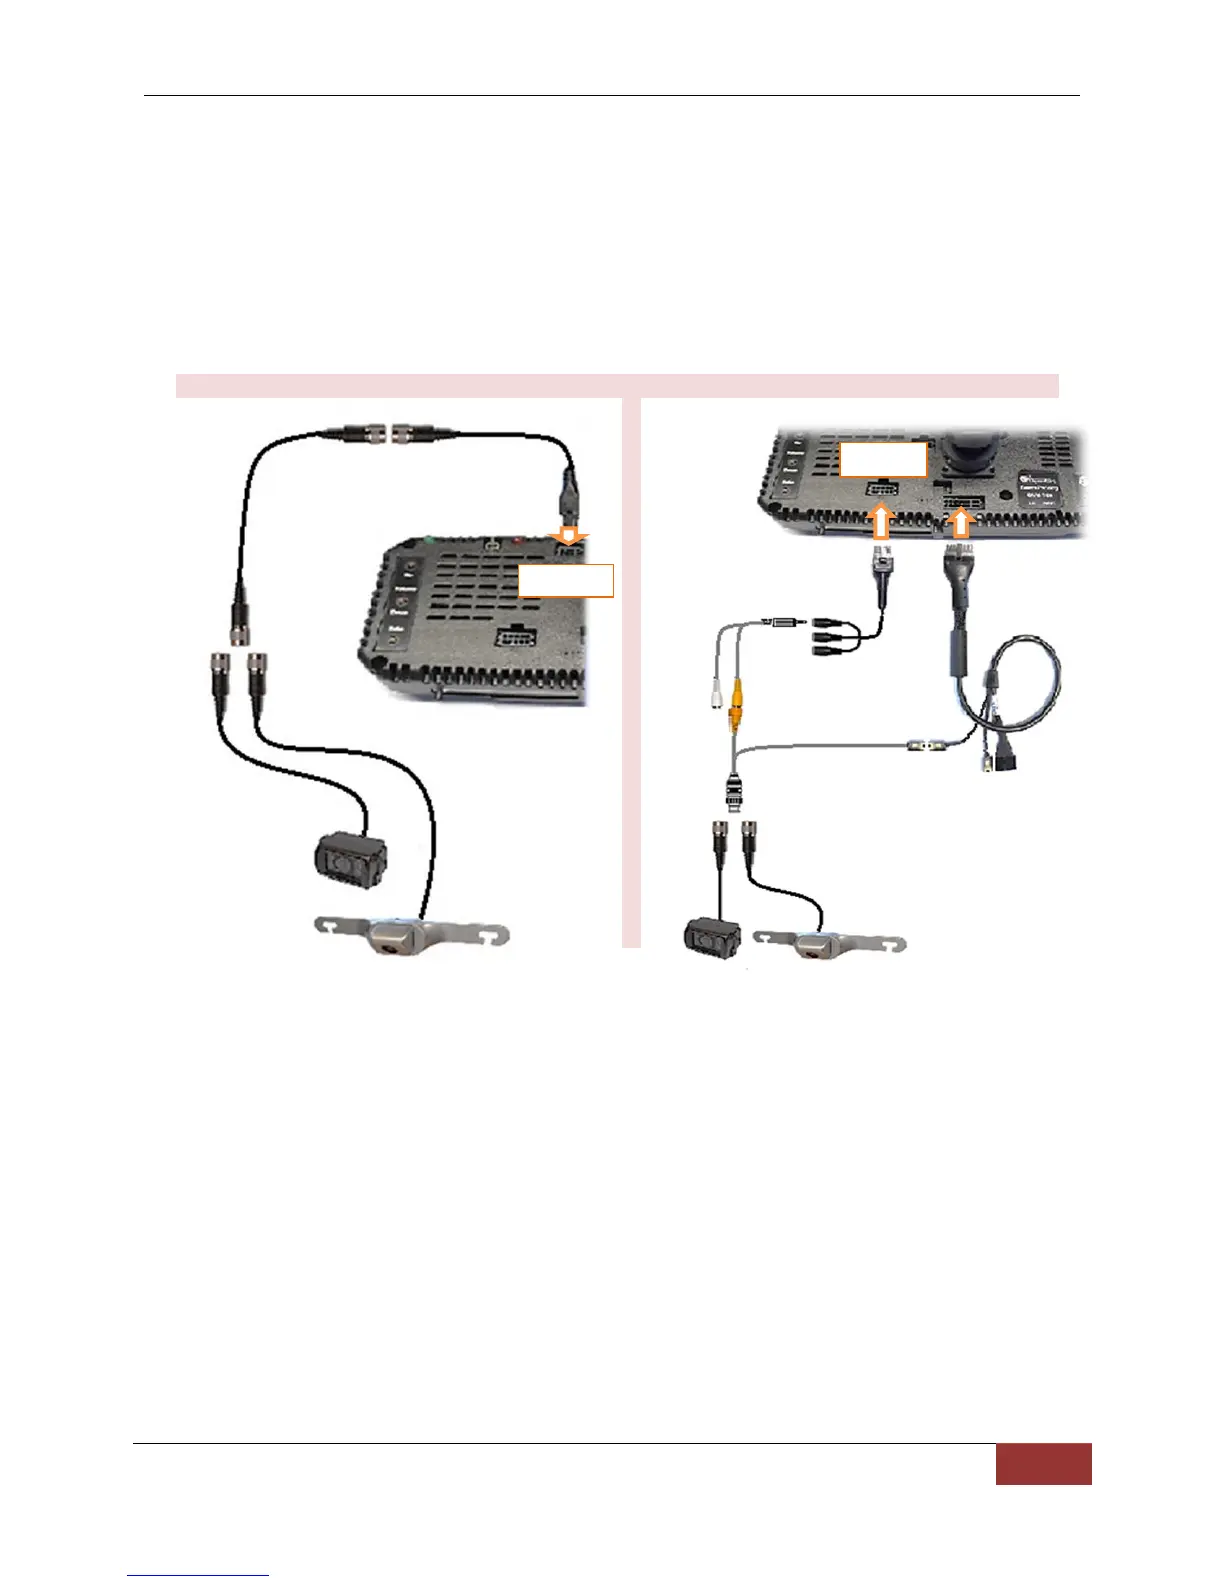
Backup Camera (optional)
Digital Ally offers two different backup camera models for you to choose depending on
your application and/or vehicle. The camera may be connected to the back of the DVM
either by using the CAM2 port, or the A/V input through the dongle cable. Refer to the
diagram below for cabling options. You may also need to use an extension cable
depending on your vehicle. Cable part numbers are located on page 5. In order for the
backup camera to function correctly, you must also connect to the vehicle’s reverse gear
signal (see Step 7).
Cabling OPTION 1: Using the CAM2 input Cabling OPTION 2: Using the A/V input
1. Route the Camera Cables
a. Review the diagrams above depending on which camera and cabling option you
have purchased. Start routing the cable from the DVM and work your way back to
your designated camera location.
b. Leave slack in the cable as a service loop and for DVM adjustment; then begin
routing the cable to the rear of the vehicle.
c. Depending on your vehicle you may be able to route the cables down the side of the
headliner to a rear compartment of the vehicle. Otherwise find a suitable route on
the floorboard of the vehicle.
d. To conceal the cable it may be necessary to loosen interior trim and other
components within the vehicle.
e. Secure the cables using Velcro or standard tie wraps as required.
Extension Cable
008-01382-03
 Loading...