76
Chapter 12 – Mechanical Seal Assembly
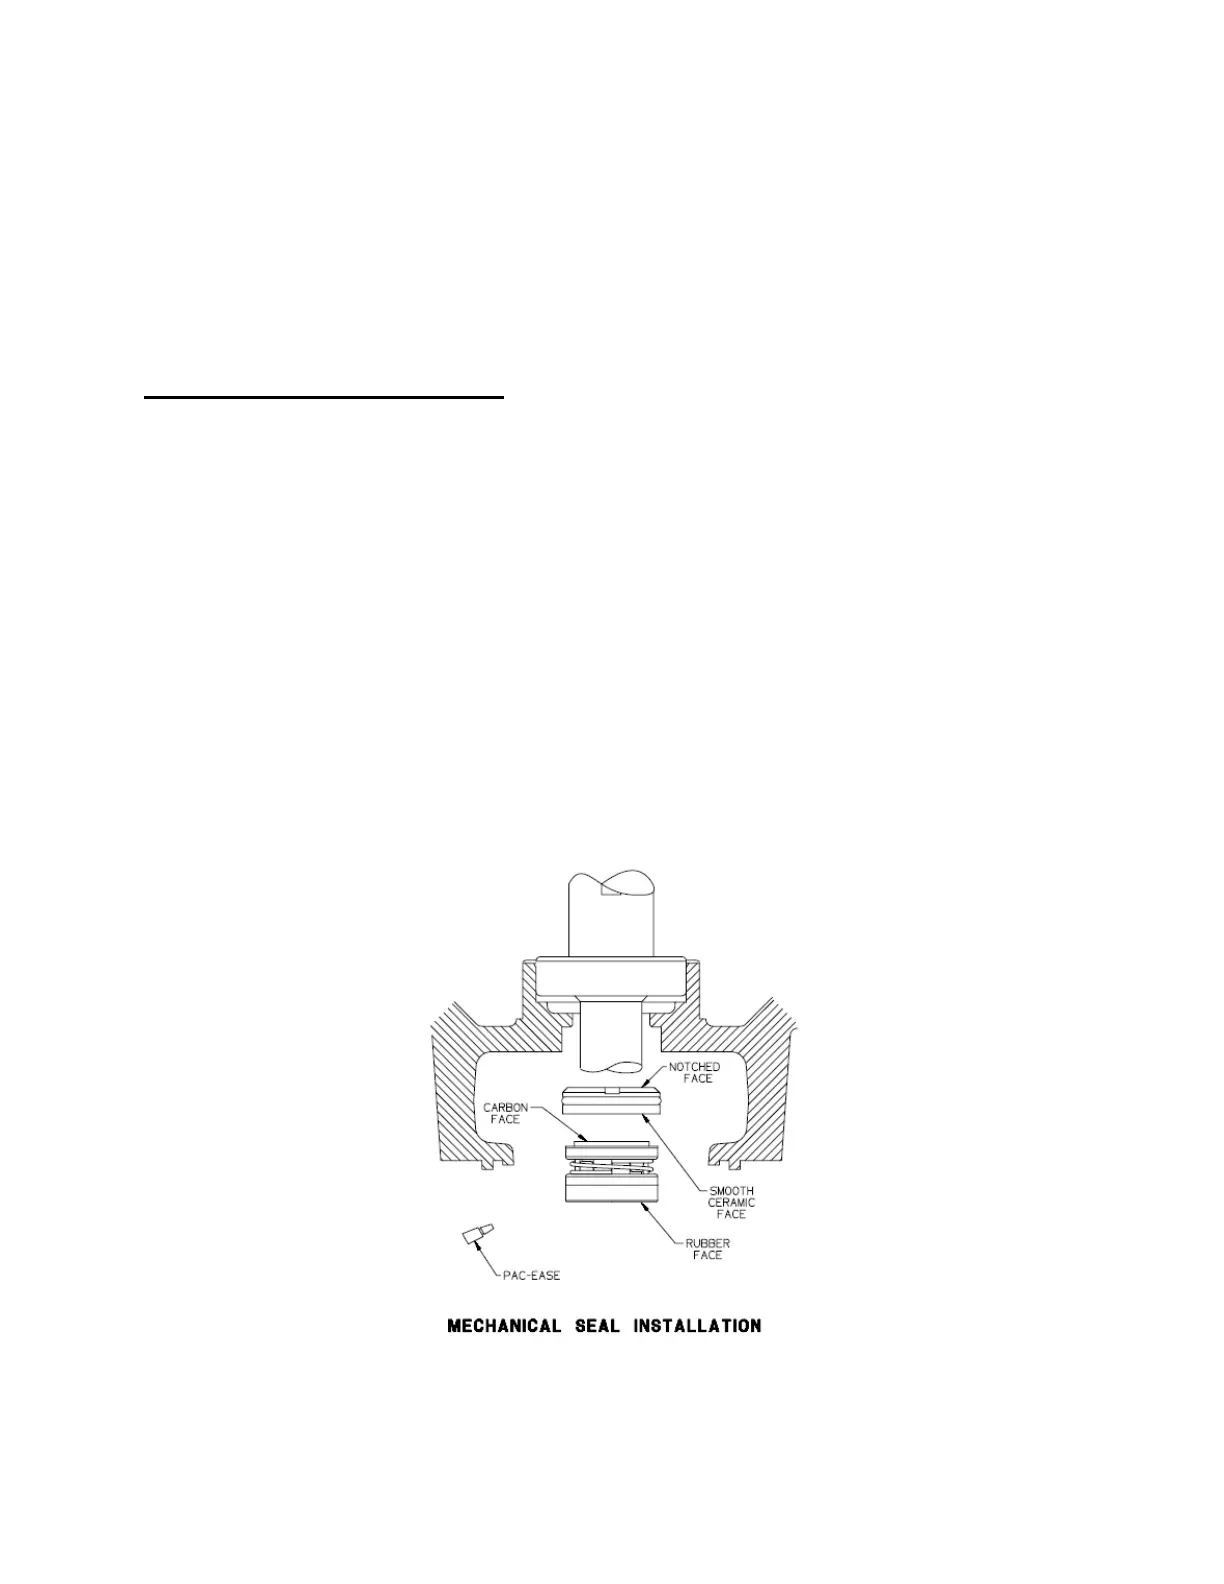
The Mechanical Seal is a carbon/ceramic type with spring bellows. The seal kit (PT# 1208)
consists of the ceramic portion, carbon portion/spring bellows, and a tube of Pac–Ease,
instruction sheet, (7) lock nuts and (4) main sealing o-rings. The seal is easily installed with the
motor turned upside down or lying on its side with the pump end facing the installer. Replace the
mechanical seal only during a motor overhaul. Do not replace the mechanical seal in the field or
as routine maintenance. Be sure to install the new motor head and control compartment o-rings
when reassembling.
Installing the Mechanical Seal
a. Ensure the pump cavity, seal bore and Armature Shaft are clean and grit free. Wash
seal installation tool (PT#4028) and hands before proceeding. Cleanliness is very
important during seal installation. Proceeding quickly to avoid the lubrication from drying
is also necessary; otherwise, a failure may occur.
b. Carefully remove the ceramic portion of the seal from the package. Lubricate the o-ring
with Pac-Ease or clean, soapy water, handling the seal by the edges. Do not
contaminate the smooth face of the seal. Slide the seal over the armature shaft,
grooved side facing the motor head. Using the seal installation tool, press the ceramic
portion of the seal into the seal bore. Do not twist or turn the tool, as this may cut the o-
ring.
c. Lubricate the bellows on the carbon portion/spring bellows portion with Pac-Ease or
clean, soapy water. Slide over the armature shaft (carbon face first) and press on with
the seal installation tool. Use a steady push and take care not to “slam” the two faces of
the seal together.
d. Install the pump rotor immediately. Install the groove pin with channel lock pliers.
e. Rotate the motor shaft to help seat the seal.
f. Proceed with the Motor Cavity and Seal Assembly Leak Test in Chapter 13.
Figure 12 – 1