Type VSA12, VSA16 and VSA20/800 maintenance instructions
9 MAINTENANCE INSTRUCTIONS MN280064EN October 2017
10. Remove two 3 ⁄ 8 inch hex nuts and lockwashers from
top of mechanism channel.
11. Remove 1 ⁄ 2 inch hex nut lockwasher attaching bottom
of channel to cabinet.
12. Remove 1 ⁄ 2 inch hex head bolt and lockwasher
attaching top of mechanism channel.
13. Maneuver complete mechanism assembly out of
operator cabinet.
Mechanism installation
Installation of the operating mechanism is essentially the
reverse of disassembly; however, two adjustments must be
made after the mechanism is installed.
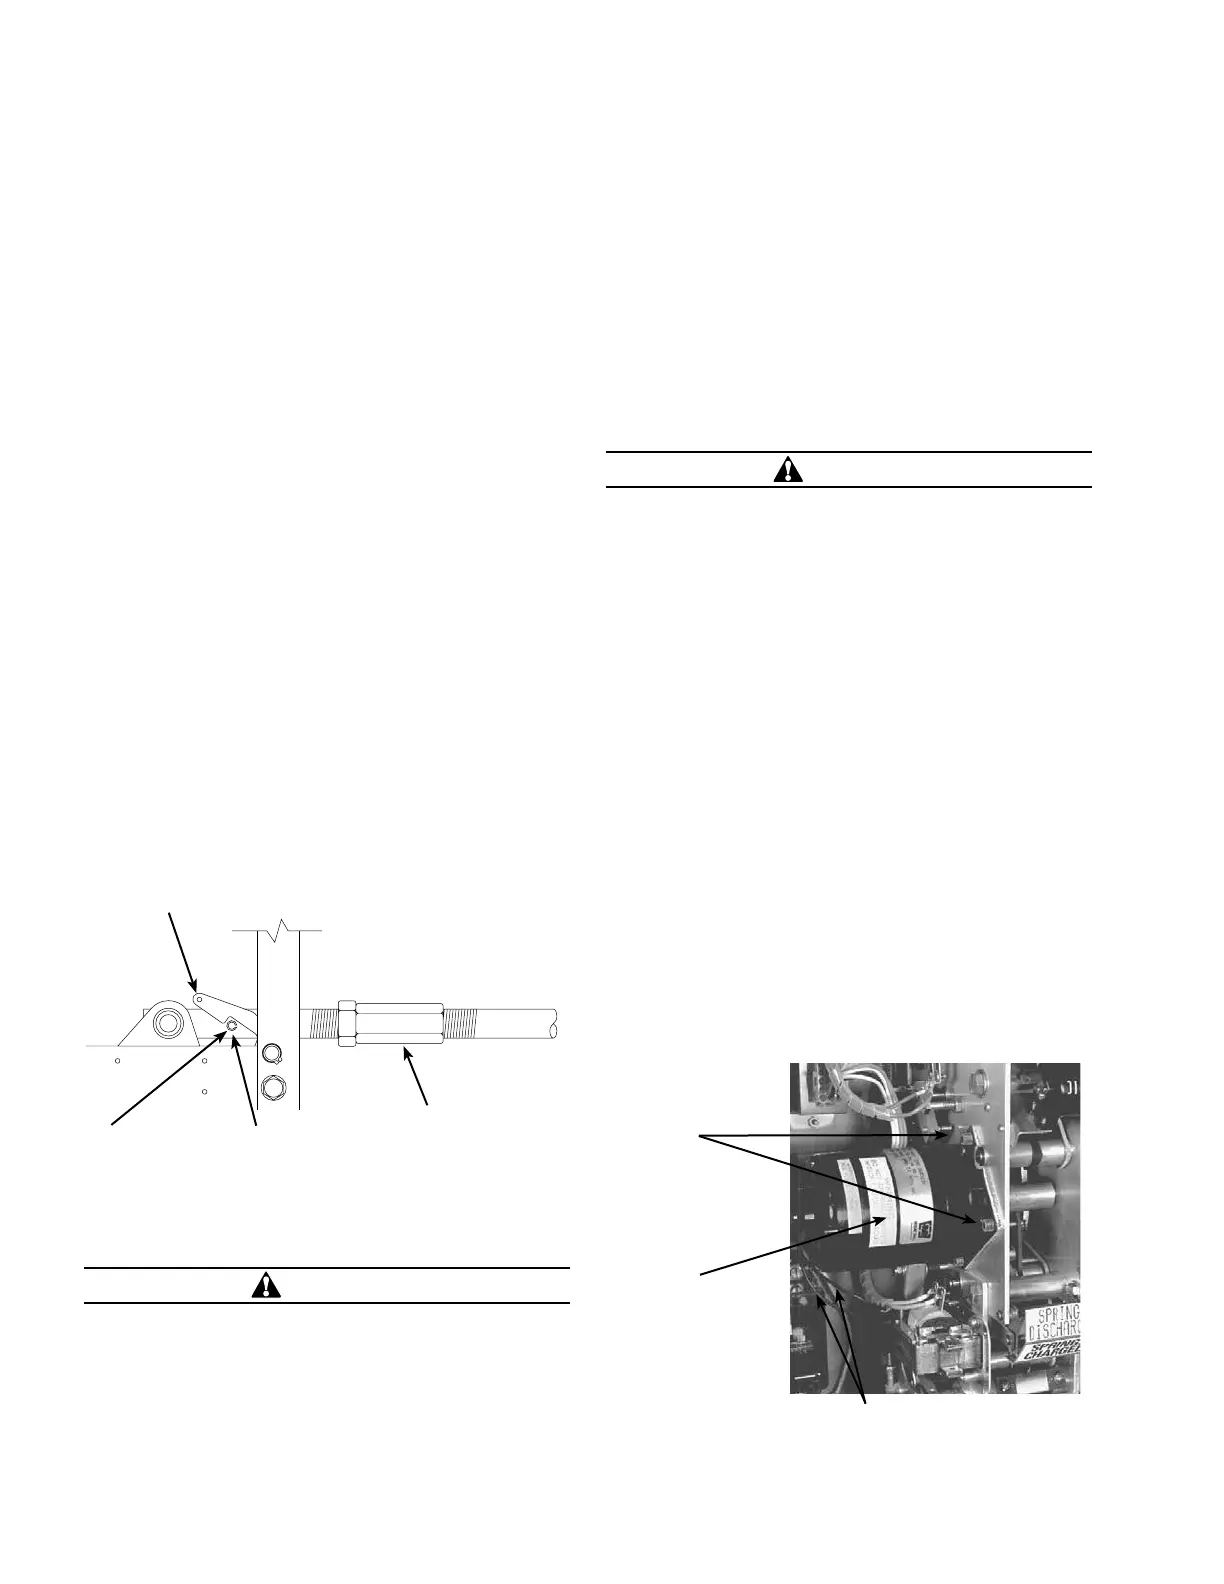
External Quick-Close pullring adjustment. The stop
nut that secures the external quick-close pullring must be
adjusted to prevent over travel of the manual close lever
assembly, refer to Figure 13.
1. From under the mechanism housing, pull quick-close
lever down until linkage comes to its mechanical stop.
2. Adjust stop nut until the top edge of the manual close
lever just contacts the spacer.
Anti-bounce latch adjustment. The anti-bounce latch
assembly must be properly adjusted to operate properly,
refer to Figure 14.
1. Loosen operating bar turn-buckle.
2. Adjust turnbuckle to provide a 1⁄32 inch gap between
operating bar roll pin and the anti-bounce latch.
3. Secure turnbuckle.
latch assembly
Roll pin
Operating bar
turnbuckle
Figure 14. Anti-bounce latch adjustment
Motor
CAUTION
This type of motor should NEVER be energized while
disconnected from gear reduction unit. Uncontrolled
motor speed will result when operated without load,
excessive speed will damage motor.
A universal series-type motor is used to charge the closing
springs. The motor is energized from either a 240- or
120-Vac auxiliary power source, through a fused pullout
switch. The motor has permanently lubricated, sealed ball-
bearings that require no service. Periodically check motor
brushes for wear or burning, replace as required.
ote:N Brush replacement kits are available for both the
240- Vac and 120-Vac motors. The kit consists of two
brushes and two brush caps.
Motor replacement
The universal drive motor must be replaced, as an
assembly, if it become damaged or worn. To replace the
motor proceed as follows, refer to Figure 5:
CAUTION
Do not attempt to replace the drive motor while recloser
contacts are closed, or while operator springs are charged.
If the operator assembly were to trip while hands are
within operating linkage personal injury couldresult.
1. Remove fused pullout switch to de-energize AC power
source to operator mechanism.
2. Make sure recloser contacts are open; manually
operate mechanism until contact position indicator
reads OPEN and closing spring status indicator reads
SPRINGS DISCHARGED.
3. Cut motor leads, close to old motor.
4. Remove hardware securing motor and carefully remove
from operator assembly.
5. Position replacement motor into operator assembly,
engage motor shaft into coupling, secure with hardware
removed. Apply Loctite #242 (blue) to screw threads
prior to assembly.
6. Trim motor leads, leave sufficient length to splice new
motor leads to old motor leads.
7. Slide shrink tube over motor leads, splice and solder
leads. Shrink tubes over joints.
8. Install fused pullout switch to energize AC
powersource.
Drive motor
hardware
Universal
drive motor
Motor leads
Figure 15. Motor replacement

 Loading...


