Alarm Configuration • 7-1
7Alarm
Configuration
Alarms in Site Supervisor can be generated from
different sources including external networked devices,
applications, value-added applications, and sub-systems.
Alarm configuration, transmission, and history settings
can be defined by the user.
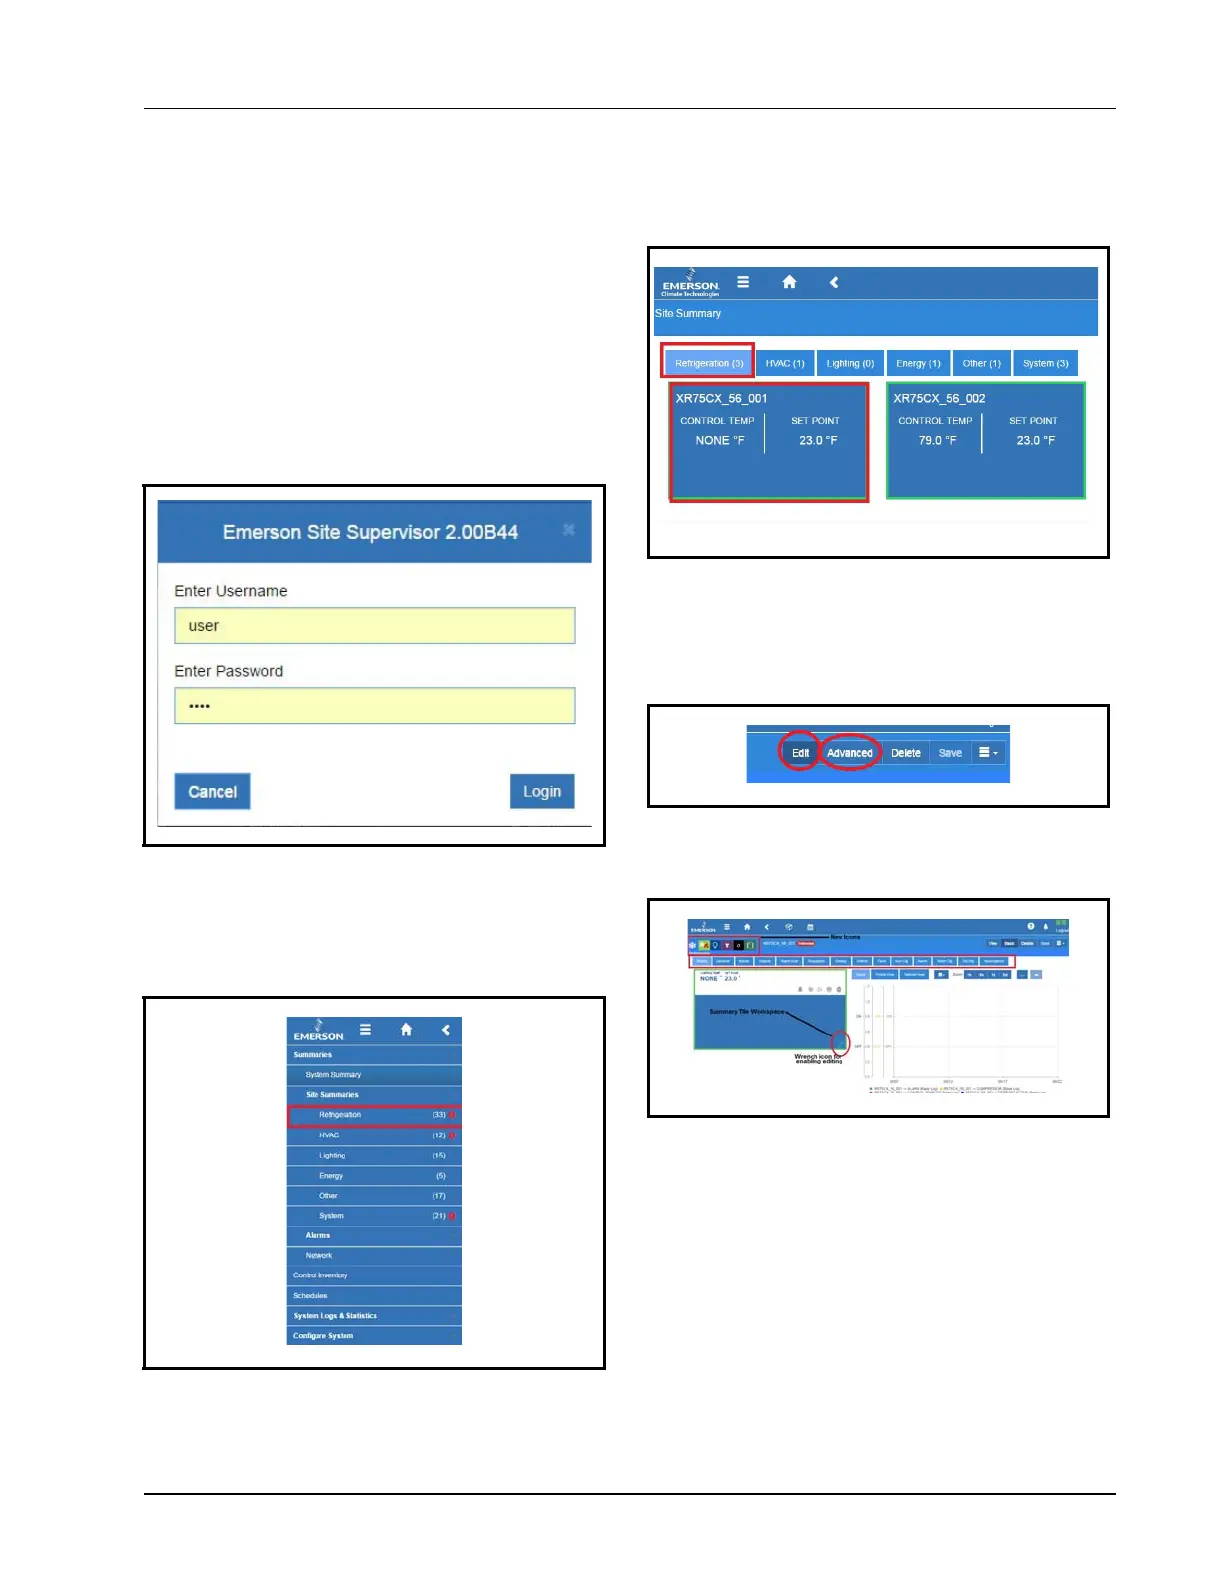
1. Log in to Site Supervisor by clicking Login on
the Main Menu, located on upper right side of the
screen and enter your username/password.
2. From the Home screen, navigate to Summaries
and Floor Plans> Site Summaries> Refrigera-
tion.
3. In this example, alarm configuration for
XR75CX 5.6 controller is used. Select the
XR75CX 5.6 device on the Site Summary>
Refrigeration screen to access the device status
page.
4. On the drop-down menu on the upper right of the
sreen, click Edit and Advanced to access
configuration properties and alarms for the
XR75CX 5.6 device.
Click each tab to see the XR75CX parameters:
Note that under the Status tab on any device applica-
tion page the wrench icon can be clicked for customizing
the summary tile information. New category icons are
located across the top and when clicked go to those appli-
cation pages.
Figure 7-1
- Site Supervisor Login
Figure 7-2 - Accessing Site Summaries - Refrigeration
Figure 7-3 - XR75CX Under Refrigeration
Figure 7-4 - Accessing the Configuration Properties of
XR75CX 5.6
Figure 7-5 - XR75CX 5.6 Tabs
 Loading...