Installation
8
427-0200-00-12 Revision 100
This document does not contain any export-controlled information.
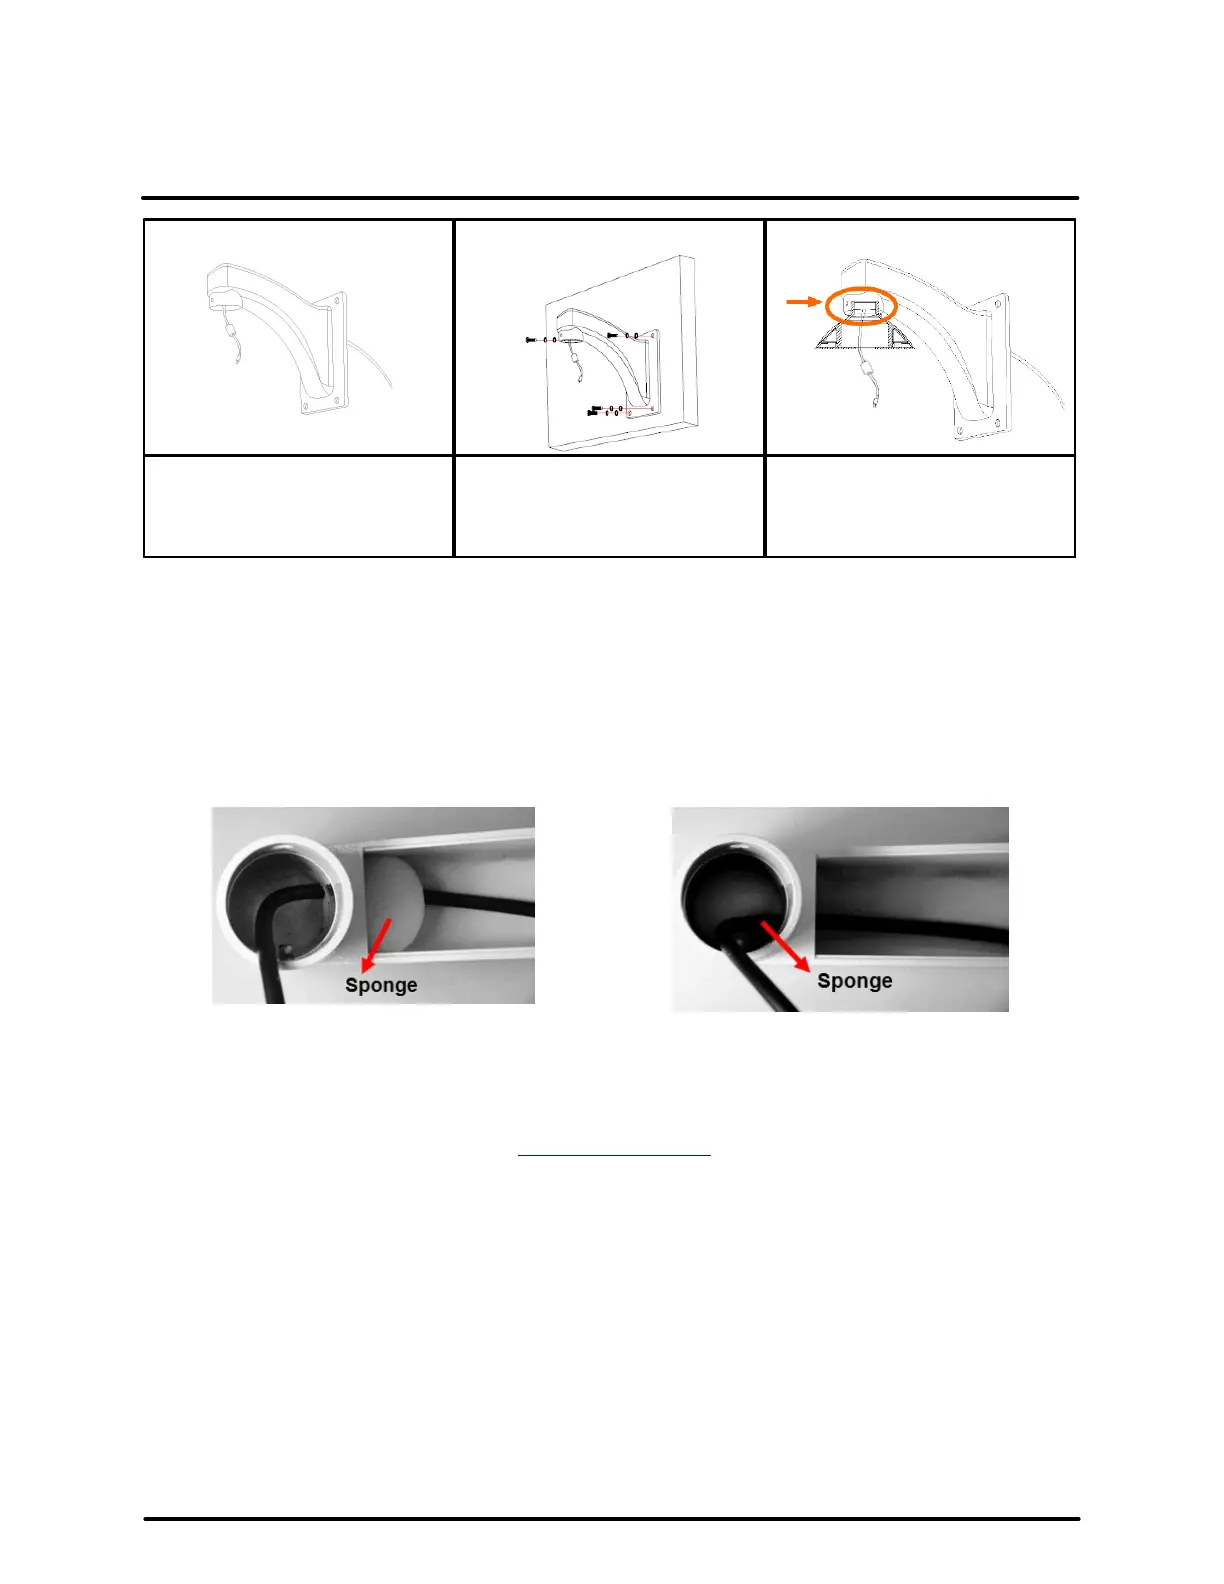
Pull cables through bracket.
Assemble pendant cap.
Use Allen key and a hex head cap
screw to firmly fix the pendant
cap to the arm.
Detailed instructions for mounting a camera using the CX-ARMX-G3 wall mount bracket
1. Cut a cable access hole in the wall.
2. Attach the wall mount to the wall using the appropriate screws and screw anchors (not provided). For
outdoor models, attach the waterproof gasket to the wall mount.
3. Thread the cables through the wall mount.
4. After threading the cables, block the entry hole with the supplied sponge to prevent insects from
entering. The sponge can be placed in one of two ways.
5. Thread the cables through the outdoor mount kit and attach the pendant mount kit to the wall mount
using the supplied screws and washers.
6. For outdoor cameras, adjust the waterproof gasket to the joint.
7. Connect the cables to the camera (see Camera Connections).
8. Secure the camera to the outdoor mount kit.
9. Ensure the camera is fixed completely, and that the thread holes on the camera’s fixing plate and the
mount kit are aligned.
10.Screw in the supplied screw and washer.
 Loading...