Installation
17
427-0200-00-12 Revision 100
This document does not contain any export-controlled information.
6. Thread the cables through the outdoor mount kit and attach the mount kit to the wall mount using the
supplied screws and washers.
7. For outdoor cameras, adjust the waterproof gasket to the joint.
8. Connect the cables to the camera.
9. Secure the camera to the outdoor mount kit.
10.Ensure the camera is fixed completely, and that the thread holes on the camera’s fixing plate and the
mount kit are aligned.
11.Screw in the supplied screw and washer.
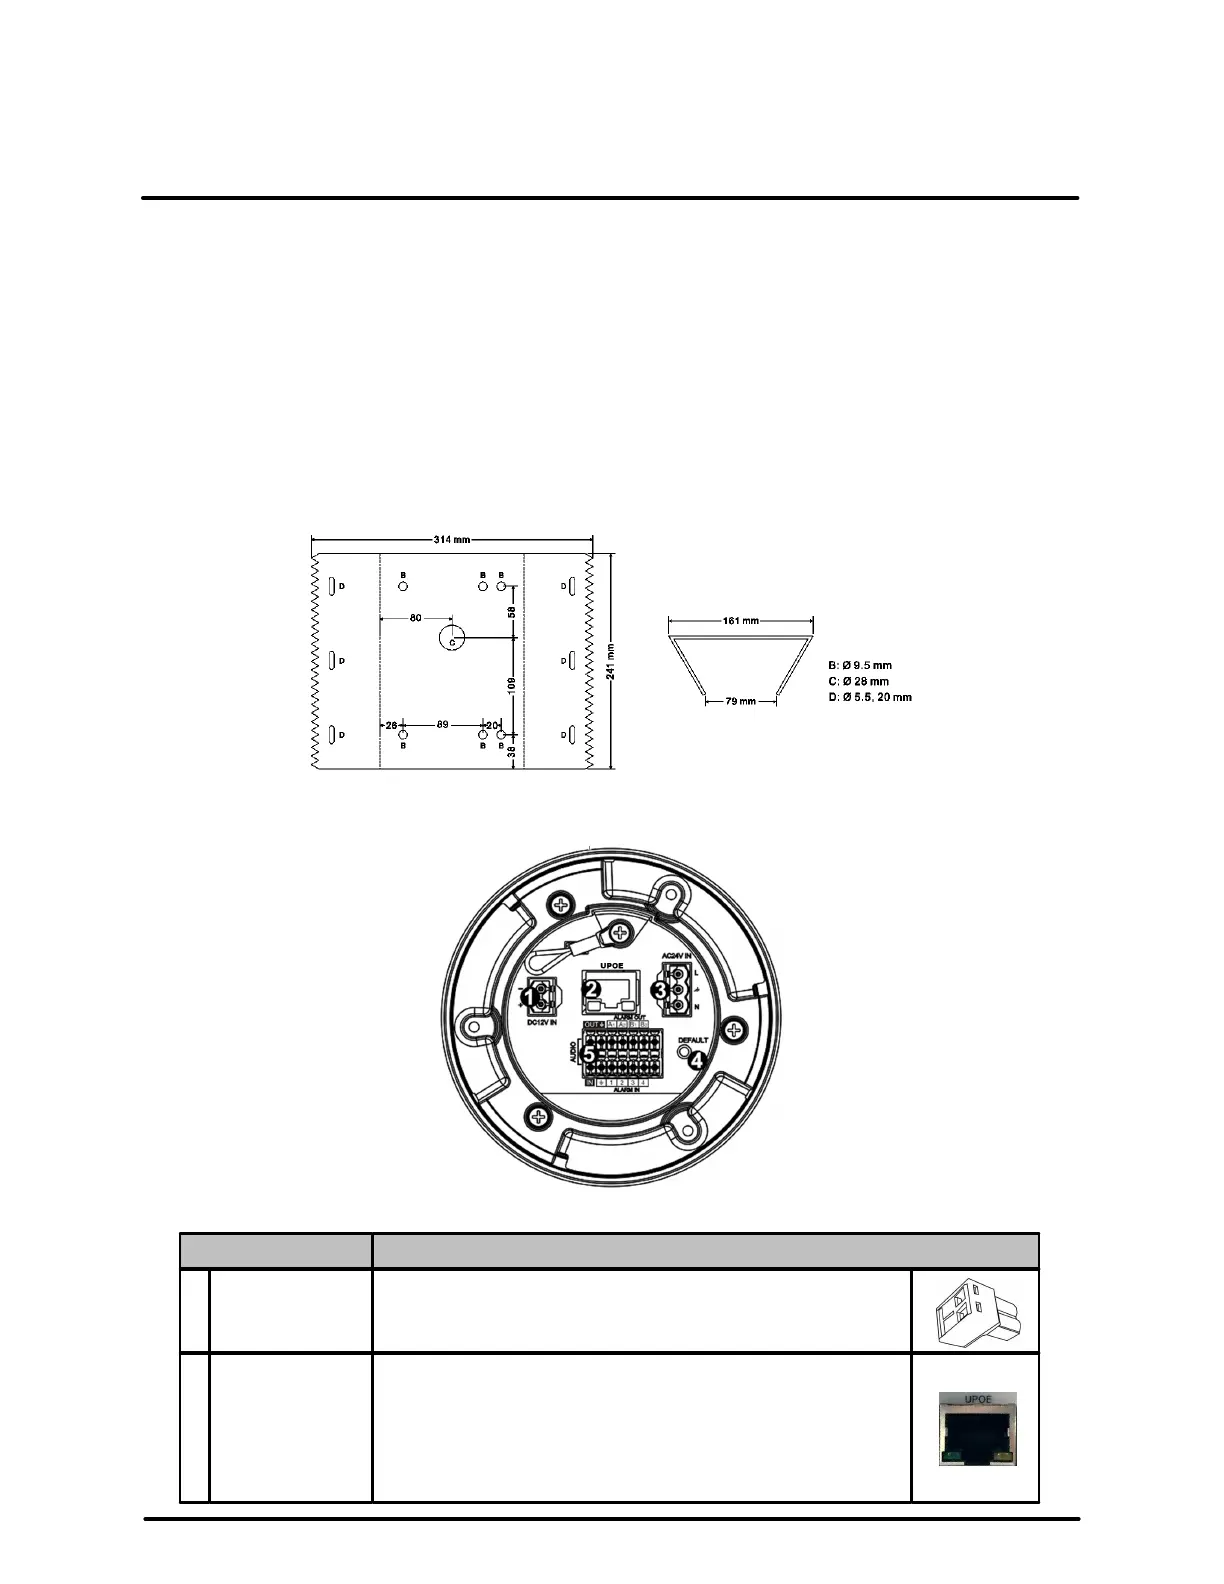
CX-POLE-G3 dimensions
2.5 Camera Connections
Connectors
If using a 12 VDC power supply, connect its wires to the
two-pin power connector.
Attach a Cat 5e or Cat 6 cable from the network switch to
the RJ45 connector for a 10/100/1000 Mbps Ethernet and
Universal PoE connection. If using Universal PoE, FLIR
recommends using a FLIR CP-POE-60W-xx or equivalent
power injector. Verify that the UPOE connector LEDs are
steady green and flashing yellow.
 Loading...