EasyManuals Logo
Home>FLIR>Security Camera>Saros DM Series

FLIR Saros DM Series User Manual

FLIR Saros DM Series
54 pages
To Next Page IconTo Next Page
To Previous Page IconTo Previous Page
Page #17 background imageLoading...
Page #17 background image
Installation
12
427-0200-00-12 Revision 100
November 2019
This document does not contain any export-controlled information.
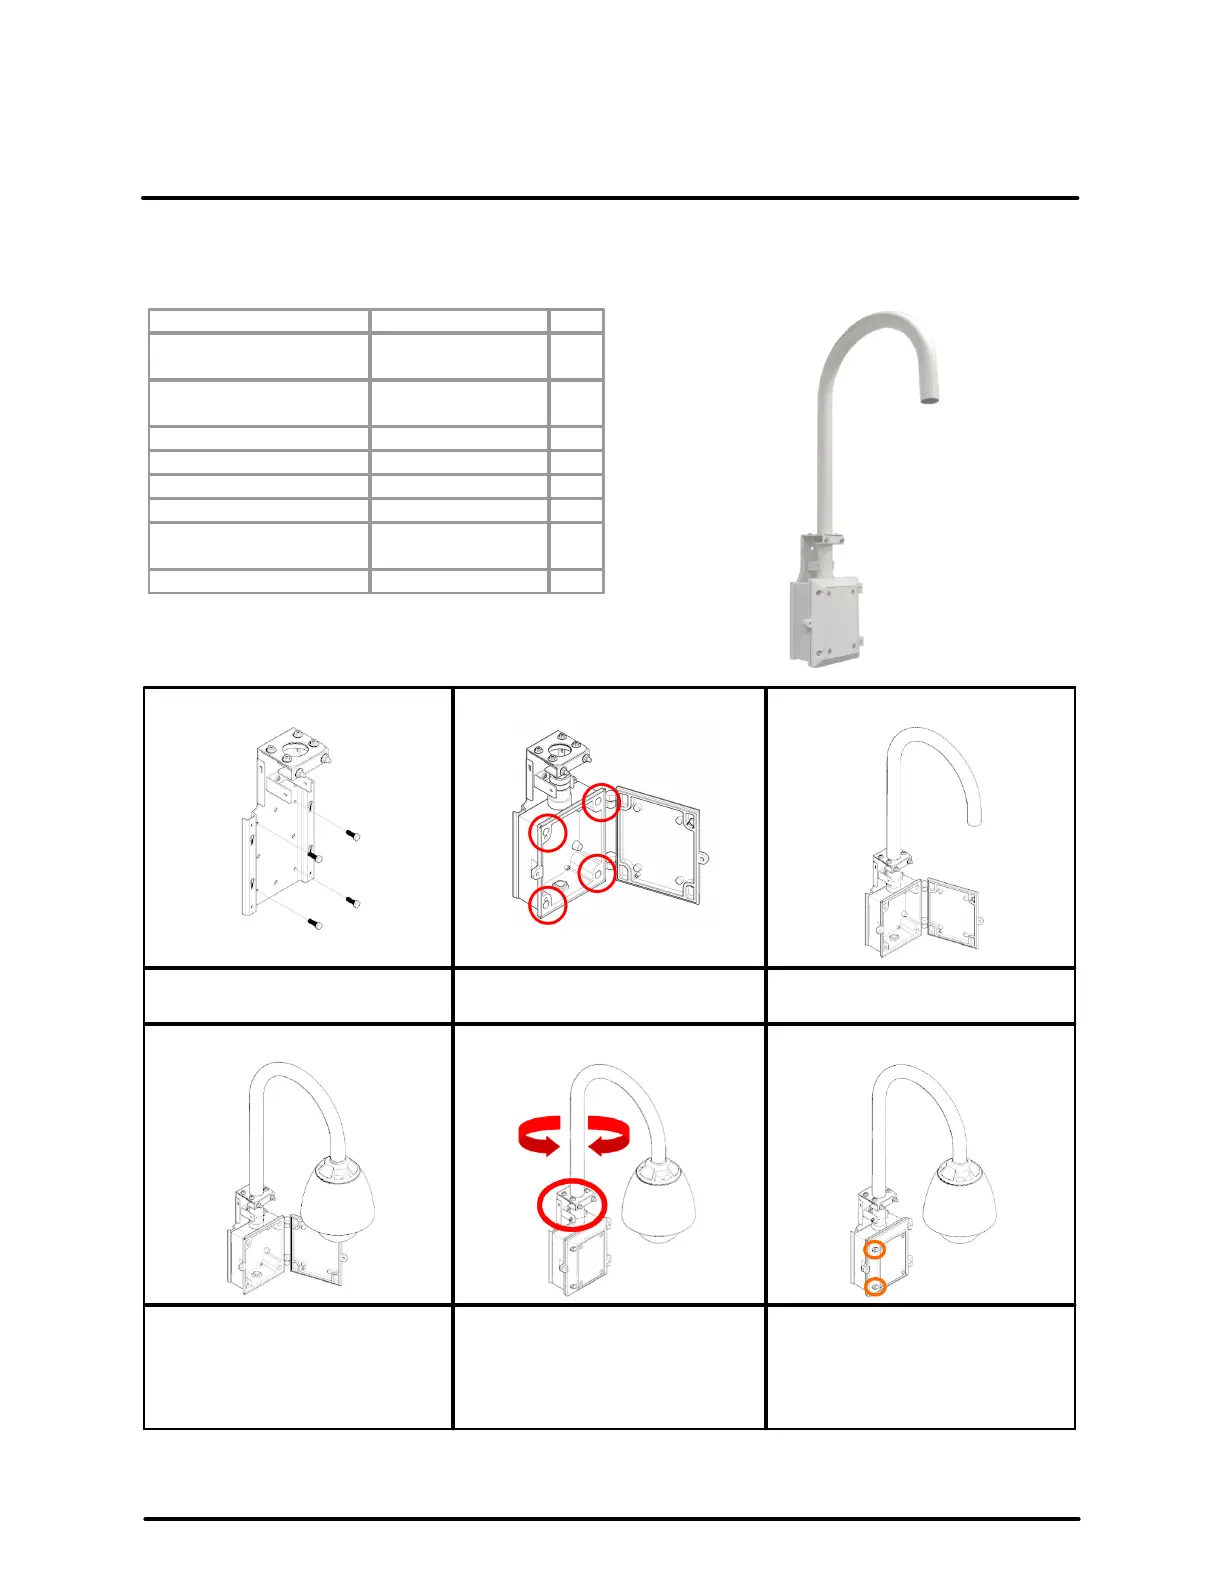
2.4.3 Gooseneck Mount with Power Box CX-GSNK-G3
Gooseneck mount (1.5 inch threaded) with IP68 power box.
Item
Details
Qty
Gooseneck bracket and
power box
CX-GSNK-G3 box
1
CX-GSNK-G3
gooseneck pipe
1
Accessory box
No. 2 Allen key
1
No. 3 Allen key
1
No. 5 Allen key
1
No. 6 Allen key
1
M4x8 hex cap
double washer
2
Quick install guide
Summarized below
1
Step 1
Step 2
Step 3
Fix backplate on mounting
surface.
Assemble power box and tighten
screws with No. 6 Allen key.
Assemble gooseneck pipe on
backplate and power box.
Step 4
Step 5
Step 6
Attach pendant cap to gooseneck
pipe, complete cable
connections, and connect
camera to pendant cap.
Rotate gooseneck pipe to the
position required. Tighten
hexagon nuts to the flange and
use No. 3 Allen key to tighten
M4x8 hex socket screws.
Use No. 6 Allen key to fix cover
screws.

Questions and Answers:

Question and Answer IconNeed help?

Do you have a question about the FLIR Saros DM Series and is the answer not in the manual?

FLIR Saros DM Series Specifications

General IconGeneral
BrandFLIR
ModelSaros DM Series
CategorySecurity Camera
LanguageEnglish

Related product manuals