Installation
18
427-0200-00-12 Revision 100
This document does not contain any export-controlled information.
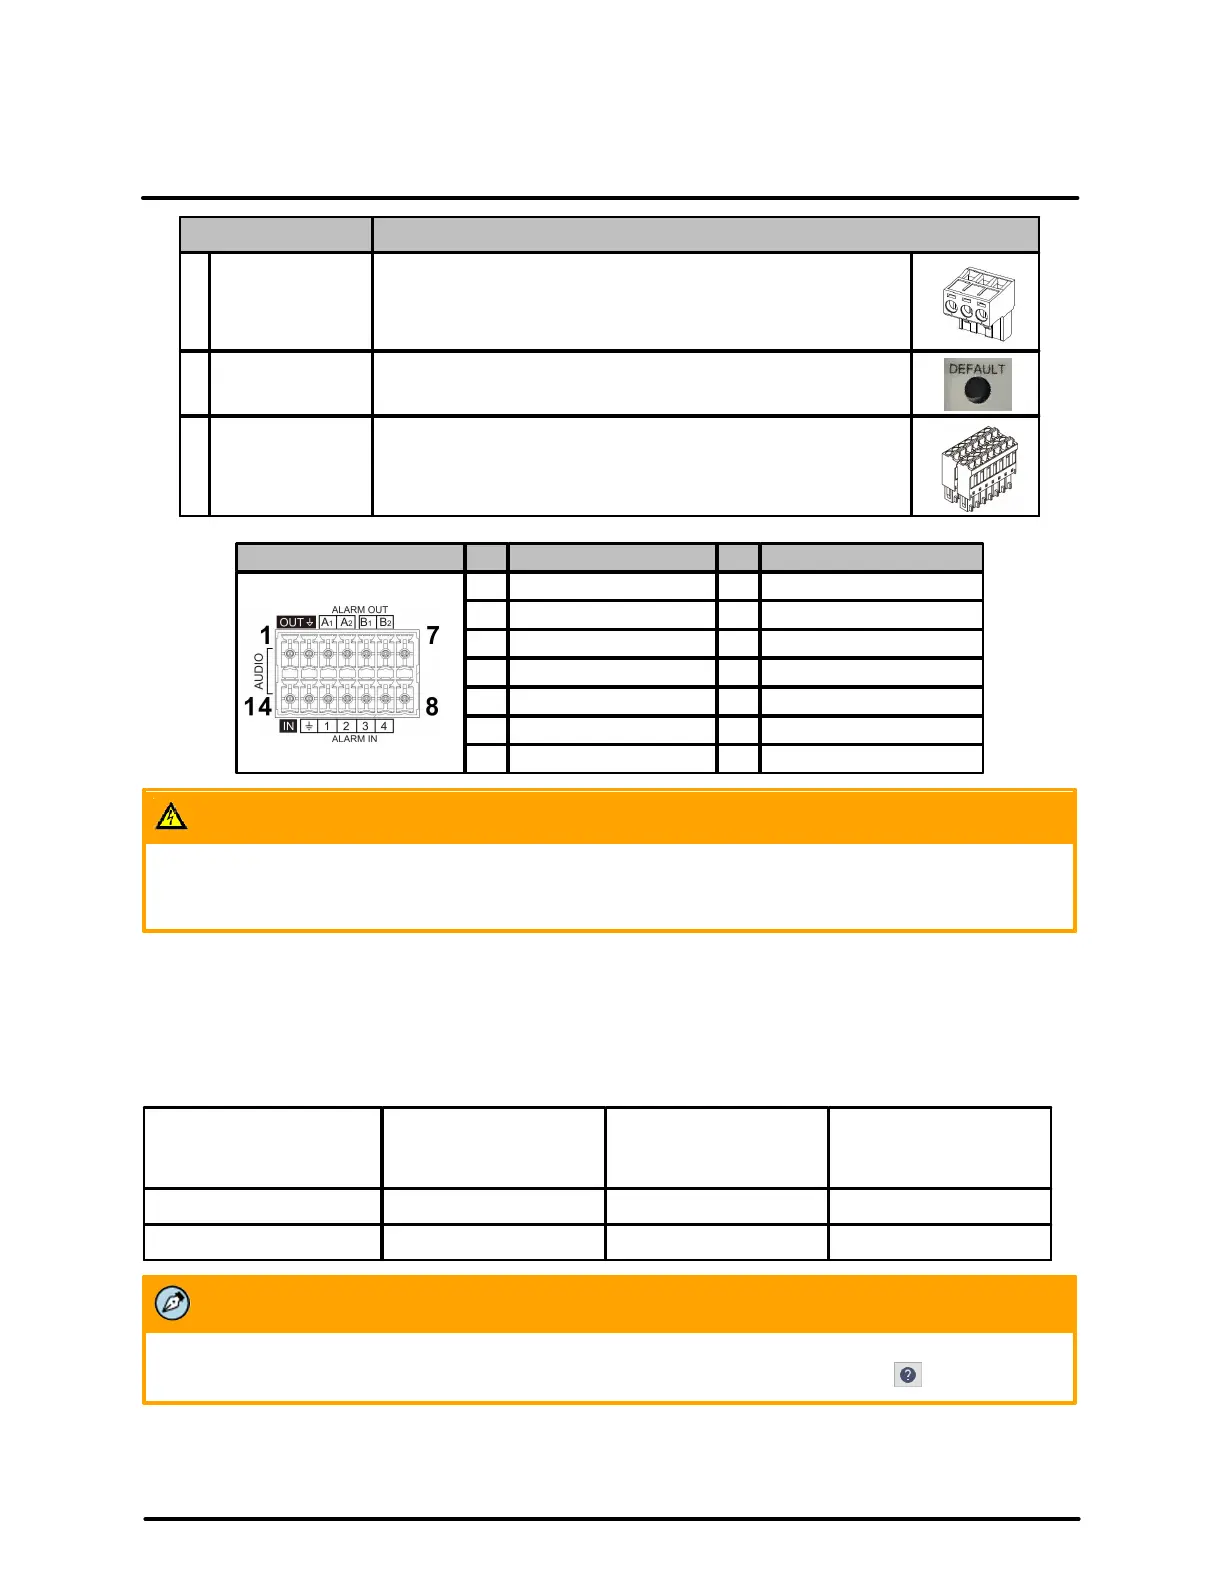
If using a 24 VAC power supply or a heater, connect its
wires to the three-pin power connector.
To reset factory defaults at any time, press the Default
button for at least 20 seconds.
Attach wires from external devices to the 14-pin terminal
block connector for alarm and audio in/out (see diagram
and definitions below).
This product contains a battery that is soldered to the PCB. There is a risk of explosion if the battery is
replaced by an incorrect type. Do not replace the battery. The battery should be disposed of in
accordance with the battery manufacturer’s instructions.
2.6 Initial Networking Configuration
By default, DHCP is enabled on the camera and a DHCP server on the network assigns the camera an IP
address. If there is no DHCP server on the network, the IP address defaults to 192.168.0.250.
To manually specify a different IP address for the camera or to configure other networking settings, you
can use either the FLIR Discovery Network Assistant (DNA) tool or the camera's web page.
Discover camera IP
address
Configure networking
settings
Configure more than
one camera at the
same time
For more information about using the DNA tool, including how to configure more than one camera at the
same time, see the DNA User Guide. While the software is open, click the Help icon .
Make sure the camera and the PC are on the same network.
 Loading...